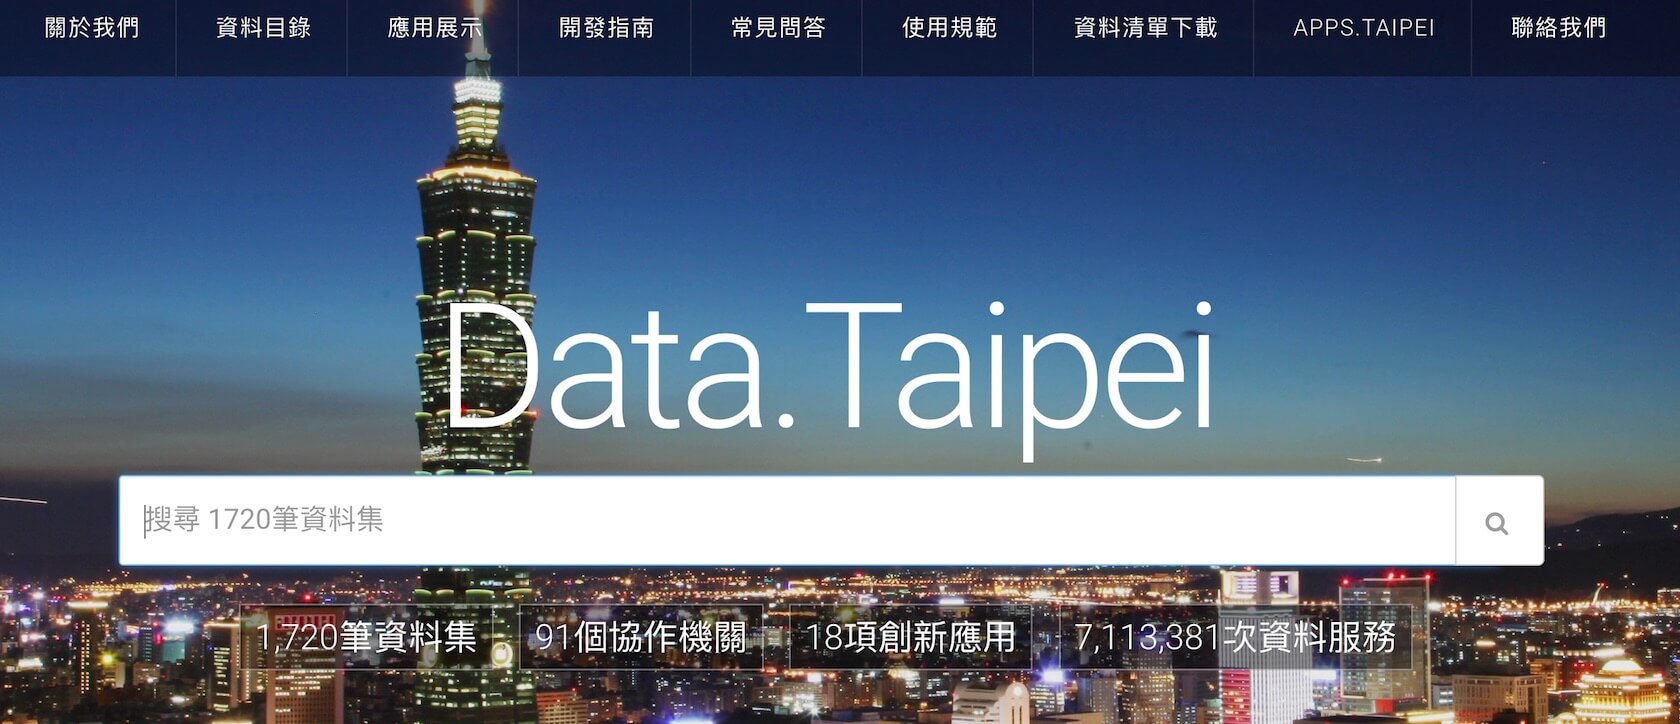
首先,我們打開瀏覽器,輸入 data.taipei 進入新版的台北市政府資料開放平台,然後我們搜尋”動物園”。
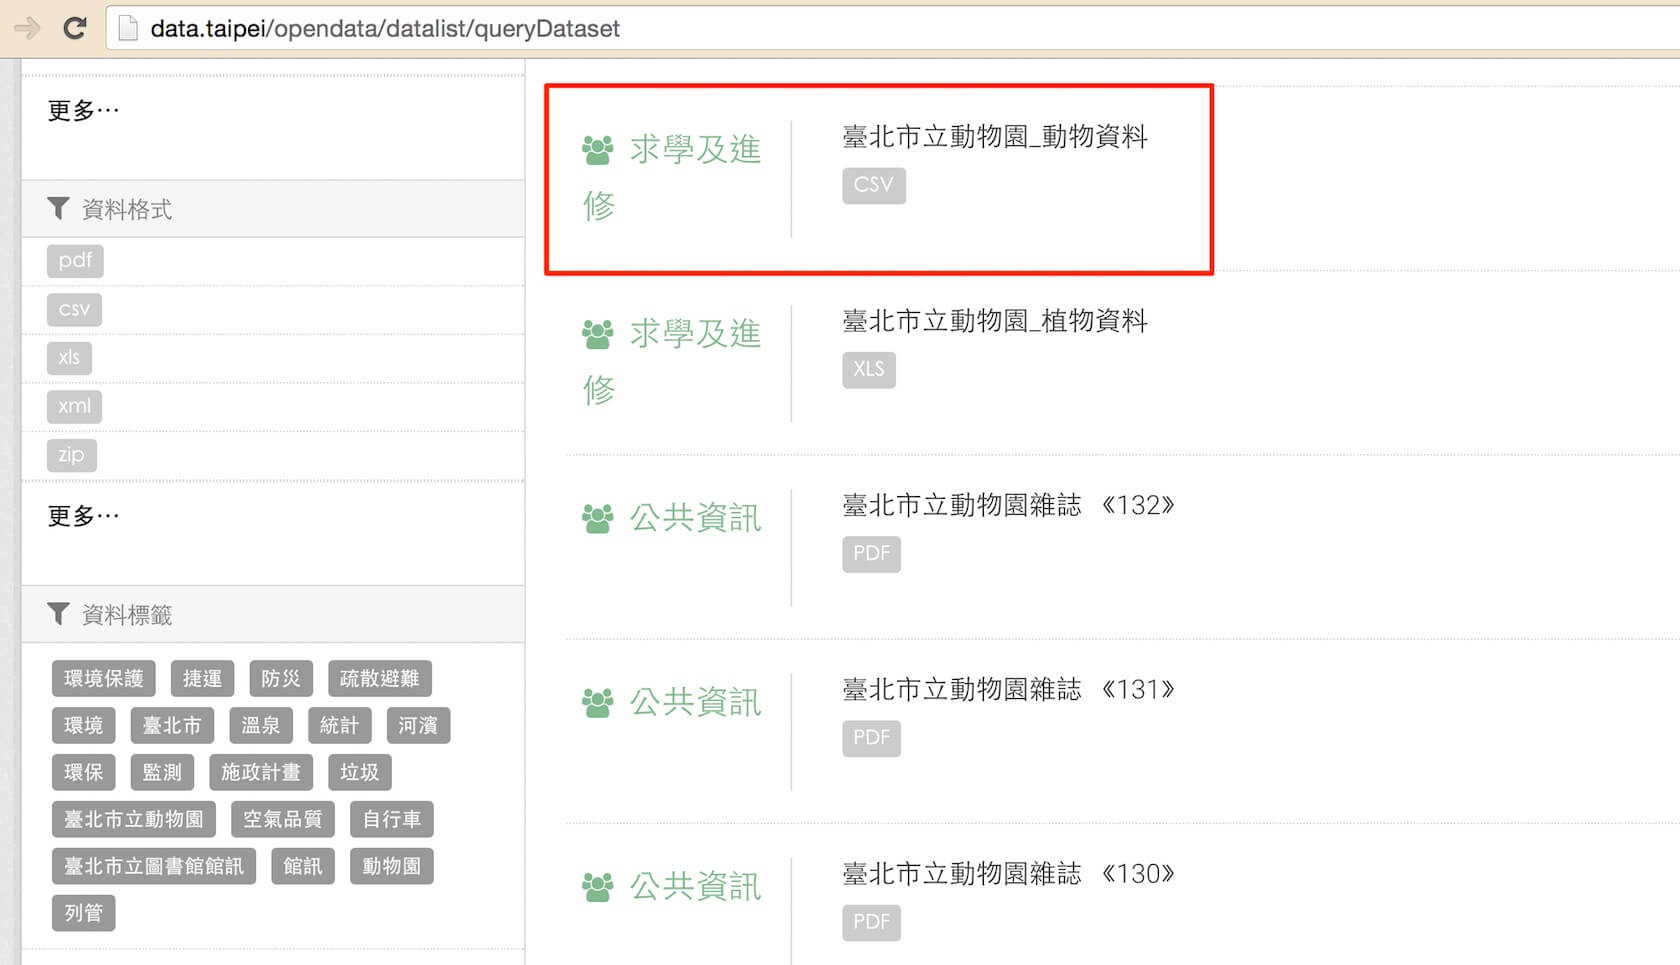
在搜尋結果中,找到台北市立動物園_動物資料。
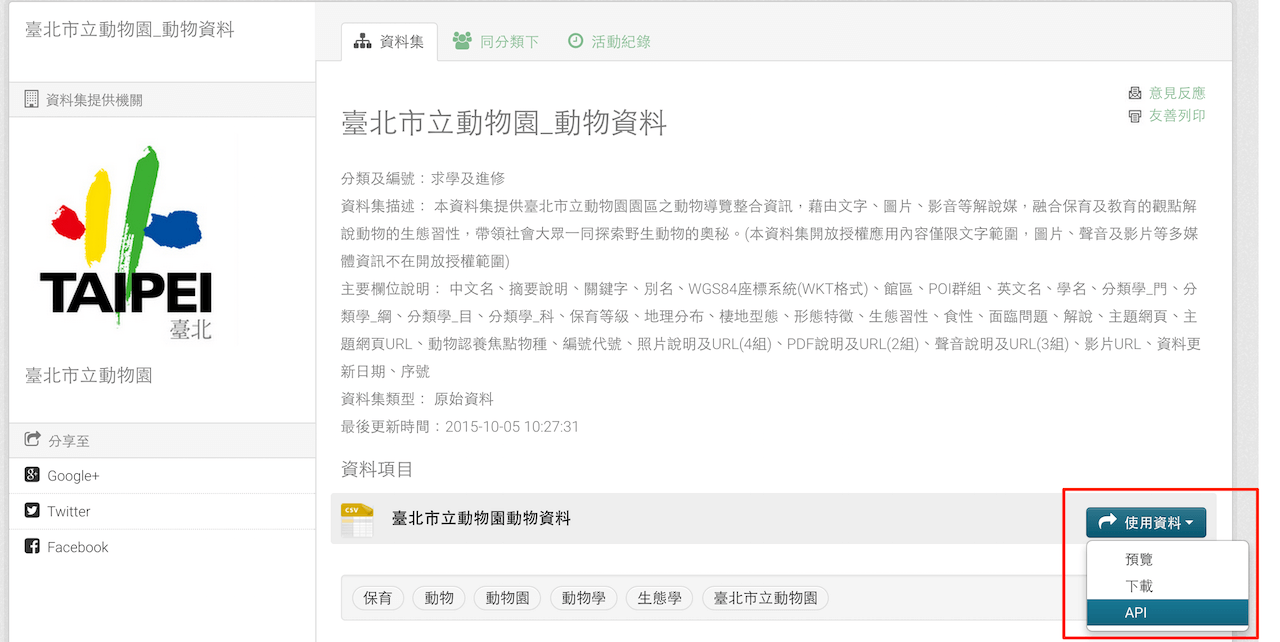
進入之後,在使用資料的下拉選單中,點選 API 進入。
此時,我們會得到兩個網址,這次的練習要使用的就是第二個網址。
- 資料集的說明 – http://data.taipei/opendata/datalist/apiAccess?scope=datasetMetadataSearch&q=id:5cb73231-b741-48b3-bec3-2ef57bb10029
- 台北市立動物園_動物資料 – http://data.taipei/opendata/datalist/apiAccess?scope=resourceAquire&rid=a3e2b221-75e0-45c1-8f97-75acbd43d613

點擊第二個網址進入後,發現他的資料是JSON格式。
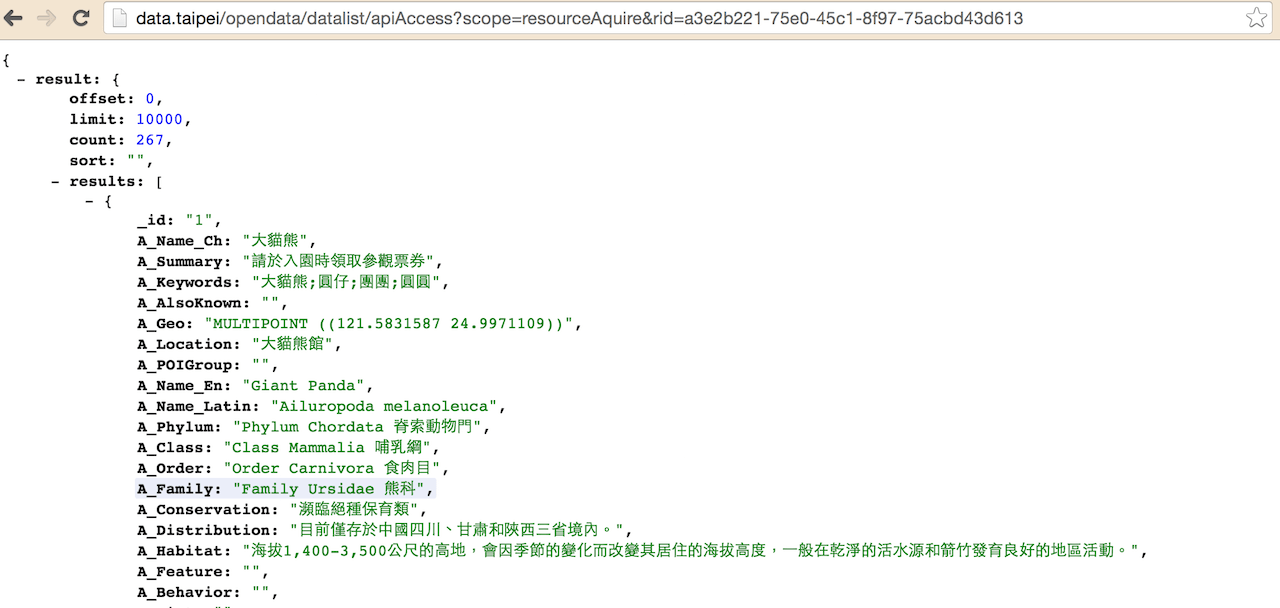
這個時候,我們已經確認找到我們要的資料,接著來分析資料的結構。最外層對應 Swift 是 Dictionary,裡面只有一筆資料,Key 值為 result:
{
  result: { ... }
}
而從result再進去,對應的也是一個Dictionary,裡面有四筆資料:
{
  result: {
    offset: 0,
    limit: 10000,
    count: 267,
    sort: "",
    results: []
  }
}
而這四筆資料分別是:
- offset – 每次回傳時的位移筆數。例如offset=5,就代表跳過前面5比,從第6筆資料開始回傳。
- limit - 每次回傳資料筆數的上限
- count – 資料集的筆數
- sort – 排序方式
所有動物資料被置放在 results 這個 Key 所對應的內容,我們趕快來看看吧:
- A_Name_Ch – 中文名
- A_Summary – 摘要說明
- A_Keywords – 關鍵字
- A_AlsoKnown – 別名
- A_Geo – WGS84座標系統(WKT格式)
- A_Location – 館區
- A_POIGroup – POI群組
- A_Name_En – 英文名
- A_Name_Latin – 學名
- A_Phylum – 分類學_門
- A_Class – 分類學_綱
- A_Order – 分類學_目d
- A_Family – 分類學_科
- A_Conservation – 保育等級
- A_Distribution – 地理分布
- A_Habitat – 棲地型態
- A_Feature – 形態特徵
- A_Behavior – 生態習性
- A_Diet – 食性
- A_Crisis – 面臨問題
- A_Interpretation – 解說
- A_Theme_Name – 主題網頁
- A_Theme_URL – 主題網頁URL
- A_Adopt – 動物認養焦點物種
- A_Code – 編號代號
- A_Pic01_ALT ~ A_Pic04_ALT – 照片說明(4組)
- A_Pic01_URL ~ A_PIc04_URL – 照片URL(4組)
- A_pdf01_ALT ~ A_pdf02_ALT – PDF說明(2組)
- A_pdf02_URL ~ A_pdf02_URL – PDF URL(2組)
- A_Vioce01_ALT ~ A_Voice03_ALT – 聲音說明(3組)
- A_Vioce01_URL ~ A_Voice03_URL – 聲音URL(3組)
- A_Vedio_URL – 影片URL
- A_Update – 資料更新日期
- A_CID – 序號
真是太棒了!一個動物就有這麼多的資料可以利用,究竟要怎麼把這些資料放進APP中呢?讓我們趕快來試試看吧!
建立簡單的動物 App
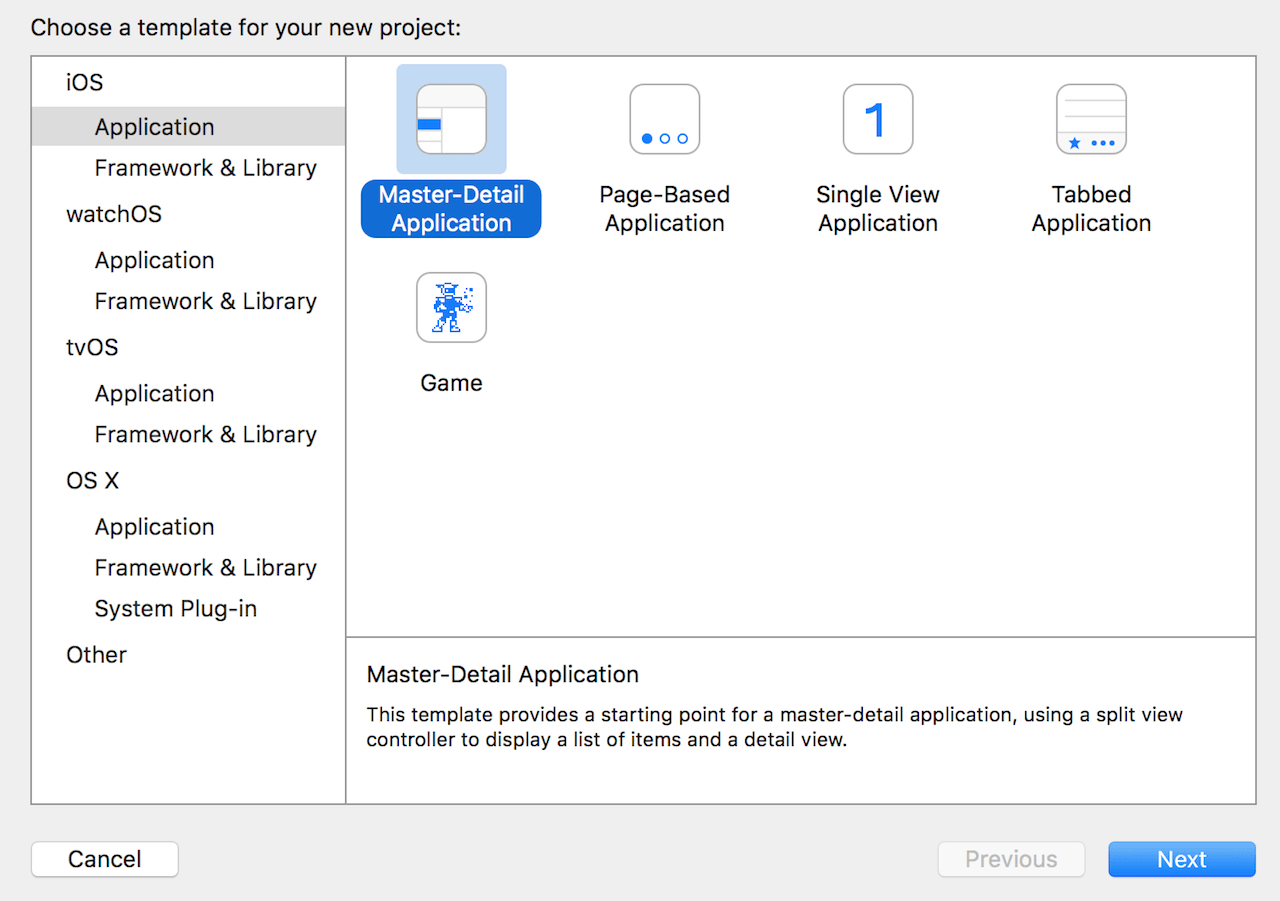
首先,建立一個新的 Xcode 專案,使用Master-Detail樣板。
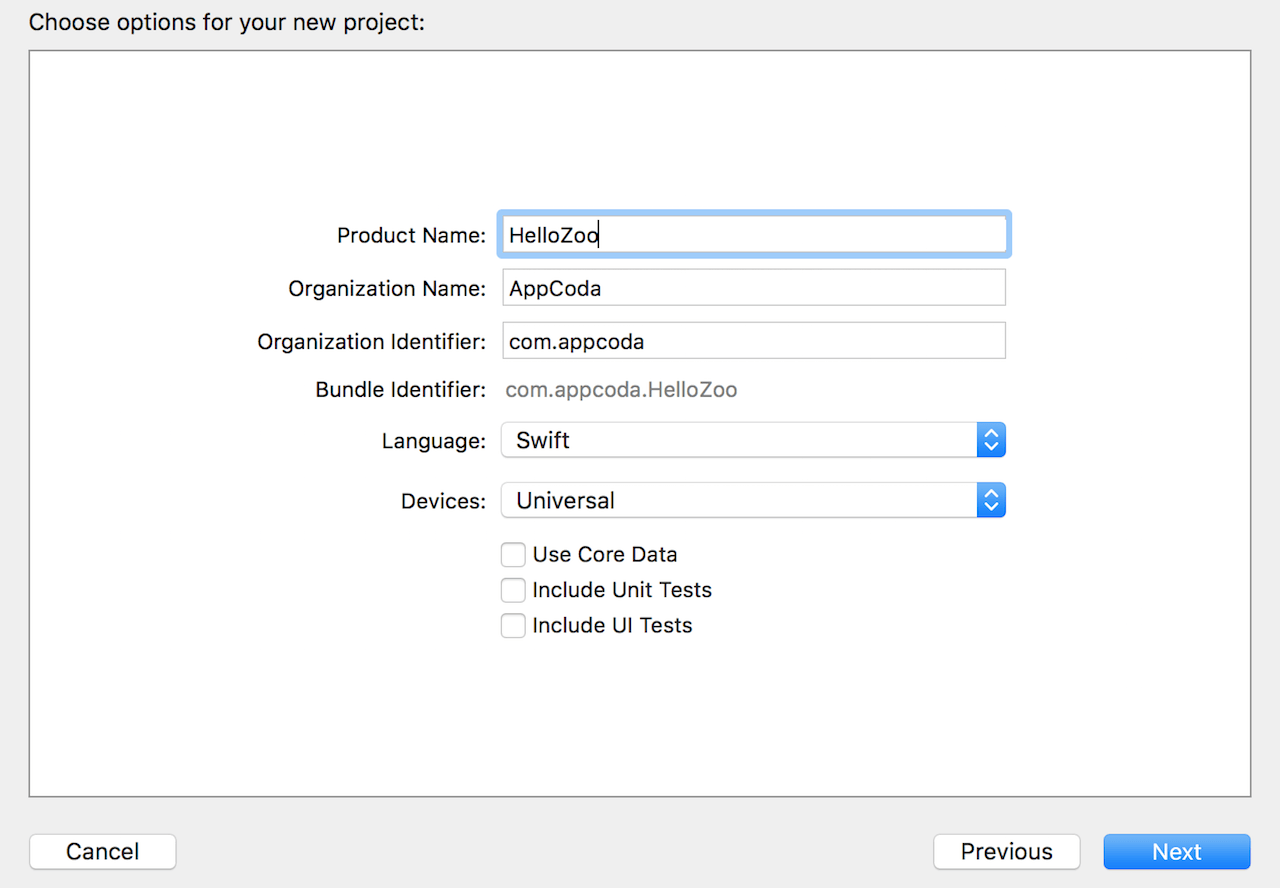
專案名稱命名為HelloZoo,組織名稱、識別符自訂,選擇Swift程式語言,適用於各種裝置,其他選項目前不勾選。
找個地方儲存專案後,進入MasterViewController.swift,增加一個dataArray來儲存取得的所有動物資料。
var dataArray = [AnyObject]() //儲存動物資料
並在viewDidLoad中開始使用NSURLSession讀取data.taipei的資料。
override func viewDidLoad() {
    super.viewDidLoad()

    //台北市立動物園公開資料網址
    let url = NSURL(string: "http://data.taipei/opendata/datalist/apiAccess?scope=resourceAquire&rid=a3e2b221-75e0-45c1-8f97-75acbd43d613")

    //建立一般的session設定
    let sessionWithConfigure = NSURLSessionConfiguration.defaultSessionConfiguration()

    //設定委任對象為自己
    let session = NSURLSession(configuration: sessionWithConfigure, delegate: self, delegateQueue: NSOperationQueue.mainQueue())

    //設定下載網址
    let dataTask = session.downloadTaskWithURL(url!)

    //啟動或重新啟動下載動作
    dataTask.resume()

    if let split = self.splitViewController {
        let controllers = split.viewControllers
        self.detailViewController = (controllers[controllers.count-1] as! UINavigationController).topViewController as? DetailViewController
    }
}
之後,將MasterViewController設定遵循NSURLSessionDelegate、NSURLSessionDownloadDelegate兩個協定:
class MasterViewController: UITableViewController, NSURLSessionDelegate, NSURLSessionDownloadDelegate
跟著我們實作完成下載的方法。其中我們使用 NSJSONSerialization.JSONObjectWithData 方法進行 JSON 資料處理,再依據先前觀察的結構,取得result對應中的results所對應的陣列。最後,重新整理Table View。
func URLSession(session: NSURLSession, downloadTask: NSURLSessionDownloadTask, didFinishDownloadingToURL location: NSURL) {

    do {

        //JSON資料處理
        let dataDic = try NSJSONSerialization.JSONObjectWithData(NSData(contentsOfURL: location)!, options: NSJSONReadingOptions.MutableContainers) as! [String:[String:AnyObject]]

        //依據先前觀察的結構,取得result對應中的results所對應的陣列
        dataArray = dataDic["result"]!["results"] as! [AnyObject]

        //重新整理Table View
        self.tableView.reloadData()

    } catch {
        print("Error!")
    }

}
我們已整理好JSON 資料。要將動物資料呈現在Table View,我們只要實作以下的方法。
override func tableView(tableView: UITableView, numberOfRowsInSection section: Int) -> Int {
    //依據動物數量呈現
    return dataArray.count
}

override func tableView(tableView: UITableView, cellForRowAtIndexPath indexPath: NSIndexPath) -> UITableViewCell {
    let cell = tableView.dequeueReusableCellWithIdentifier("Cell", forIndexPath: indexPath)

    //顯示動物的中文名稱於Table View中
    cell.textLabel?.text = dataArray[indexPath.row]["A_Name_Ch"] as? String

    return cell
}
此時執行看看,Xcode 會在 Console區告訴你:
App Transport Security has blocked a cleartext HTTP (http://) resource load since it is insecure. Temporary exceptions can be configured via your app's Info.plist file.
一般的HTTP網址被視為不安全,若真的還是希望能存取,我們要到Info.plist中做這個設定,請在Info.plist檔案按下右鍵,Open As -> Source Code。最後面加上:
NSAppTransportSecurity

    NSAllowsArbitraryLoads
這個時候再執行看看,就可以看見動物資料了!
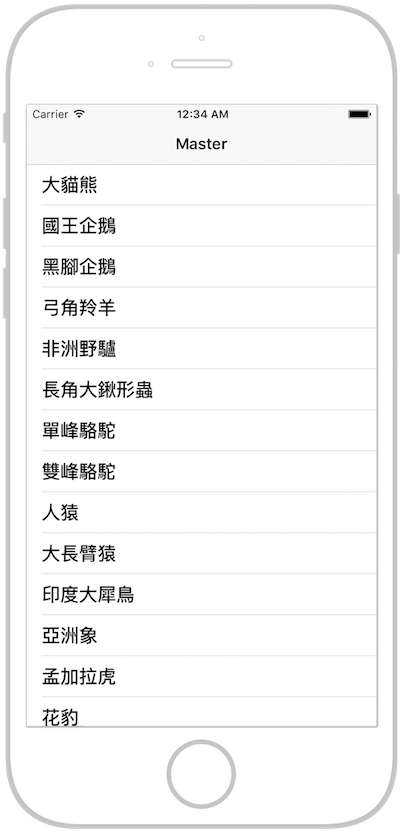
呈現動物圖片
那要如何在第二頁中呈現圖片呢?
由於我們並不確定台北市立動物園是不是有為每一種動物準備圖片,所以我們必須要判斷:
- 如果有圖片 -> 在該項目點擊後,在第二頁中顯示動物圖片
- 如果沒有圖片 -> 在該項目點擊後,在第二頁中顯示預設圖片
首先,請先準備一張預設圖片,在本例子中,我們準備的是AppCoda的Logo圖檔。下載完成後,可修改檔名為appcoda.png。
接著,請將appcoda.png加到Assets.xcassets。在Storyboard中的第二個畫面(Detail)中,增加一個ImageView在中間,設定預設圖片為appcoda.png,並且把原本樣板中的 label 往上移動。你可以利用 Add Missing Constraints功能要求 Xcode 自動設定 layout constraints。
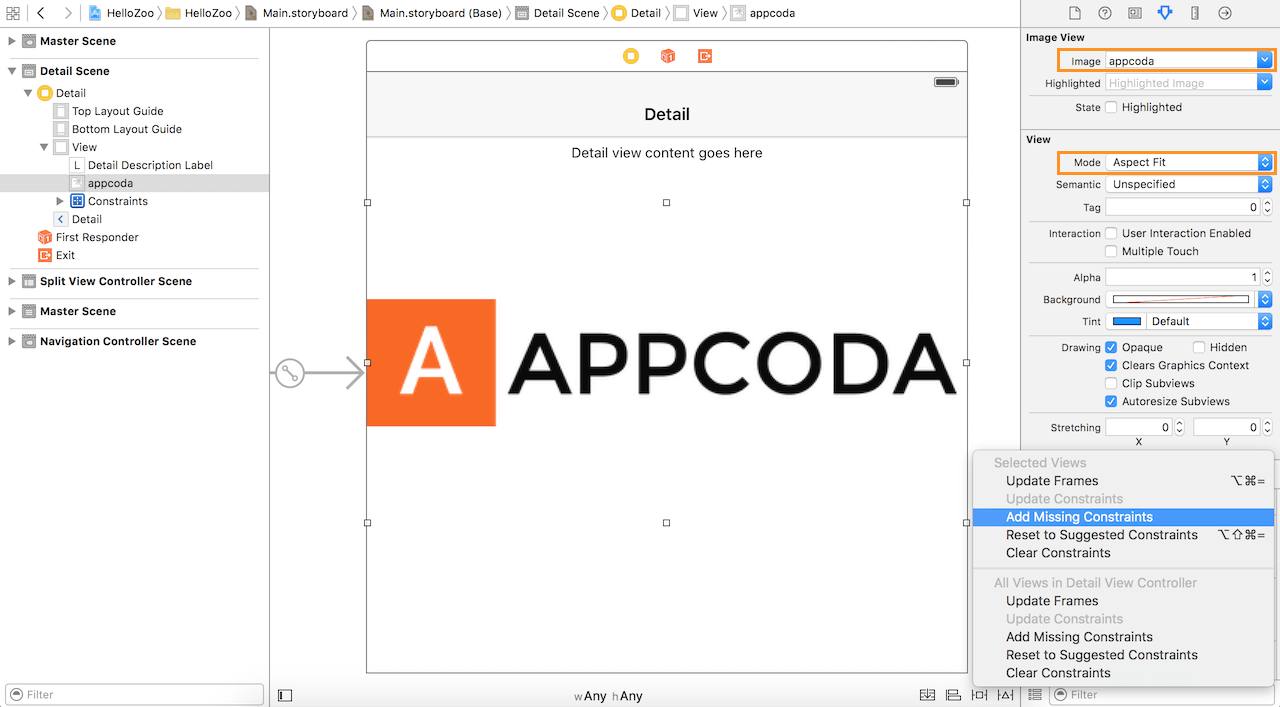
此時也請將 ImageView 拉線至 DetailViewController.swift,並建立Outlet關係,名稱為imageView。
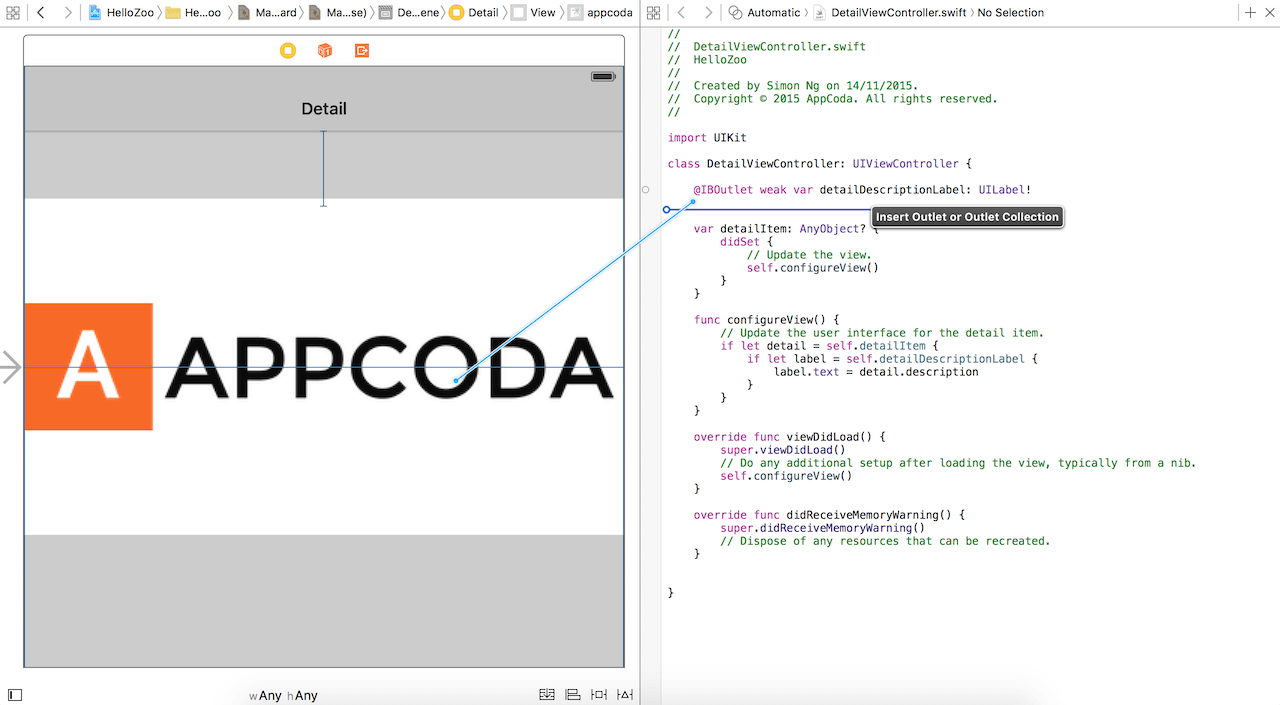
佈局好畫面之後,由於每一隻動物的資料是一個Dictionary,所以我們需要在第二個畫面的控制器中建立一個變數,來儲存這隻動物的各項屬性:
在DetailViewController.swift中,請增加一個變數(thisAnimalDic),加上剛剛拉過來的imageView以及原本的detailDescriptionLabel,此時程式碼如下:
class DetailViewController: UIViewController {
    @IBOutlet weak var imageView: UIImageView!
    @IBOutlet weak var detailDescriptionLabel: UILabel!

    var thisAnimalDic:AnyObject?
在第一個畫面中,拿到資料時,我們已將資料儲存在dataArray陣列,所以我們可在MasterViewController 的 prepareForSegue方法中,依據使用者目前所選取的項目,去陣列中拿到那一隻動物的資料,然後傳遞至下一個畫面:
override func prepareForSegue(segue: UIStoryboardSegue, sender: AnyObject?) {
    if segue.identifier == "showDetail" {
        if let indexPath = self.tableView.indexPathForSelectedRow {
            //取得被選取到的這一隻動物的資料
            let object=dataArray[indexPath.row]
            //設定在第二個畫面控制器中的資料為這一隻動物的資料
            let controller = (segue.destinationViewController as! UINavigationController).topViewController as! DetailViewController
            controller.thisAnimalDic = object
            controller.navigationItem.leftBarButtonItem = self.splitViewController?.displayModeButtonItem()
            controller.navigationItem.leftItemsSupplementBackButton = true
        }
    }
}
在第二個畫面控制器 (DetailViewController.swift) 中,當我們拿到資料後,圖片只是一個網址,必須透過相同的方式,向伺服器取得圖片資料。首先請一樣設定遵循這兩個協定: NSURLSessionDelegate 和 NSURLSessionDownloadDelegate。
class DetailViewController: UIViewController, NSURLSessionDelegate, NSURLSessionDownloadDelegate
接著,我們試著取得網址,並利用Swift語言的if let語法來處理:
- 如果有圖片 -> 取得該圖片資料
- 如果沒圖片 -> 不動作 (因為已經在Storyboard中設定了預設圖片了)
請將viewDidLoad更新至以下程式碼:
override func viewDidLoad() {
    super.viewDidLoad()

    //取得圖片網址
    let url = (thisAnimalDic as! [String:AnyObject])["A_Pic01_URL"]

    if let url = url //如果有圖片網址,向伺服器請求圖片資料
    {
        let sessionWithConfigure = NSURLSessionConfiguration.defaultSessionConfiguration()

        let session = NSURLSession(configuration: sessionWithConfigure, delegate: self, delegateQueue: NSOperationQueue.mainQueue())

        let dataTask = session.downloadTaskWithURL(NSURL(string: url as! String)!)

        dataTask.resume()
    }
}
我們利用NSURLSession的downloadTaskWithURL方法下載指定的動物圖片。接著實作協定中的方法,將取得的資料交給imageView來呈現:
func URLSession(session: NSURLSession, downloadTask: NSURLSessionDownloadTask, didFinishDownloadingToURL location: NSURL) {

    guard let imageData = NSData(contentsOfURL: location) else {
        return
    }

    imageView.image = UIImage(data: imageData)
}
恭喜你完成了!趕快來測試看看。如果該動物有圖片,你會看到以下畫面:
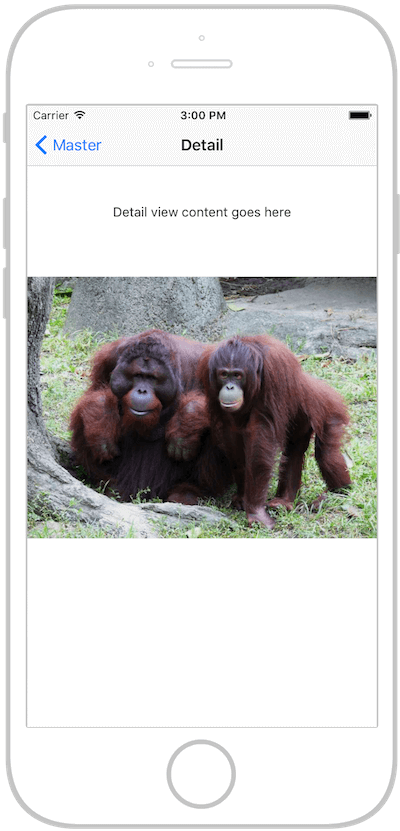
是不是覺得意猶未盡?試試看,你能不能自己增加以下的部分:
- 修改第二個畫面的標題為該動物的名稱
- 修改第二個畫面的描述為該動物的摘要說明(並注意顯示的大小)
供你參考,請從 GitHub 下載本文的完整 Xcode 專案。如你對這篇教學有任何意見,歡迎留言討論。

