

真正產品化的 App,通常都有不同的環境與配置,包括環境資訊與後端不同環境的位置,上線後測試功能分流,一般實驗時可以很容易上手 CI/CD,但在實戰中可能需要更加複雜且靈活的設置。讓我們來看看,這些配置在實戰中是甚麼樣子!你可以在這裡參考原始碼。
在專案準備中,我們使用 GitLab 來實作。我們透過 GitLab CI/CD,完成產品 App 中的 CI/CD Pipeline 流水線的建置,然後建立一個新的 App 當作我們產品的標的(即模擬實戰中正在開發產品),並且分出各個環境來代表實戰中的項目環境。同時,配置 fastlane 在我們將程式碼推送到 GitLab 執行,它會幫我們在不同環境中執行各個事項,比如建置、打包、根據環境推送到不同的 App Store 項目中等等。後面,我們還會提供更進階的配置,比如 firebase 要怎麼納入我們的環境管理中。好,讓我們開始吧!
專案準備
首先,我們要建立好 GitLab 與 GitLab Runner,並新增一個 Xcode 專案,當作我們的產品標的。
建立 GitLab 專案與 Runner
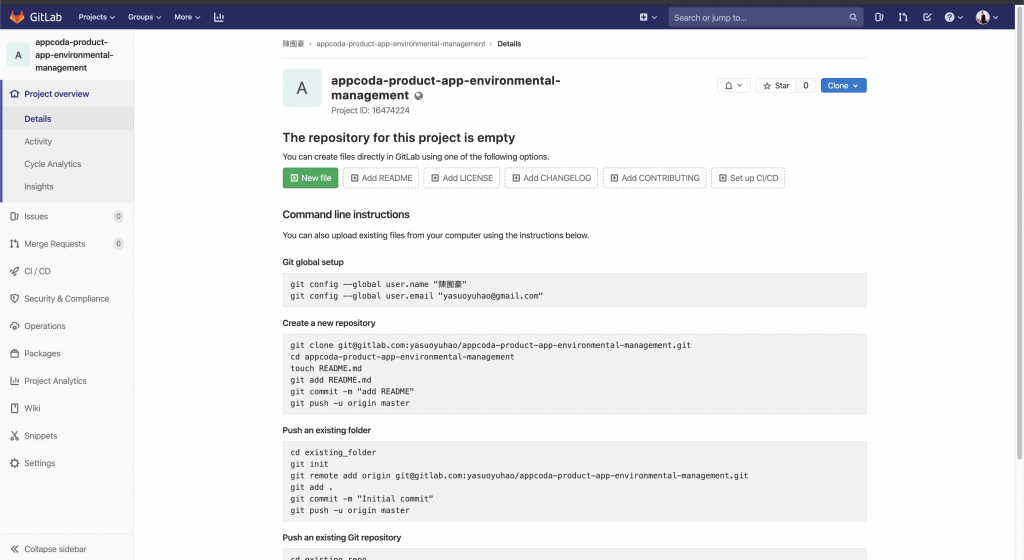
讓我們先在 GitLab 建立一個新專案,然後設定好 GitLab-CI Runner。這邊就不再贅述步驟,如果不熟悉的話,你可以參考這篇文章:GitLab 初學者指南: 輕鬆為 iOS 專案設定持續集成(CI/CD)。
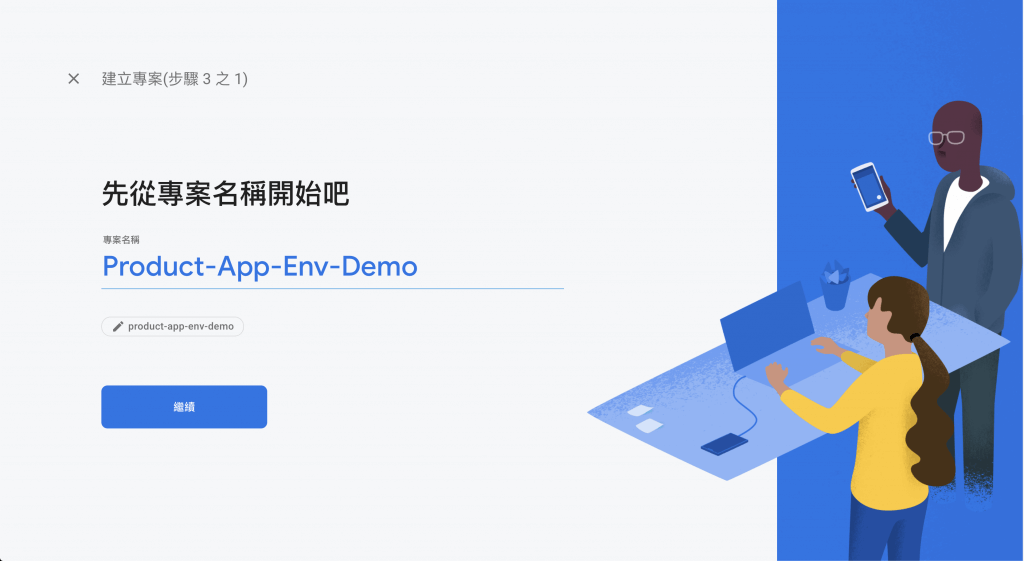
建立新的 iOS 專案
接下來,讓我們這樣建立一個新的 iOS 專案當作範例。

預覽一下我們的新專案:

配置環境
現在,我們要模擬一個產品中,有很多種環境。我們會先定義環境,再透過環境定義抽換各種變數。
讓我們加入以下環境:
- Debug
- Staging
- Release
按下 New Scheme:
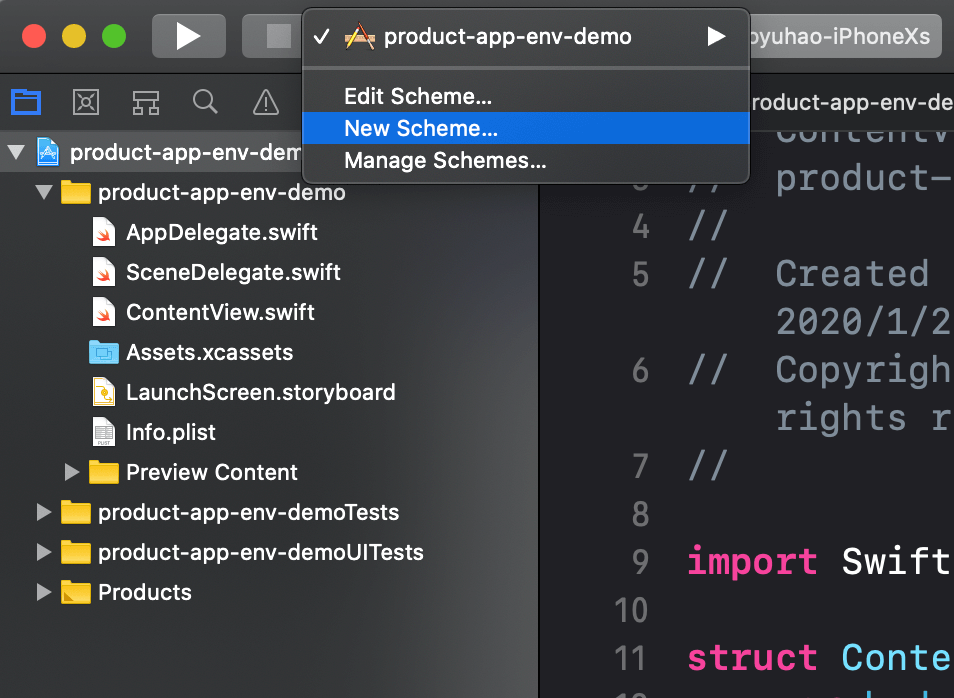
填入我們三個 Scheme 的名稱:
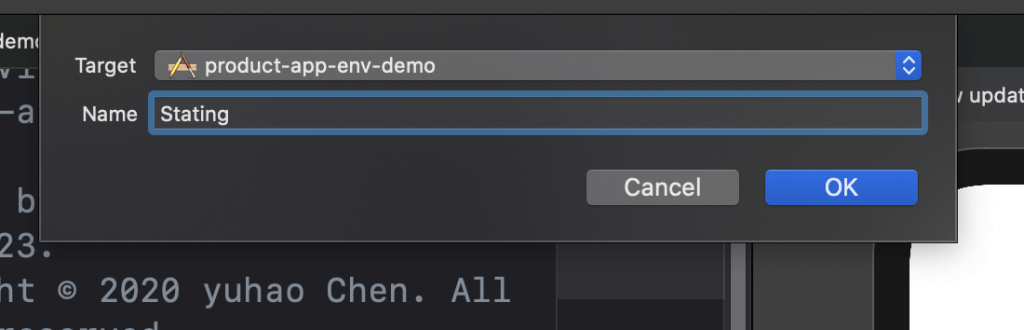
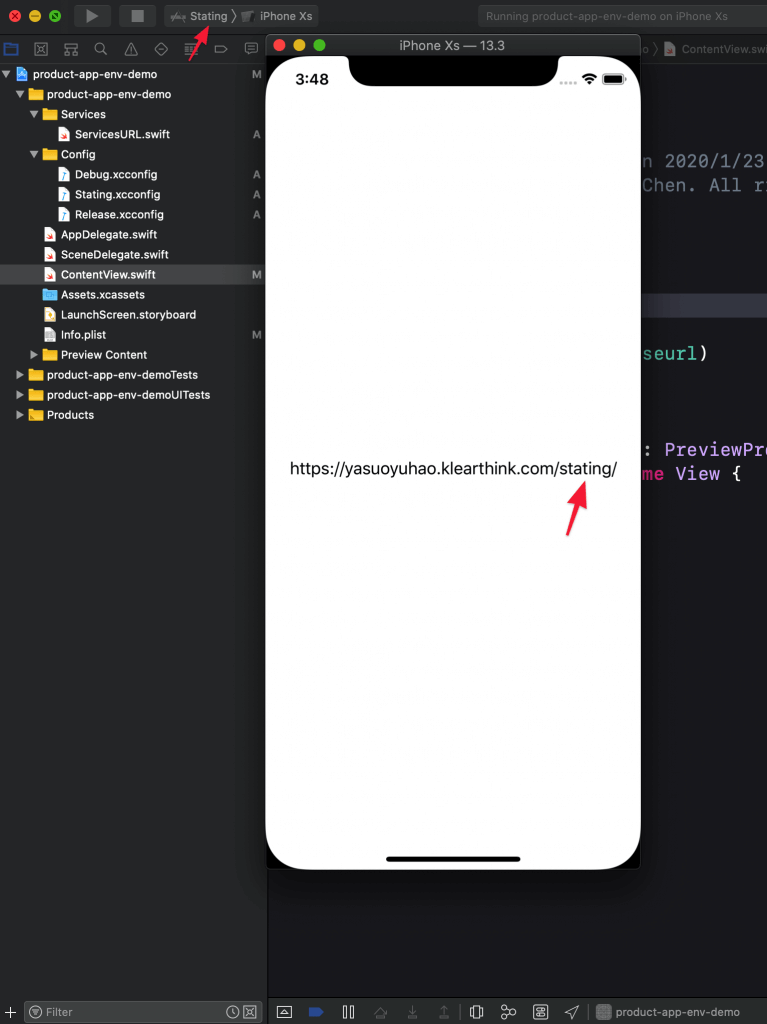
這邊有個小伏筆,我故意把 Staging 打成 Stating,後面會詳述如何更正。
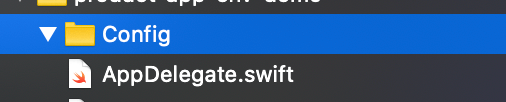
新增 Config
現在,讓我們建立 Config 資料夾:
然後,新增 Config 檔案:
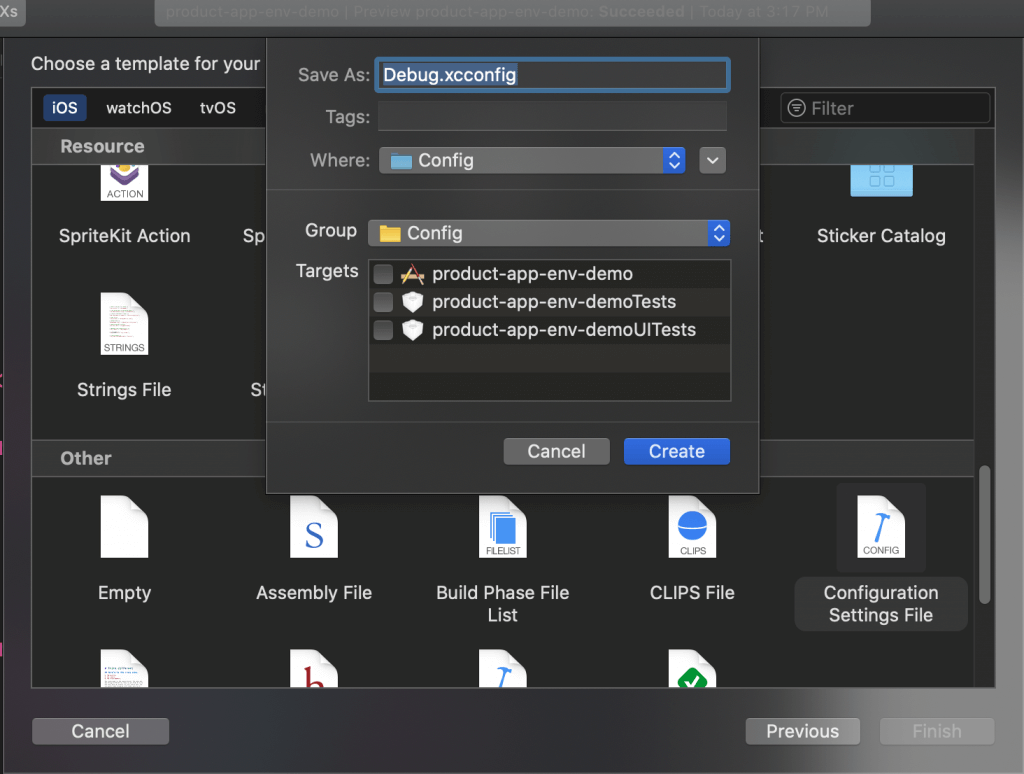
我們一樣需要三個檔案:
- Debug.xcconfig
- Staging.xcconfig
- Release.xcconfig
然後,我們綁定 Config:
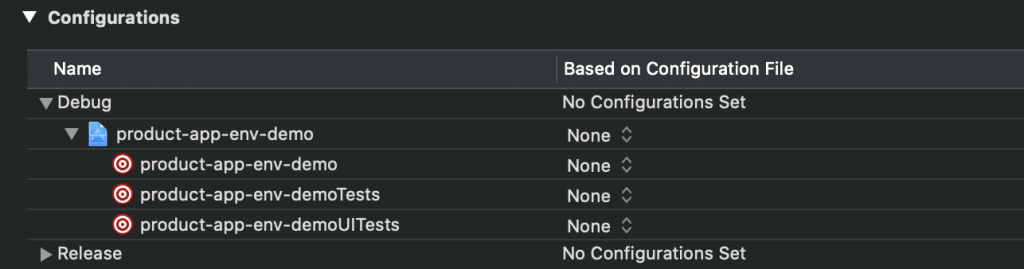
完成後,成果應該像這樣:

填入與設置變數
下一步,我們會模擬不同環境,有不同的 API 位置來作配置。我們會用網址來代表不同環境的後端 API 位置:
Debug.xcconfig
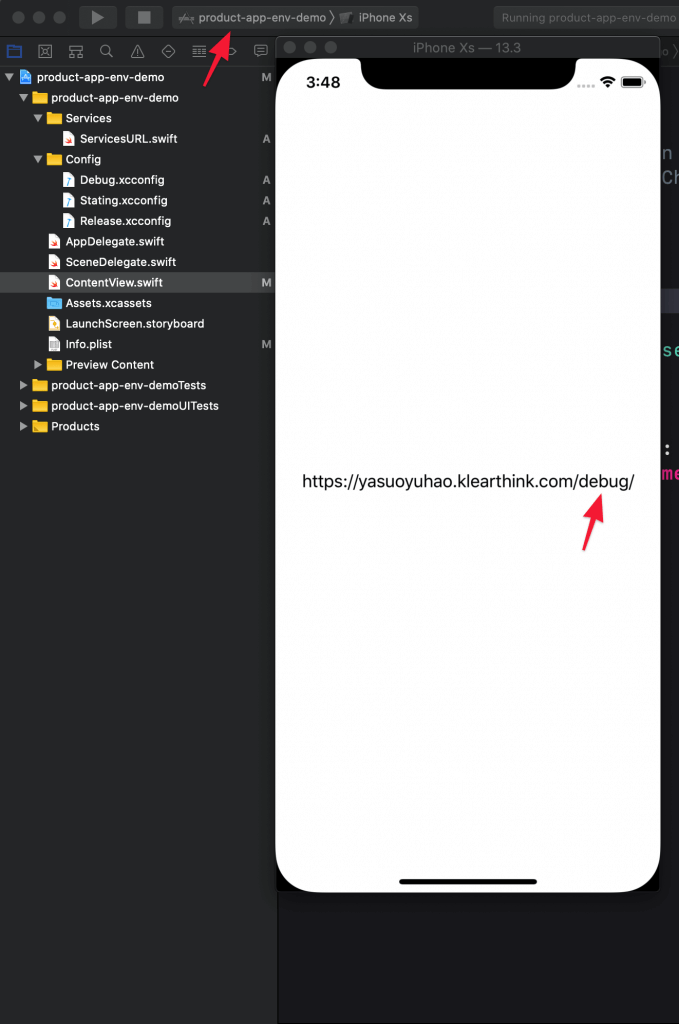
API_URL = https:\/\/yasuoyuhao.klearthink.com/debug/Staging.xcconfig
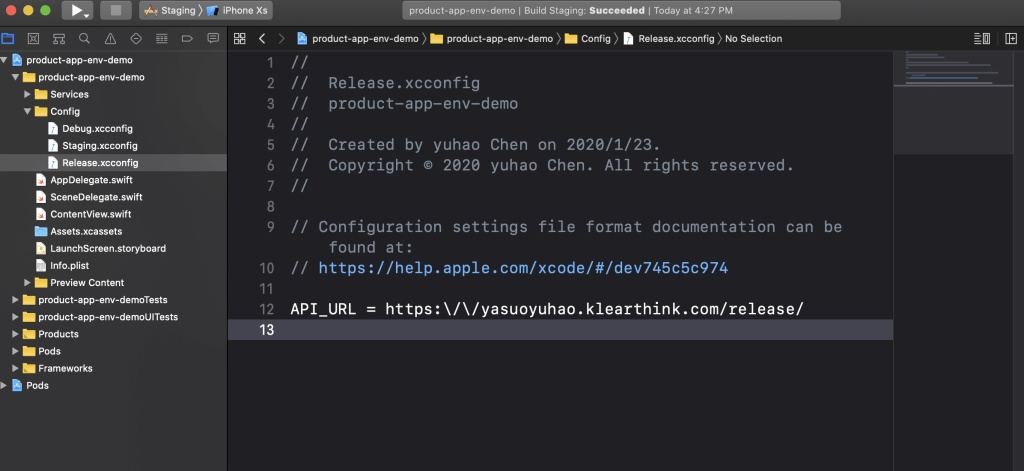
API_URL = https:\/\/yasuoyuhao.klearthink.com/staging/Release.xcconfig
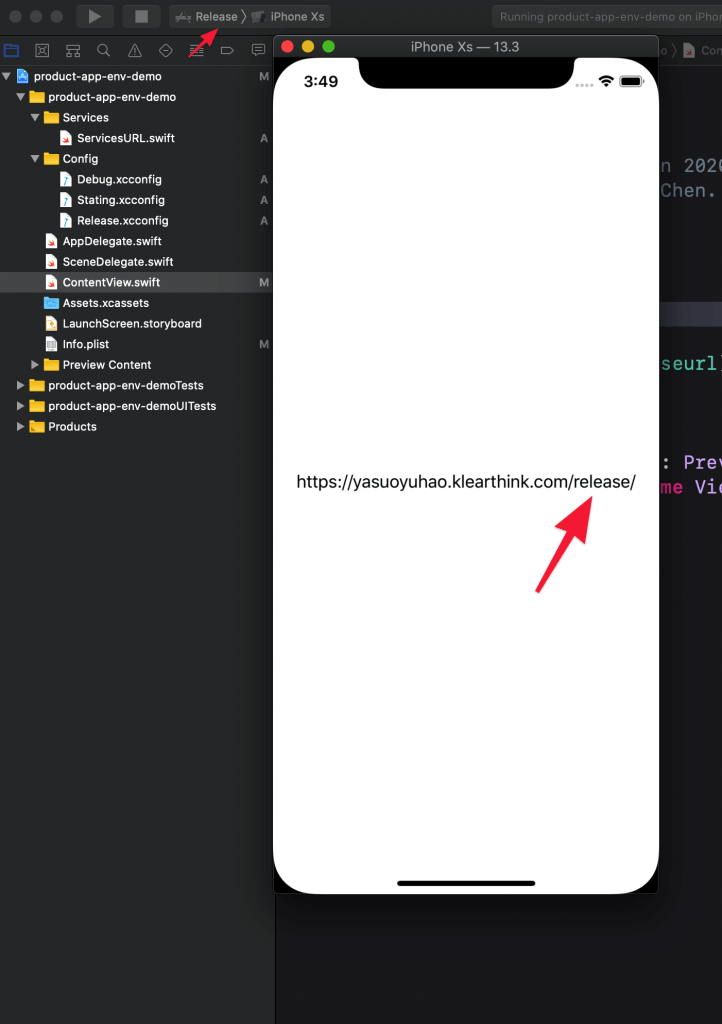
API_URL = https:\/\/yasuoyuhao.klearthink.com/release/預覽一下完成後的結果:
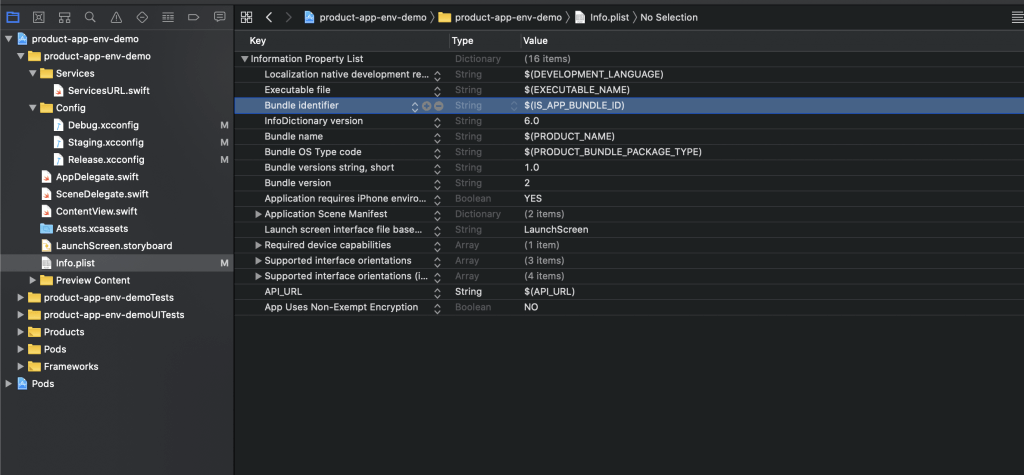
修改 Info.plist
然後,我們如下修改 Info.plist:
<key>API_URL</key>
    <string>$(API_URL)</string>
建立 ServicesURL
下一步,我們要這樣建立 ServicesURL:
import Foundation

public struct ServicesURL {

    static var baseurl: String {
        return (Bundle.main.infoDictionary?["API_URL"] as? String)?.replacingOccurrences(of: "\\", with: "") ?? ""
    }
}
然後,讓我們的畫面讀取這個數值:
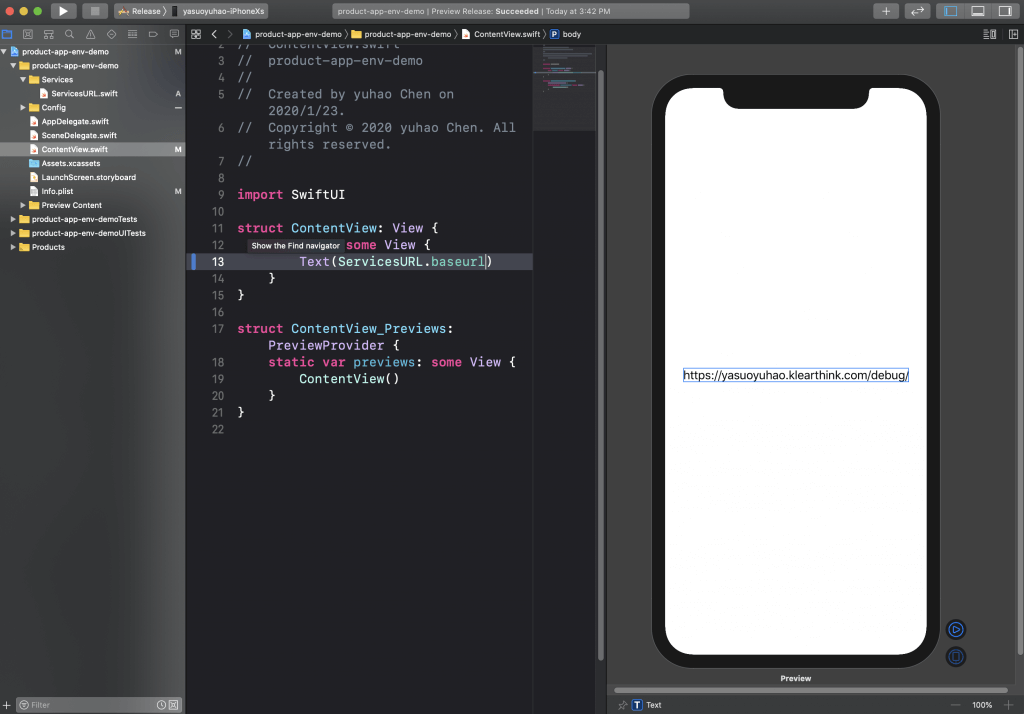
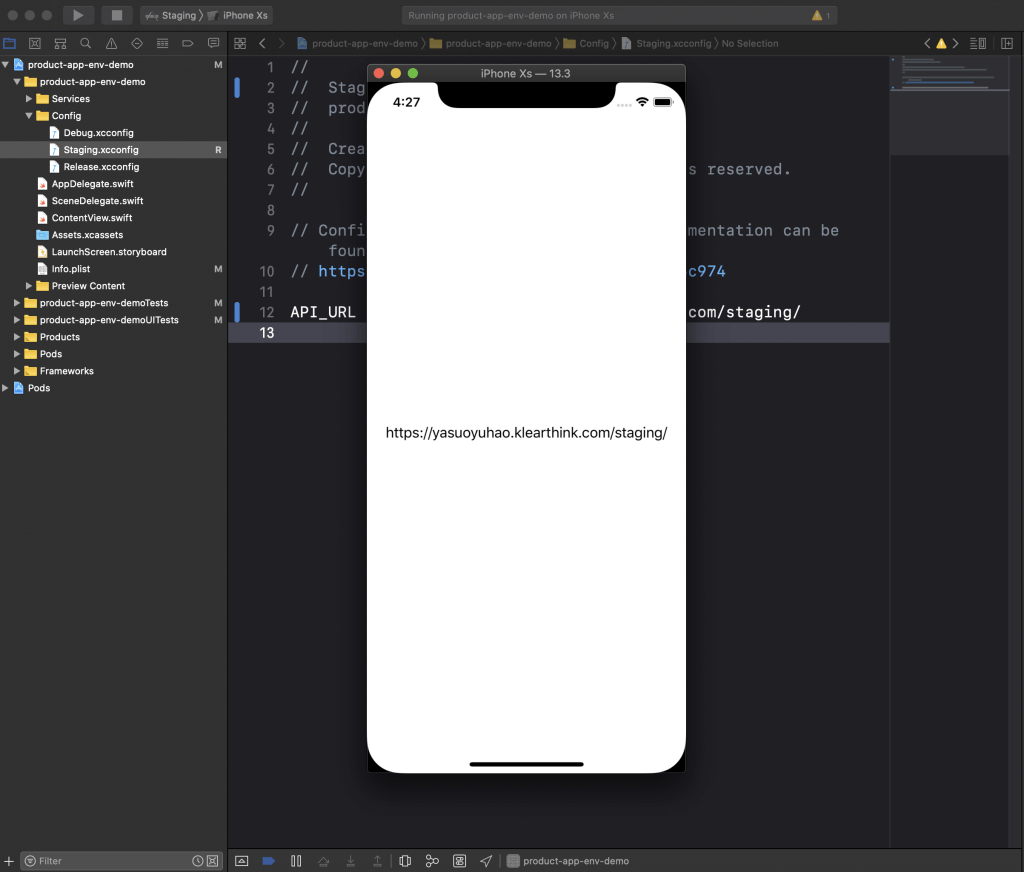
最後,讓我們綁定 Scheme 並看看效果:
- Debug 模式下
- Staging 模式下
- Release 模式下
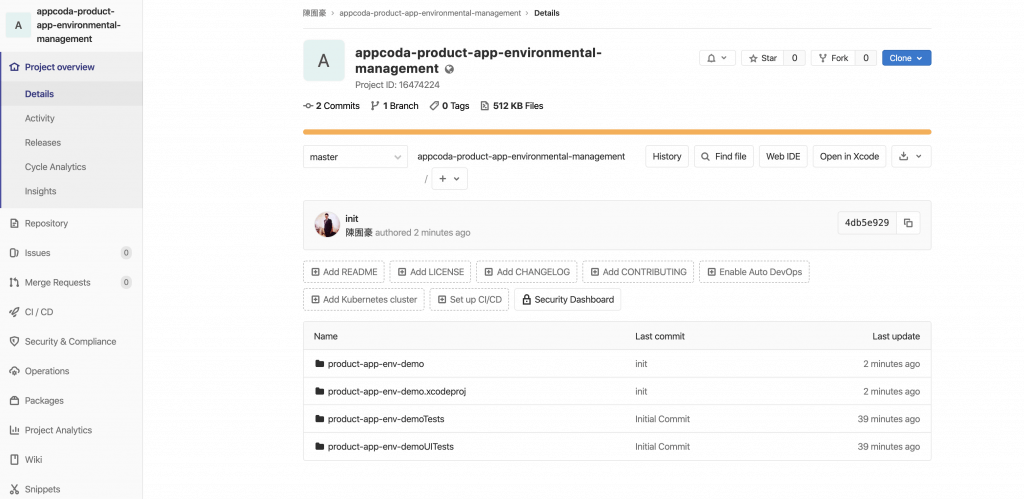
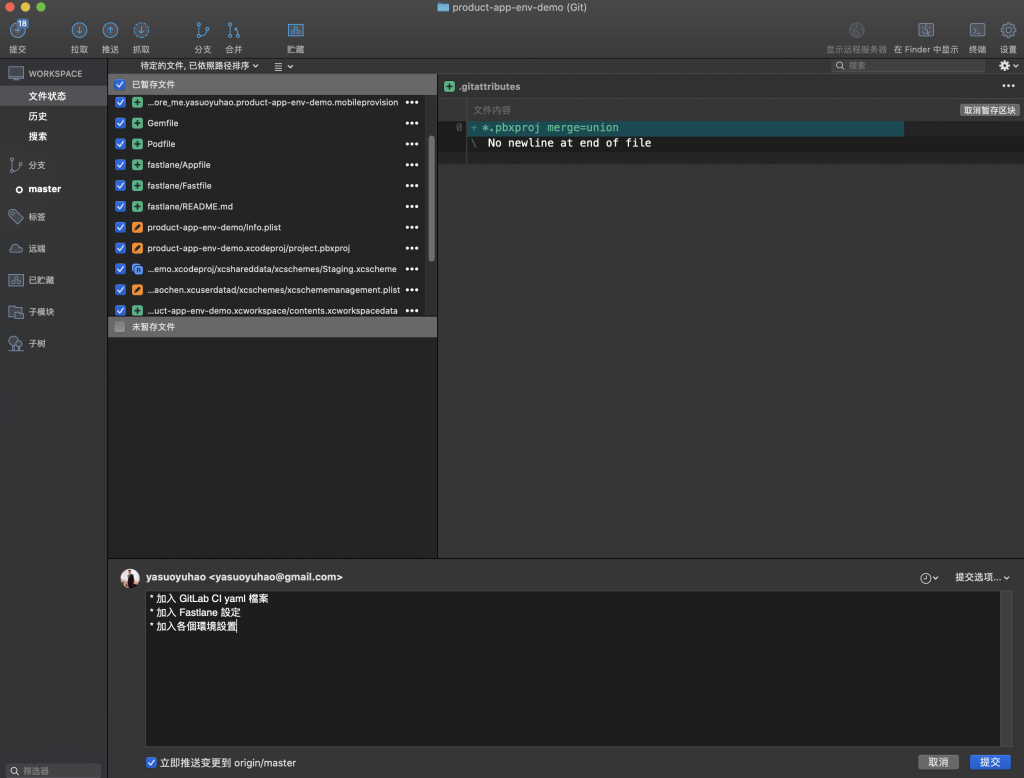
太棒了,我們已經成功的切換環境變數配置!最後,讓我們把成果推到剛建立好的 GitLab 遠端上:
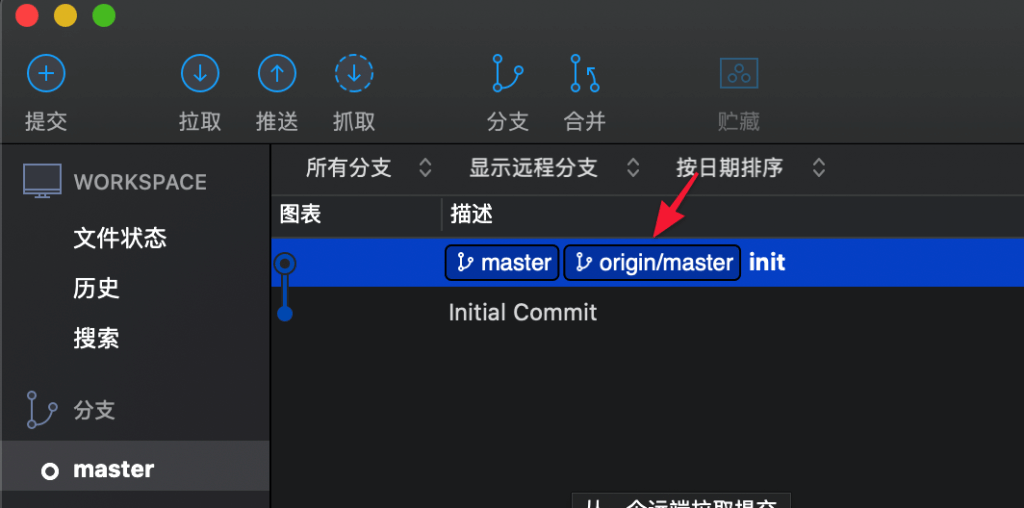
確認是否真的推上了:
配置 Fastlane 與 Gitlab CI
接下來,我們需要配置好 Fastlane 與 Gitlab CI,讓我們的建置、配置、測試、部署完全自動化!
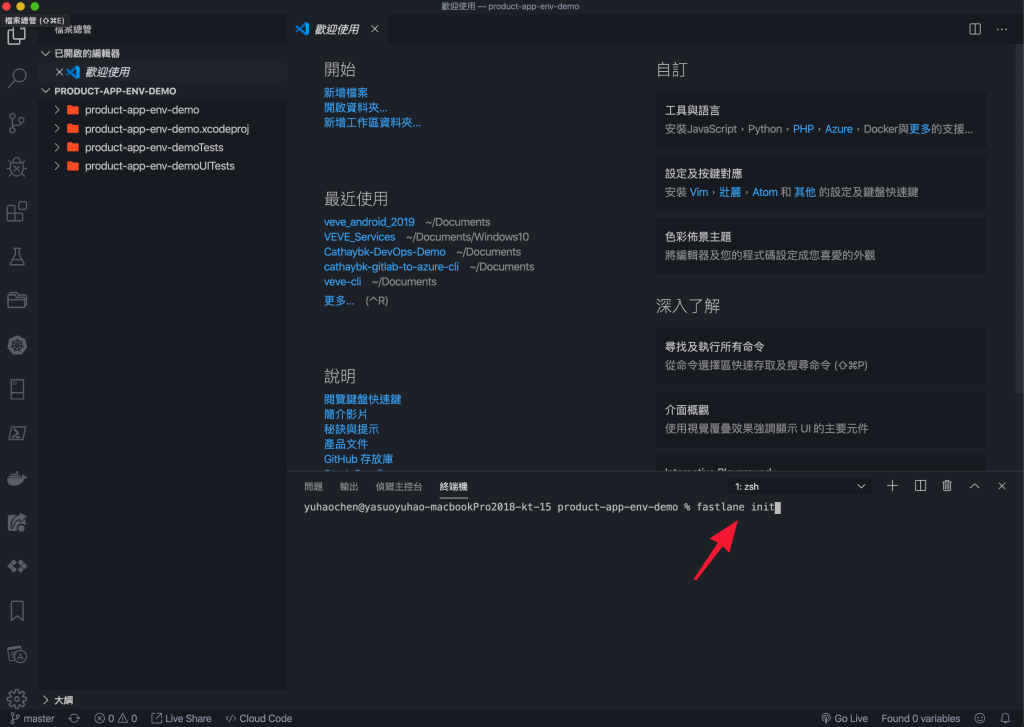
配置 Fastlane
首先,讓我們如此初始化 Fastlane:
然後,我們會以兩個文件來配置 Fastlane:
Fastfile
# This file contains the fastlane.tools configuration
# You can find the documentation at https://docs.fastlane.tools
#
# For a list of all available actions, check out
#
#     https://docs.fastlane.tools/actions
#
# For a list of all available plugins, check out
#
#     https://docs.fastlane.tools/plugins/available-plugins
#

# Uncomment the line if you want fastlane to automatically update itself
# update_fastlane

default_platform(:ios)

platform :ios do

  def install_pods
    cocoapods(
      clean: true,
      podfile: "Podfile",
      try_repo_update_on_error: true
    )
  end

  desc "Push a new beta build to TestFlight"
  lane :beta do
    sigh(force: true)
    install_pods()
    build_number = number_of_commits()
    increment_build_number(
      build_number: build_number # set a specific number
    )
    build_app(workspace: "product-app-env-demo.xcworkspace",
      scheme: "Staging",
      configuration: "Staging")
    # upload_to_testflight
    pilot(skip_waiting_for_build_processing: true)
  end

  desc "Publish a new build to prod"
  lane :prod do
    sigh(force: true)
    install_pods()
    build_number = number_of_commits()
    increment_build_number(
      build_number: build_number # set a specific number
    )
    build_app(workspace: "product-app-env-demo.xcworkspace", scheme: "Release", configuration: "Release")
    # upload_to_testflight
    pilot(skip_waiting_for_build_processing: true)
  end

  desc "Runs all the tests"
  lane :tests do
    install_pods()
    scan(workspace: "product-app-env-demo.xcworkspace",
        scheme: "product-app-env-demo",
        devices: ["iPhone Xs"],
        code_coverage: true,
        clean: true)
  end
endAppfile(這邊要記得換成自己的資訊)
app_identifier("me.yasuoyuhao.product-app-env-demo") # The bundle identifier of your app
apple_id("[email protected]") # Your Apple email address

itc_team_id("119027236") # App Store Connect Team ID
team_id("Q7DP9UNF3W") # Developer Portal Team ID

# For more information about the Appfile, see:
#     https://docs.fastlane.tools/advanced/#appfile
然後,我們要初始化 cocoapods:
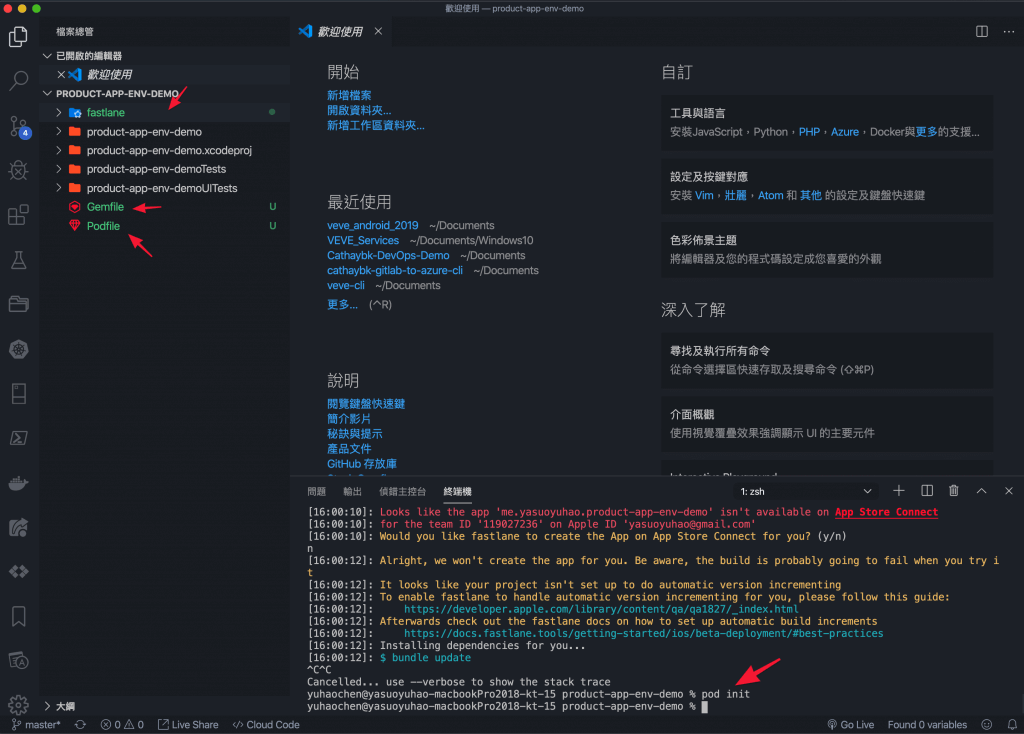
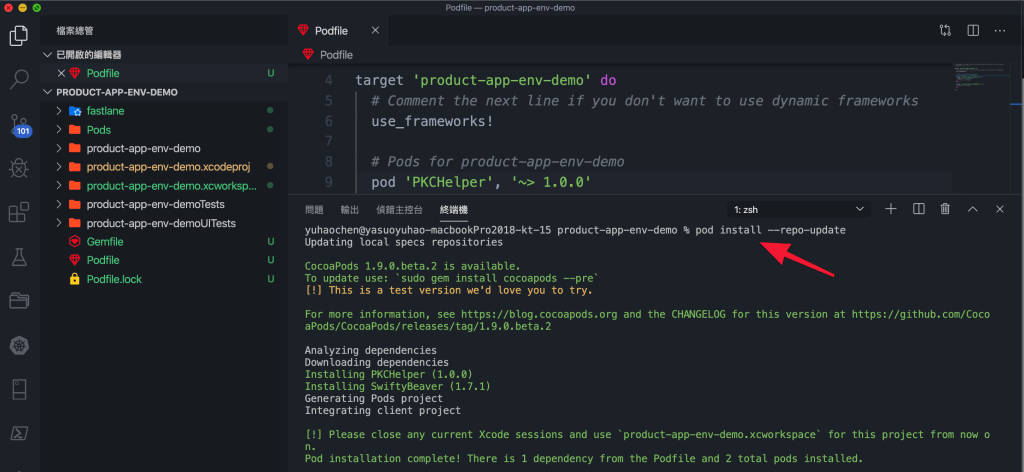
如此編輯 Podfile,並且安裝
讓我們重新修改 Xcode 配置:

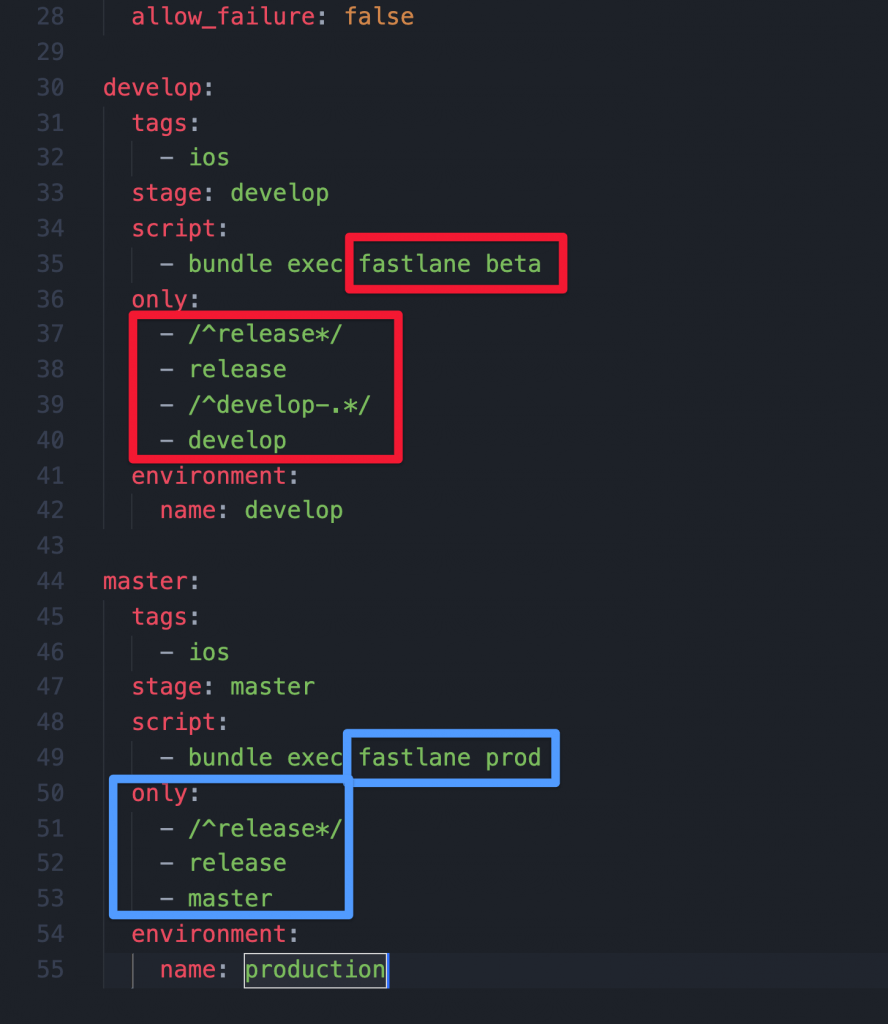
然後新增檔案 .gitlab-ci.yml:

我們把 Stages 分為三個項目,填入以下程式碼:
- unit_tests 代表跑測試
- develop 代表 Staging 環境部署,並且 Release to Testflight
- master 代表 Release 環境部署,並且 Release to Testflight
stages:
  - unit_tests
  - develop
  - master

variables:
  LANG: "en_US.UTF-8"
  LC_ALL: "en_US.UTF-8"
  GIT_SUBMODULE_STRATEGY: normal

# before_script:
#   - sudo gem install bundler && bundle update
#   - sudo gem install cocoapods

unit_tests:
  tags:
    - ios
  stage: unit_tests
  script:
    - bundle exec fastlane tests
  only:
    - branches
  except:
    - tags
  artifacts:
    paths:
      - fastlane/test_output/
  allow_failure: false

develop:
  tags:
    - ios
  stage: develop
  script:
    - bundle exec fastlane beta
  only:
    - /^release*/
    - release
    - /^develop-.*/
    - develop
  environment:
    name: develop

master:
  tags:
    - ios
  stage: master
  script:
    - bundle exec fastlane prod
  only:
    - /^release*/
    - release
    - master
  environment:
    name: production
完成了!接下來,我們想把這個成果展示在 Testflight 中,所以我們需要先配置一個 AppStore 項目。
配置 AppStore
讓我們到 AppStore 如此新增一個 App:

完成後,App 應該會像這樣:
測試 Fastlane
我們努力了那麼久,現在是時候測試一下成果了!
先在本地測試一下 fastlane 指令,如果遇到憑證問題,可以先到 Xcode 裡面設定好。

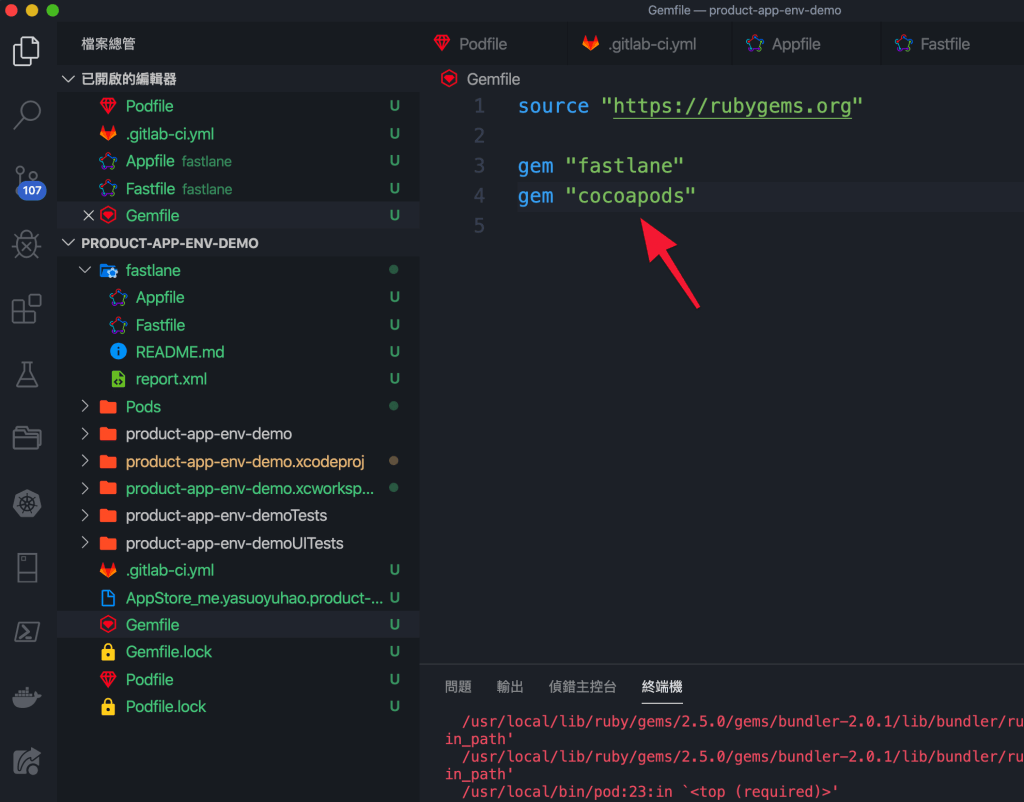
記得在 Gemfile 加入 cocoapods:

情境:環境配置錯了怎麼改
接下來讓我們模擬看看,如果在過程中,環境資訊配置錯誤了,該怎麼處理?
讓我們直接建立一個 Config Staging.xcconfig,直接更換配置就可以了,另外記得 Scheme 也要更換:
然後確認看看:
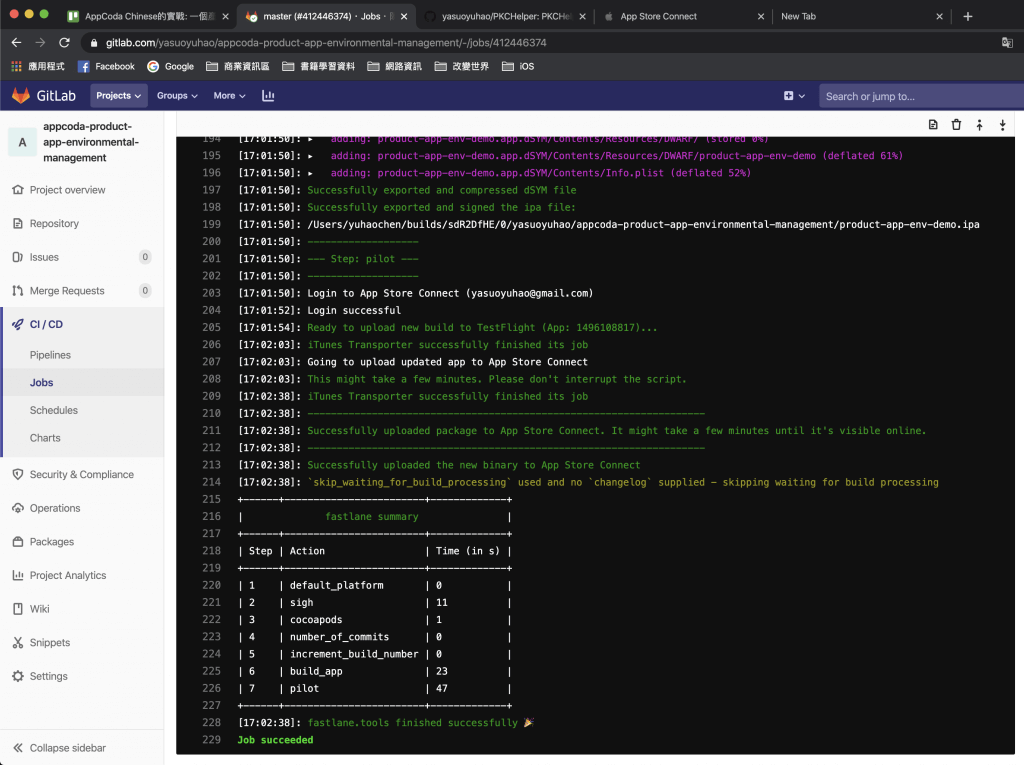
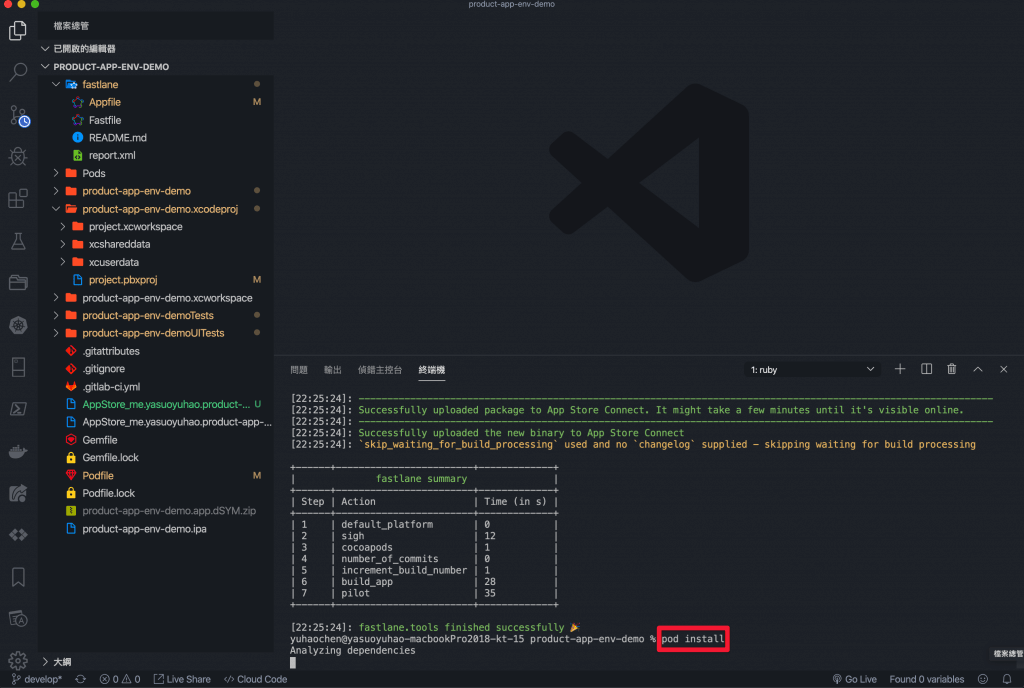
最後讓我們再跑一次 fastlane beta:
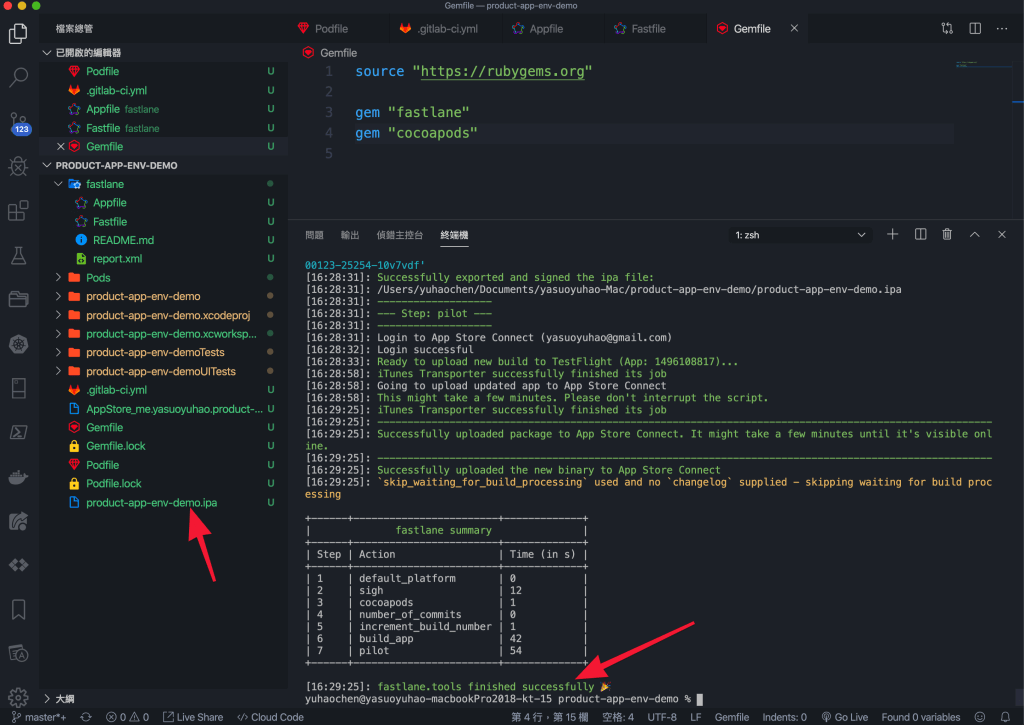
大功告成,我們再也不怕環境配置輸入錯誤而措手不及了!
測試 Gitlab CI
接下來讓我們推送到 Gitlab,測試與查看 Gitlab CI 的效果吧!
在推送的同時,CI 也在執行中:
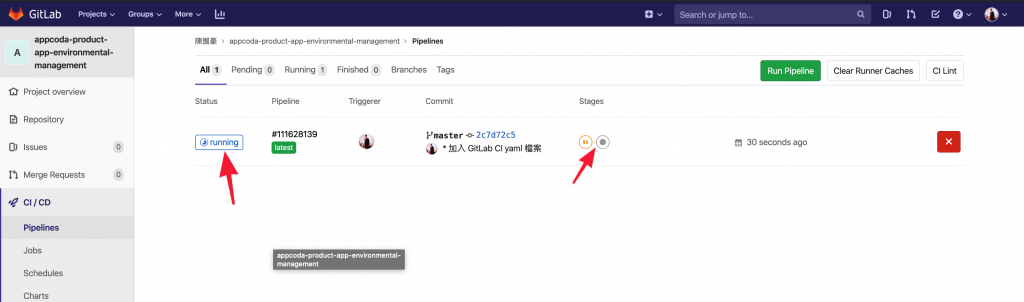
太棒了,我們的 Gitlab CI 執行成功了!
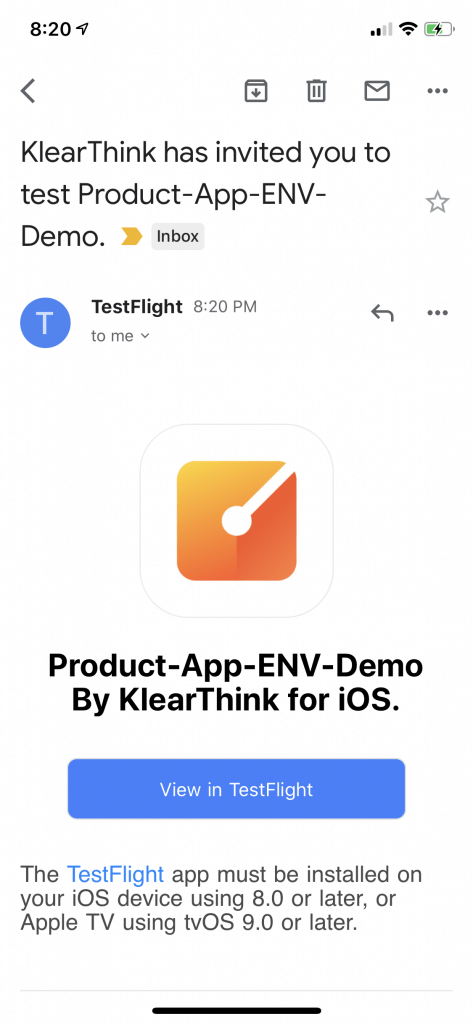
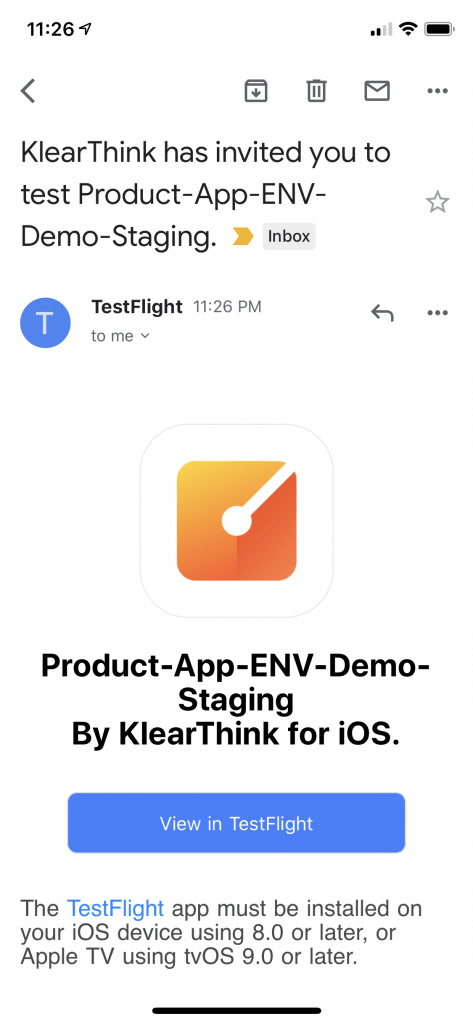
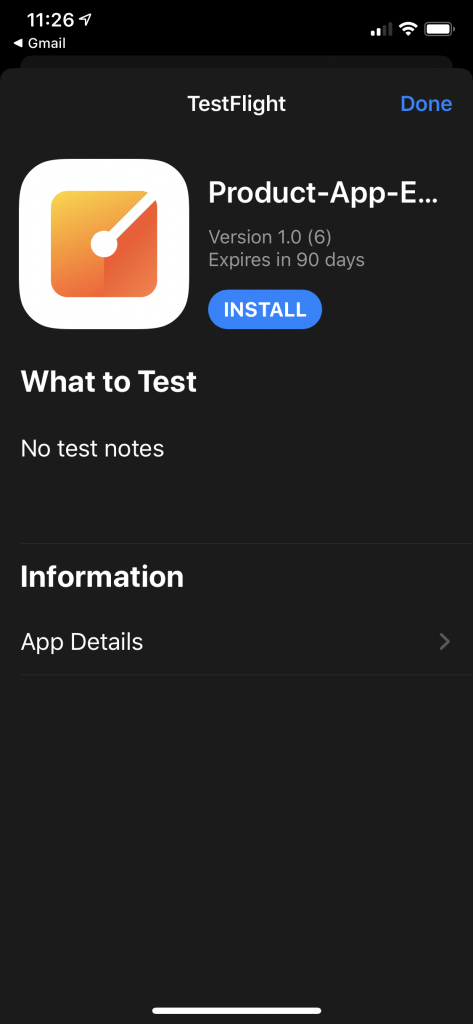
檢驗成果:Testflight
現在是收割的時刻了!接下來,我們需要到 Testflight 上查看,我們部署出去的 App 是不是真的可以使用 Testflight 提供測試。
先來檢查一下 Testflight 上有沒有檔案吧:
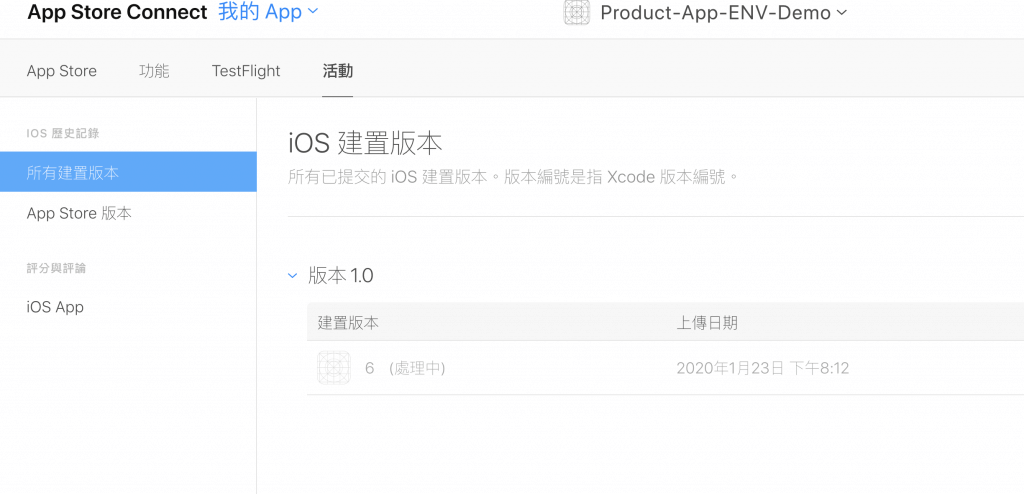
我們完成了!!

目前,我們把實戰中最基礎的配置部分都完成了!接下來,讓我們看看如何透過不同的分支,打包與部署出不同環境的 App 吧!
進階:不同分支的App Release
接下來,我們會示範使用分支來打包與部署不同環境的 App:
- 透過 Develop 分支 -> 推送 Staging 環境
- 透過 Master 分支 -> 推送 Release 環境
可以看到我們的 CI 檔案中已經設置好應有的分支,再來只要推送就好了!
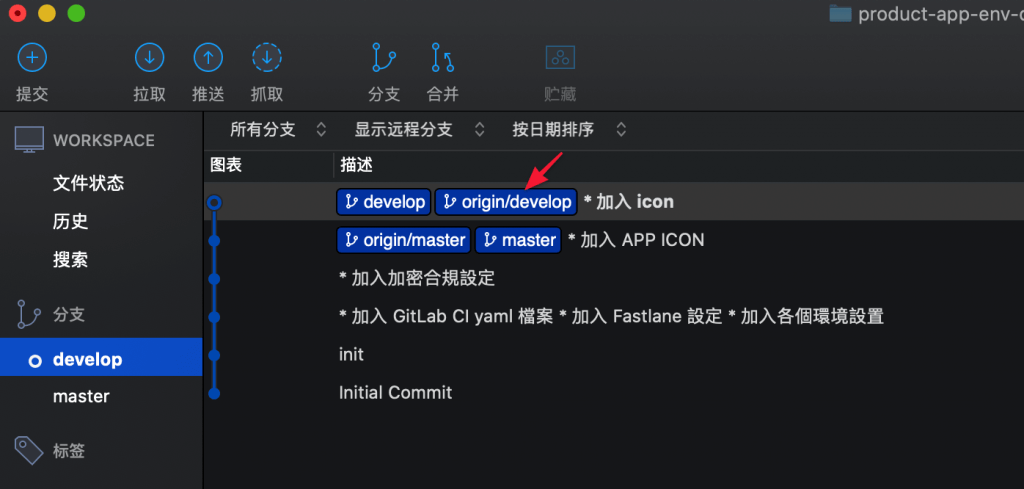
嘩,我們成功讓不同分支可以讀到不同的環境配置了!
接下來,讓我們再更近一步,將不同環境的 App 部署到不同的 App Store 項目中,使得我們可以在正式與測試環境中很自由的使用與測試吧!
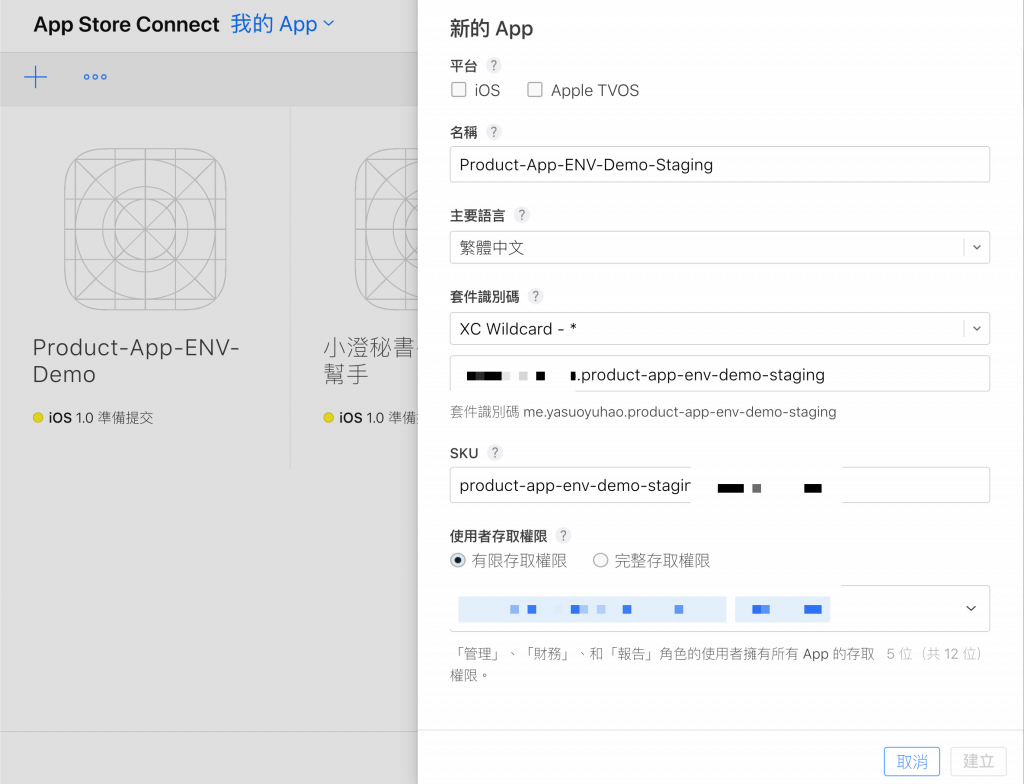
進階:把環境分到不同的 App 中
首先,讓我們再建立一個 AppStore App:
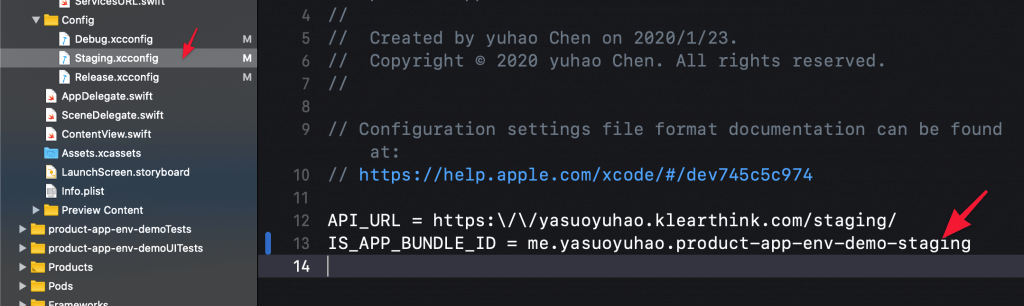
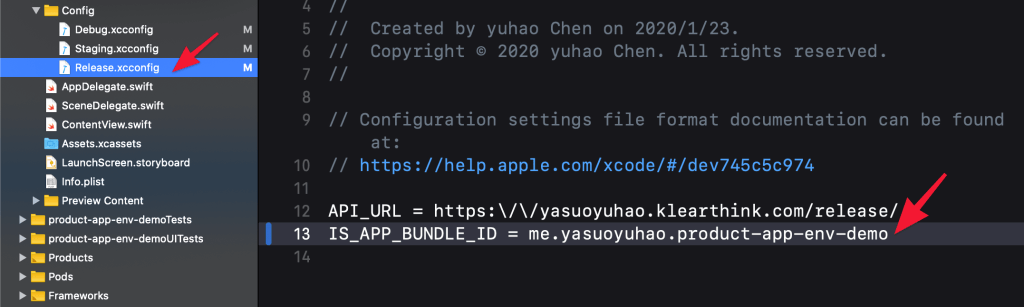
然後,分別在 Config 檔案中加入變數:
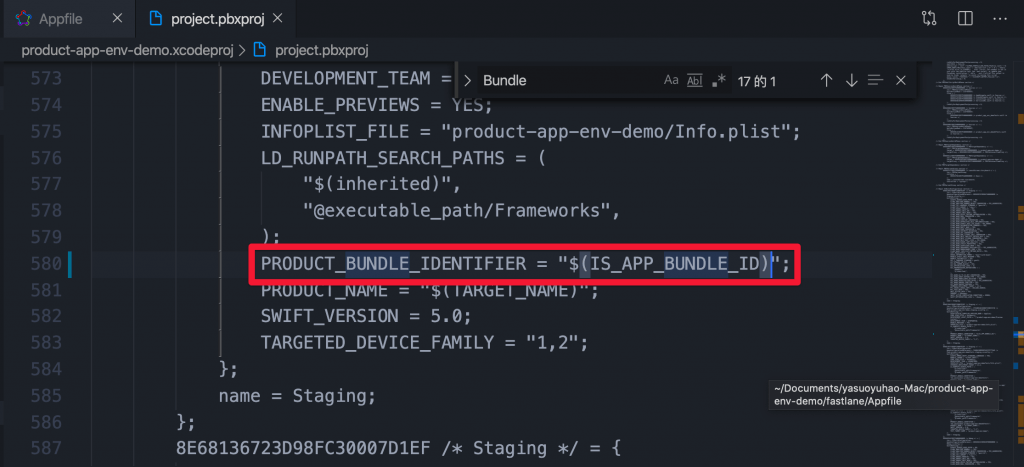
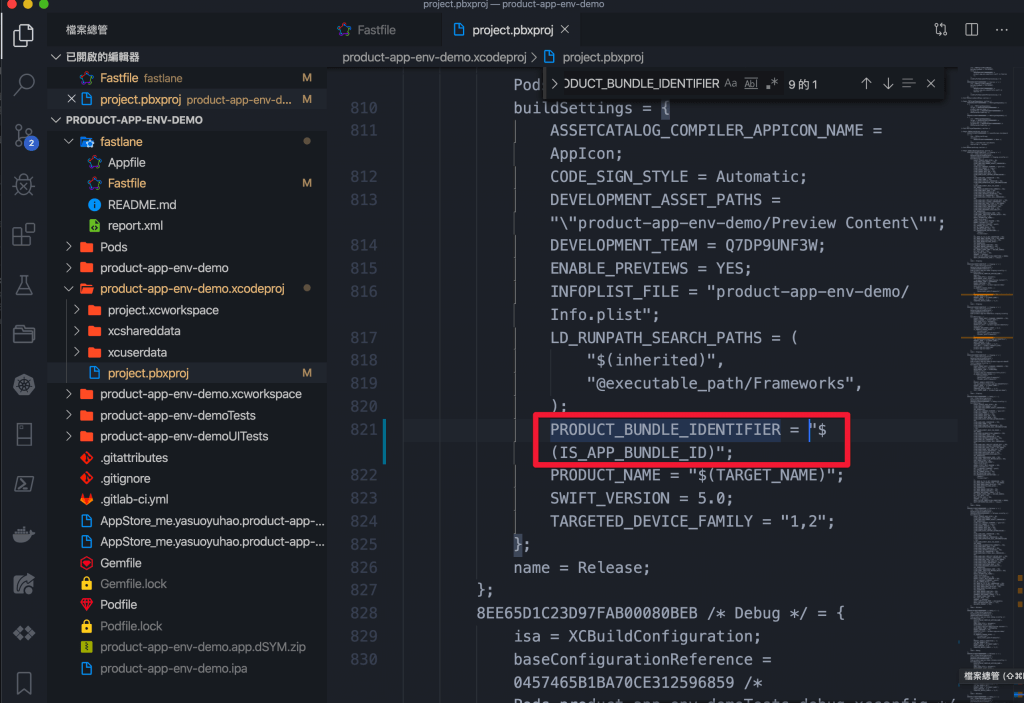
這邊有一個要特別注意的點,也是常常會出現的坑:就是要記得修改project.pbxproj內的程式碼:
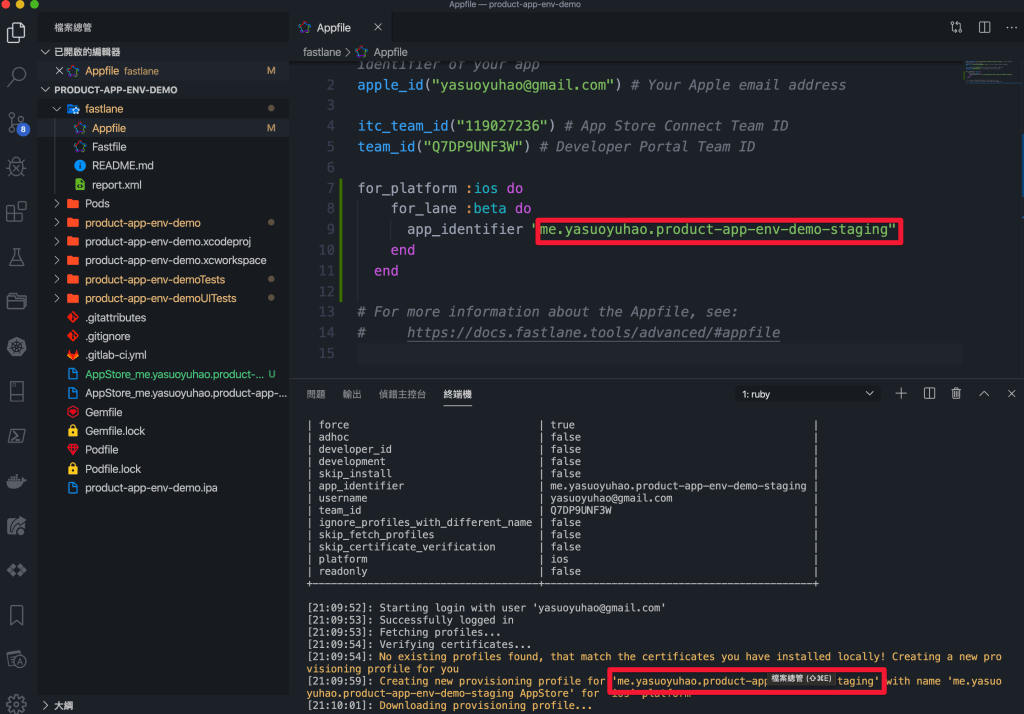
最後,我們修改一下 Appfile:

完成後,讓我們測試一下,看看替換有沒有成功:

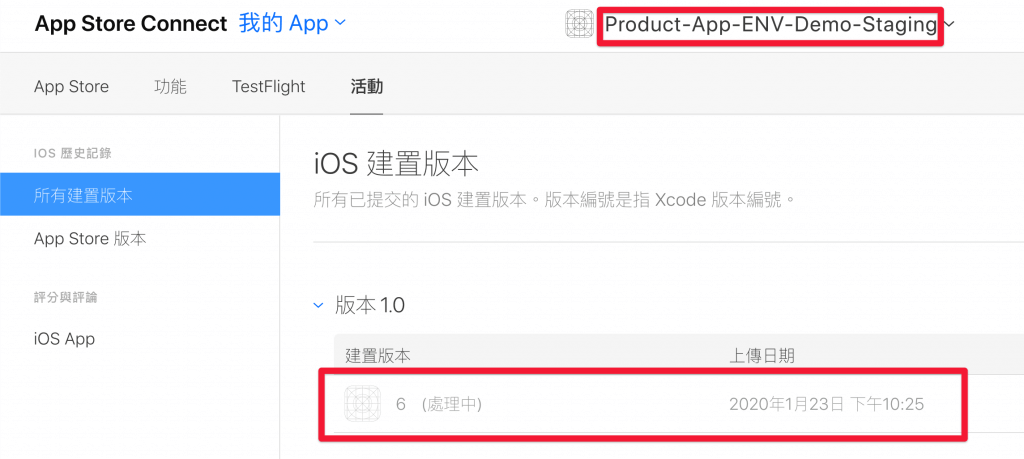
然後,我們回到 AppStore 查看,確定 Deploy 成功了!
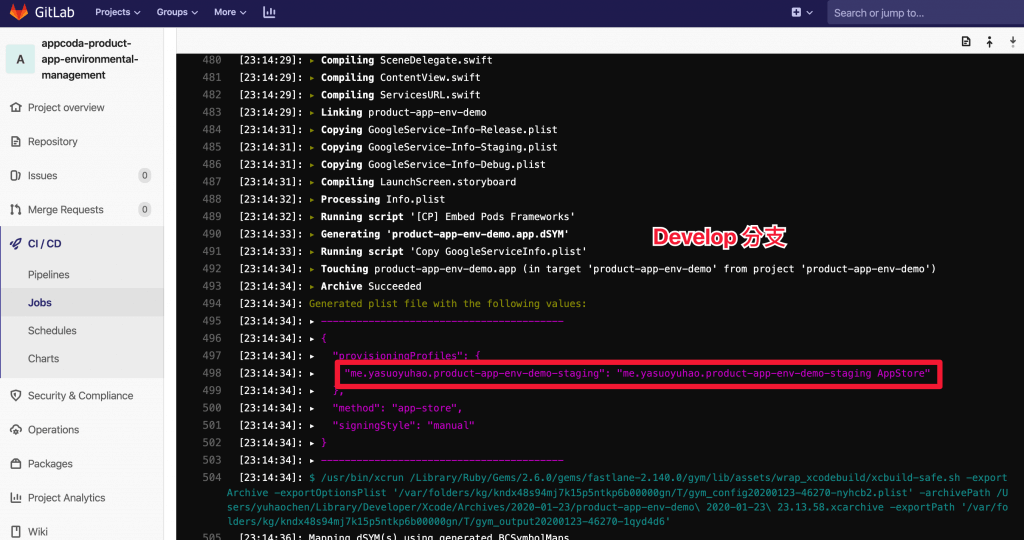
同時,也確認 Develop 分支下的包 ID:
和 Master 分支下的包 ID:
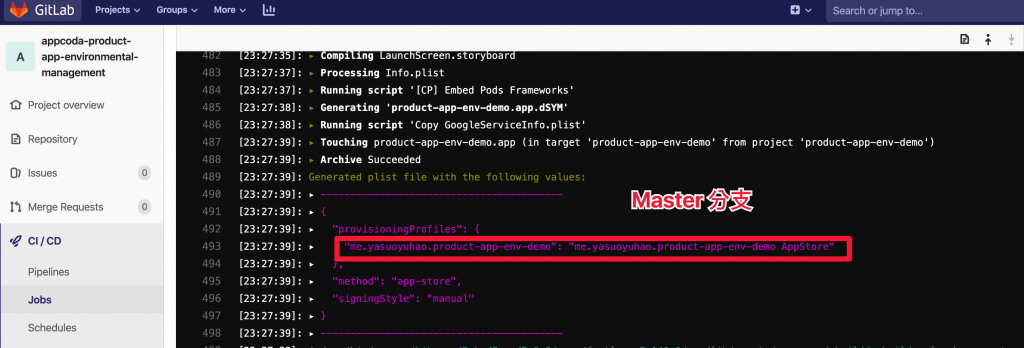
完成了!
哇,我們現在環境配置與建置已經非常完整了!
進階:Firebase 配置也可以分環境?
App 中常常會加入 Firebase 來使用,是很棒的工具庫,那我要如何將 Firebase 也換環境呢?
我們知道 firebase 都有一個設定檔案 GoogleService-Info.plist。如果我想依照環境設置不同的設定檔案,該如何做?
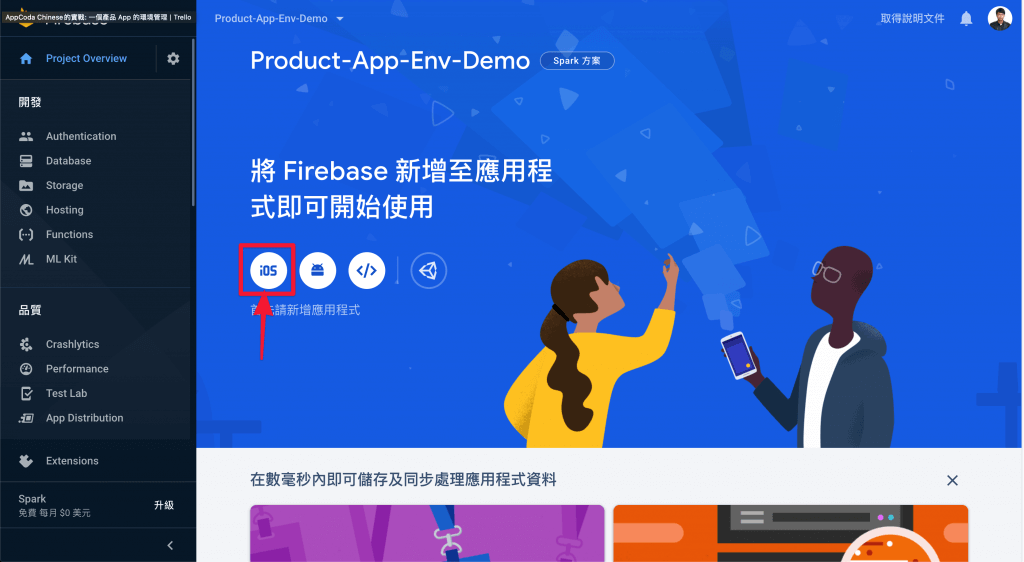
設置 Firebase
首先,讓我們建立專案:
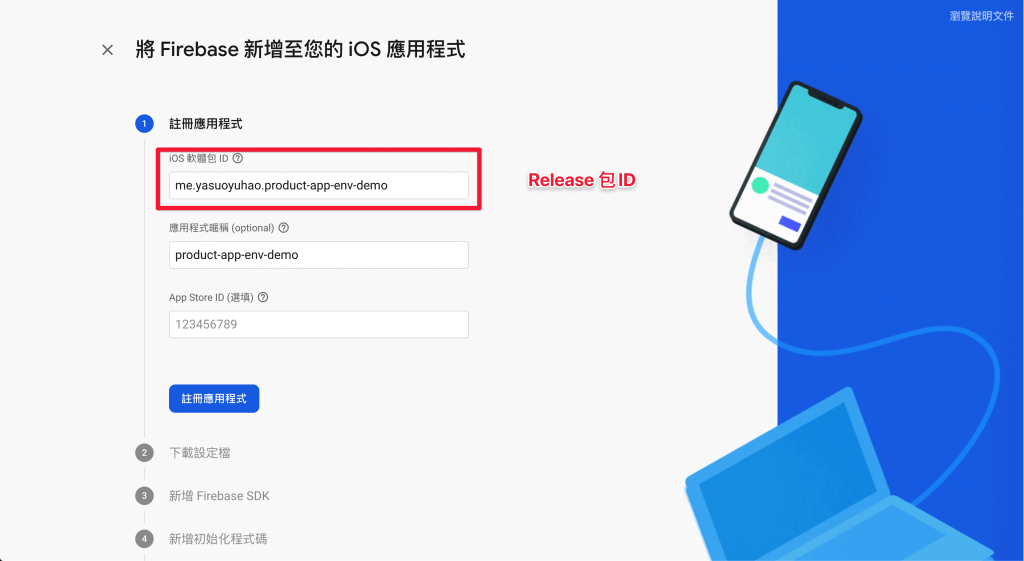
然後,加入 iOS App:
讓我們輸入 Release 的基本資訊 :
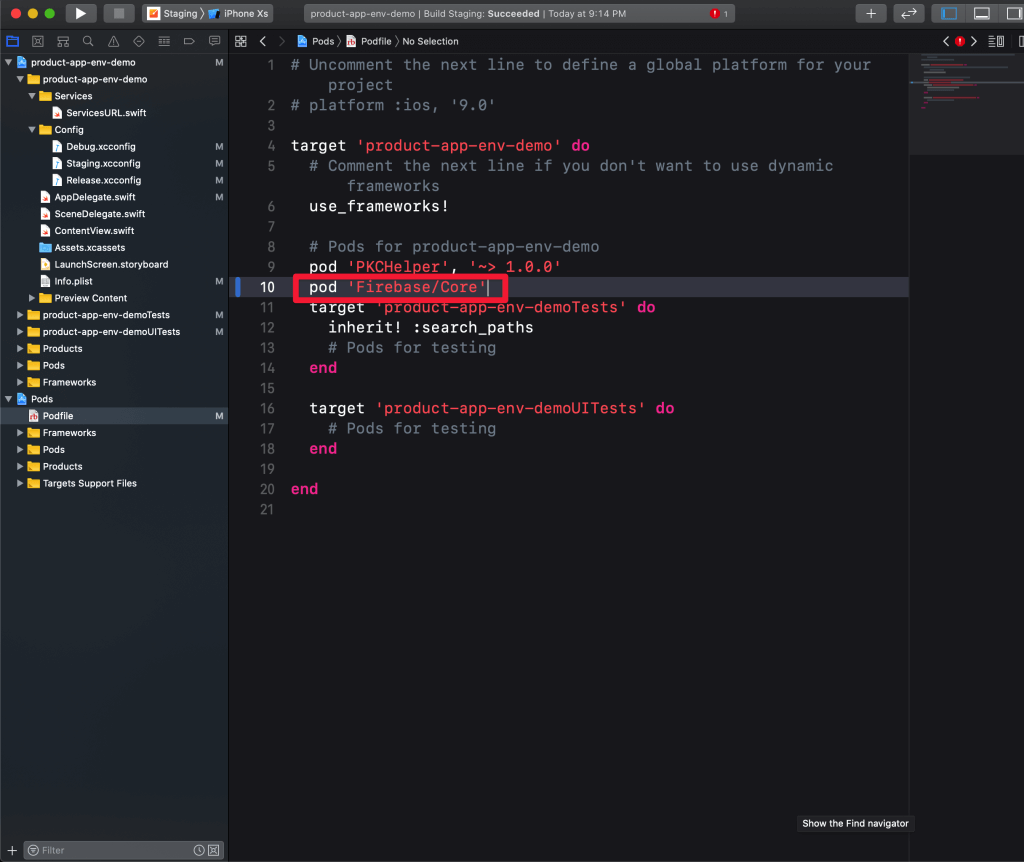
接著,安裝 Pod:
並初始化 SDK:

然後,重複上面的步驟,也輸入 Debug 和 Staging 的包 ID,建立讓 Debug 和 Staging 用的 Firebase。
然後,將下載下來的檔案,分別命名成
- GoogleService-Info-Debug.plist
- GoogleService-Info-Staging.plist
- GoogleService-Info-Release.plist
最後來加一個腳本,內容如下:
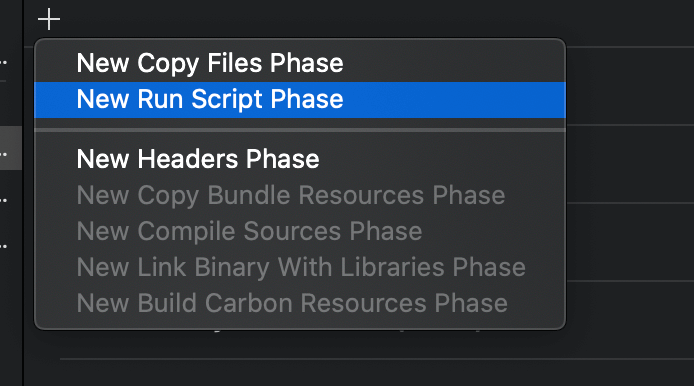
# Type a script or drag a script file from your workspace to insert its path.
RESOURCE_PATH=${SRCROOT}/${PRODUCT_NAME}/GoogleServiceInfoPlists/GoogleService-Info-$CONFIGURATION.plist

BUILD_APP_DIR=${BUILT_PRODUCTS_DIR}/${PRODUCT_NAME}.app

echo "Copying ${RESOURCE_PATH} to ${BUILD_APP_DIR}"
cp "${RESOURCE_PATH}" "${BUILD_APP_DIR}/GoogleService-Info.plist"
如此一來,App 就會在編譯期間抓取需要的設定檔案,實現分離環境讀取 firebase 設定!太棒了,連 firebase 都可以分環境了!
進階:Slack 通知
我們幾乎將所有實戰中遇到的問題都配置完成了!接下來,讓我們看如何更完整,把 Slack 通知也一併的配置進來。
我們的目標是讓 ChatOps 活起來,如此一來團隊中每個成員都可以很好的知道目前 App 的動向。
很簡單,我們只需要修改 Fastfile,加入 slack插件,將 slack url 替換成自己設置好的 webhook 就可以了!
def post_slack_message(message)
  slack(
    message: "App successfully uploaded to iTunesConnect. #{message}",
    success: true,
    slack_url: "https://hooks.slack.com/services/xxxx/xxx/xxx"
  )
end
最後再加入我們的 Deploy 中:
desc "Publish a new build to prod"
lane :prod do
sigh(force: true)
install_pods()
build_number = number_of_commits()
increment_build_number(
build_number: build_number # set a specific number
)
build_app(workspace: "product-app-env-demo.xcworkspace", scheme: "Release", configuration: "Release")
# upload_to_testflight
pilot(skip_waiting_for_build_processing: true)
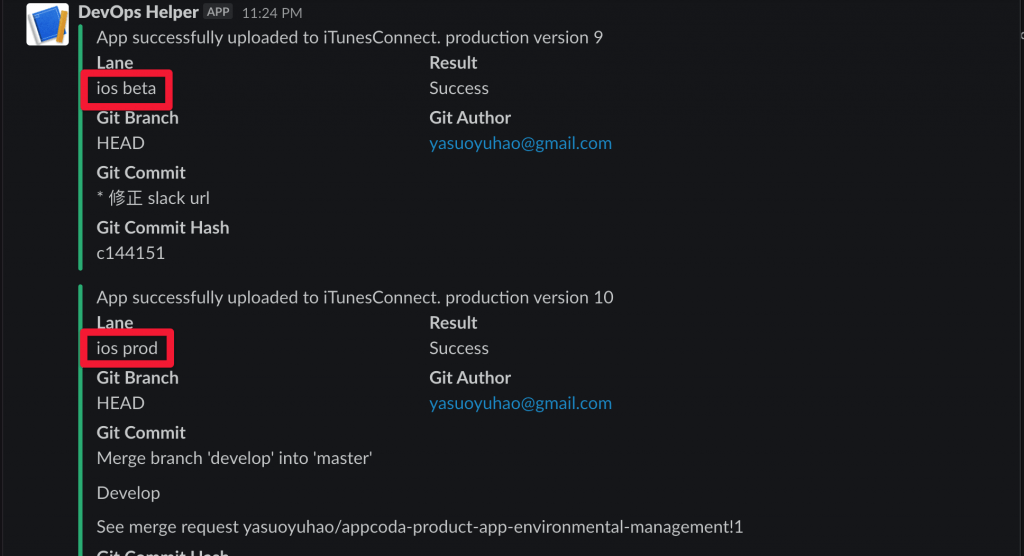
post_slack_message("production version #{build_number}")
end完成了!讓我們來看一下訊息:
總結
大功告成!到目前為止,我們完成了真正一個產品開發的環境管理。因為有變數的關係,理論上是所有服務都可以分環境的,FB SDK、Line SDK 等等,授權與認證完全可以用變數的方式取代,CI/CD 也大大簡化了人工分環境的困擾與繁瑣的流程。同時,我們也成功地引入 DevOps、 Code as Infrastructure 的精神。
希望你喜歡本篇文章,如果你有不同的想法或問題,歡迎留言或電郵給我。感謝你的閱讀,祝你有個美好 Coding 夜晚,我們下次見。
別忘了,你可以在這裡下載原始碼作參考。