今天,我們會客製由一個視圖控制器 (ViewController) 轉場到另一個的轉場動畫。
為什麼會想要寫這個主題呢?過去,我花了很多時間去了解視圖控制器之間的轉換。遺憾的是,目前線上鮮有能簡單說明視圖控制器動畫轉場的教程。
因此,我決定寫幾篇文章,教大家用最簡單的方法,創建令人驚艷的轉場動畫。而這篇文章會比前一篇更進階。
讓我們開始來創建客製化的 UINavigationController 轉場動畫吧!
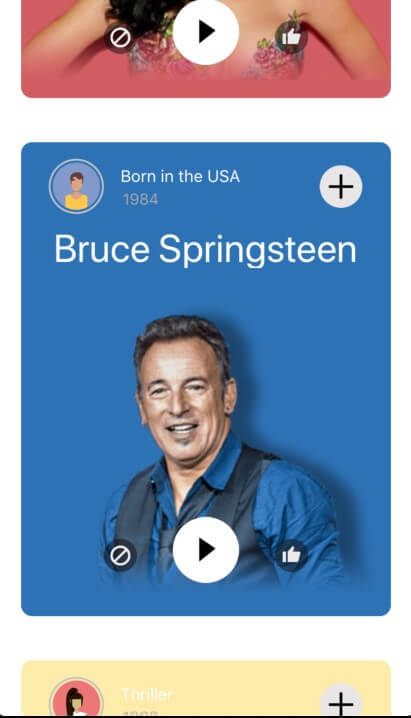
先看一下我們最後的成果:
專案
讓我們先花點時間來了解這個專案和以下元素:
- MainViewController.swift:主視圖控制器,你會在這裡看到 fadeIN 或 fadeOut 單元格的方法。
- MainViewController+DataSource.swift:我們在這檔案放置 TableView DataSource 方法。
- MainViewController+ProtocolTransitions.swift:在這裡,我們可以看到要製作動畫的每個物件的協定 (Protocol)。
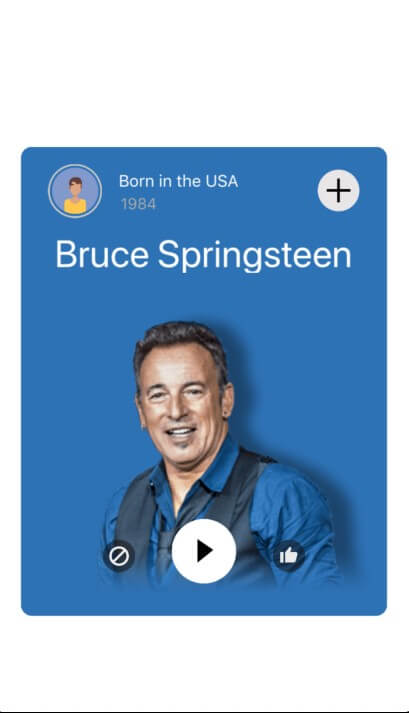
- PushedViewController.swift:專案中的第二個視圖控制器,它就是動畫的最終狀態。
- AnimationCollectionViewLayout.swift:這是用在 MainViewController CollectionView 的 CollectionView Layout。
- MainTableViewCell.swift:這是我們將在專案的 MainViewController 上使用的 MainTableViewCell。
- Helpers.swift:我們會在這裡定義在 MainViewController 和 PushedViewController 上使用的協定,以獲取要進行動畫處理的物件的引用。
- PushAnimator.swift: 此類別將繼承自 NSObject,並將實作 UIViewControllerAnimatedTransitioning 協定,以從 MainViewController 轉換到 PushedViewController。
- PopAnimator.swift: 此類別將繼承自 NSObject ,並將實作 UIViewControllerAnimatedTransitioning 協定,以從 PushedViewController 轉換到 MainViewController。
- TransitionCoordinator.swift: 此類別將繼承自 NSObject,並將實作 UINavigationControllerDelegate 協定。 在此類別中,我們定義 push 時使用 PushAnimator 的轉場,以及在 pop 時使用的 PopAnimator 轉場效果。
小提示 #2:當視圖控制器從 UINavigationController 的堆疊 (stack) 中 push 和 pop 時,UINavigationControllerDelegate 協定定義了 UINavigationController 可以實現的方法。
實現動畫的步驟
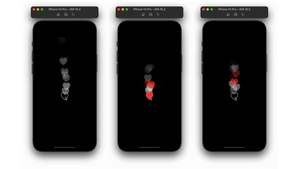
1. 正常狀態
2. Cells 淡出 + TableView Cell 縮小
3. Avatar 和 Plus ImageView 利用一個 QuadCurve Animation 執行動畫。其他物件則執行線性動畫 (Linear Animation).
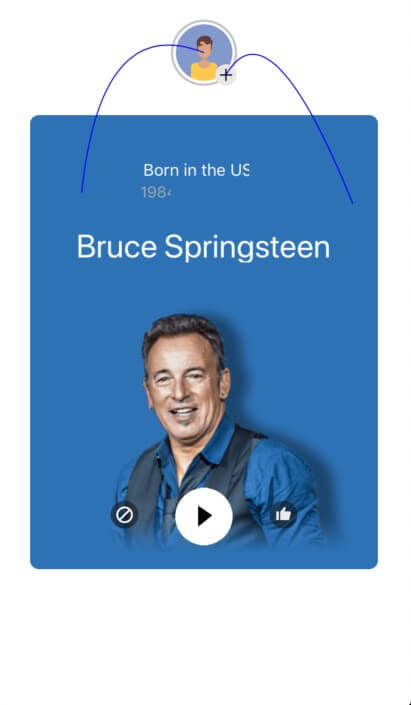
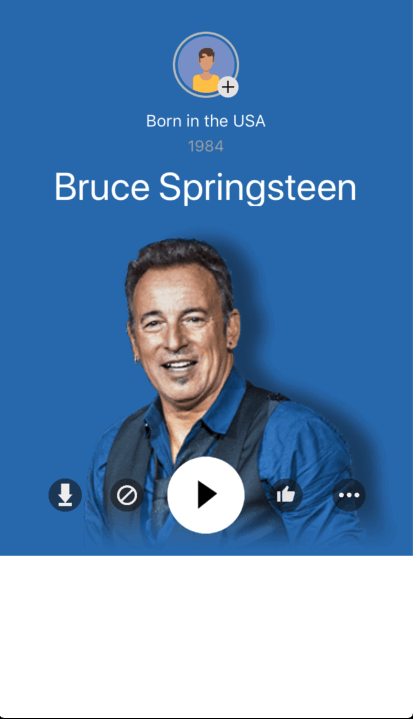
4. 最終動畫:Background 擴展至與容器視圖同寬,高度為螢幕的一半,而帶有標籤的 Avatar 和 Plus Image 也會同時擴展。
讓我們進入動畫控制器!
在這邊,我們將提供 2 個客製化的轉場動畫:一個用來 push,一個用在 pop。現在讓我們專注在 push 動畫,首先,我們需要準備什麼?
一個動畫控制器 (Animation Controller) !
該控制器需要實作下列兩種方法,以符合 UIViewControllerAnimatedTransitioning() 協定。
1. transitionDuration:整個動畫的持續時間
transitionDuration(using transitionContext: UIViewControllerContextTransitioning?) -> TimeInterval2. animateTransition(using:): 這是動畫邏輯所在
animateTransition(using transitionContext: UIViewControllerContextTransitioning)讓我們開始第一個動畫吧。
- PushAnimator:
class PushAnimator: NSObject, UIViewControllerAnimatedTransitioning {

    func transitionDuration(using transitionContext: UIViewControllerContextTransitioning?) -> TimeInterval {
        return 2.0
    }

    func animateTransition(using transitionContext: UIViewControllerContextTransitioning) {
    }

}
在轉場期間,我們需要提供一個容器視圖 (container view),讓轉場動畫在裡面運行。
- 以下是需要添加到控制器視圖的 transitionContext 視圖:
class PushAnimator: NSObject, UIViewControllerAnimatedTransitioning {

    func transitionDuration(using transitionContext: UIViewControllerContextTransitioning?) -> TimeInterval {
        return 2.0
    }

    func animateTransition(using transitionContext: UIViewControllerContextTransitioning) {

        let containerView = transitionContext.containerView

        guard let fromVC = transitionContext.viewController(forKey: .from) as? animTransitionable,
            let toVC = transitionContext.viewController(forKey: .to) as? animTransitionable else {
                transitionContext.completeTransition(false)
                return
        }

        let fromViewController = transitionContext.viewController(forKey: .from)!
        fromViewController.view.backgroundColor = UIColor.clear

        let toViewController = transitionContext.viewController(forKey: .to)!

    }

}
我們將會新增一個協定,用來獲取要執行動畫的視圖單元格的參考。該協定可用於 MainViewController 和 PushedViewController。
protocol animTransitionable {
    var profileImageView: UIImageView { get }
    var backgroundImageView: UIImageView { get }
    var plusImageView: UIImageView { get }
    var playImageView: UIImageView { get }
    var likeImageView: UIImageView { get }
    var cancelImageView: UIImageView { get }
    var backgroundColor: UIView { get }
    var cellBackground: UIView { get }
    var bigTitle: UILabel { get }
    var albumLbl: UILabel { get }
    var yearLbl: UILabel { get }
}
所以 ⋯⋯ 我們要如何透過動畫使物件從一個視圖控制器移動到另一個呢?我們需要創建每個視圖/物件,將它們添加到容器視圖中,並設置動畫。
來看一下如何實作程式碼吧:
class PushAnimator: NSObject, UIViewControllerAnimatedTransitioning {

    var duration : TimeInterval

    init(duration : TimeInterval) {
        self.duration = duration
    }

    func transitionDuration(using transitionContext: UIViewControllerContextTransitioning?) -> TimeInterval {
        return duration
    }

    func animateTransition(using transitionContext: UIViewControllerContextTransitioning) {

        let containerView = transitionContext.containerView


        guard let fromVC = transitionContext.viewController(forKey: .from) as? animTransitionable,
            let toVC = transitionContext.viewController(forKey: .to) as? animTransitionable else {
                transitionContext.completeTransition(false)
                return
        }


        let fromViewController = transitionContext.viewController(forKey: .from)!
        let toViewController = transitionContext.viewController(forKey: .to)!

        // Plus Image
        let imageViewSnapshotPlus = UIImageView(image: fromVC.plusImageView.image)
        imageViewSnapshotPlus.contentMode = .scaleAspectFit

        //Profile Image
        let imageViewSnapshotProfile = UIImageView(image: fromVC.profileImageView.image)
        imageViewSnapshotProfile.contentMode = .scaleAspectFit

        //Background Image
        let imageViewSnapshotBackground = UIImageView(image: fromVC.backgroundImageView.image)
        imageViewSnapshotBackground.contentMode = .scaleAspectFit


        //Like Image
        let imageViewSnapshotLike = UIImageView(image: fromVC.likeImageView.image)
        imageViewSnapshotLike.contentMode = .scaleAspectFit

        //Play Image
        let imageViewSnapshotPlay = UIImageView(image: fromVC.playImageView.image)
        imageViewSnapshotPlay.contentMode = .scaleAspectFit

        //Cancel Image
        let imageViewSnapshotCancel = UIImageView(image: fromVC.cancelImageView.image)
        imageViewSnapshotCancel.contentMode = .scaleAspectFit


        //Background View With Correct Color
        let backgroundView = UIView()
        backgroundView.frame = fromVC.backgroundColor.frame
        backgroundView.backgroundColor = UIColor.white
        containerView.addSubview(backgroundView)


        // Title
        let titleLabel = duplicateLabel(label: fromVC.bigTitle)
        titleLabel.text = fromVC.bigTitle.text
        titleLabel.backgroundColor = UIColor.clear
        titleLabel.frame = containerView.convert(fromVC.bigTitle.frame, from: fromVC.bigTitle.superview)

        // Album
        let albumLabel = duplicateLabel(label: fromVC.albumLbl)
        albumLabel.text = fromVC.albumLbl.text
        albumLabel.backgroundColor = UIColor.clear
        albumLabel.frame = containerView.convert(fromVC.albumLbl.frame, from: fromVC.albumLbl.superview)


        // Year
        let yearLabel = duplicateLabel(label: fromVC.yearLbl)
        yearLabel.text = fromVC.yearLbl.text
        yearLabel.backgroundColor = UIColor.clear
        yearLabel.frame = containerView.convert(fromVC.yearLbl.frame, from: fromVC.yearLbl.superview)


        // Cell Background
        let cellBackground = UIView()
        cellBackground.frame =  containerView.convert(fromVC.cellBackground.frame, from: fromVC.cellBackground.superview)
        cellBackground.backgroundColor = fromVC.cellBackground.backgroundColor
        cellBackground.layer.cornerRadius = fromVC.cellBackground.layer.cornerRadius
        cellBackground.layer.masksToBounds = fromVC.cellBackground.layer.masksToBounds


        containerView.addSubview(fromViewController.view)
        containerView.addSubview(toViewController.view)

        // Background Cell
        containerView.addSubview(cellBackground)

        // Top
        containerView.addSubview(imageViewSnapshotProfile)
        containerView.addSubview(imageViewSnapshotBackground)
        containerView.addSubview(imageViewSnapshotPlus)

        // Down
        containerView.addSubview(imageViewSnapshotPlay)
        containerView.addSubview(imageViewSnapshotCancel)
        containerView.addSubview(imageViewSnapshotLike)


        // Title Label
        containerView.addSubview(titleLabel)
        containerView.addSubview(albumLabel)
        containerView.addSubview(yearLabel)

        containerView.bringSubview(toFront: imageViewSnapshotPlus)

     }
}
來到這一步,我們得到:
- ImageView
- Plus Image View
- Profile Image View(也就是 Avatar)
- Background
- Like(讚好鍵)
- Play(播放鍵)
- Cancel(取消鍵)
- View
- Background
- Label(標籤)
- Title(標題)
- Album(專輯)
- Year(年份)
PushAnimator 的完整動畫:
class PushAnimator: NSObject, UIViewControllerAnimatedTransitioning {

    var duration : TimeInterval

    init(duration : TimeInterval) {
        self.duration = duration
    }

    func transitionDuration(using transitionContext: UIViewControllerContextTransitioning?) -> TimeInterval {
        return duration
    }

    func animateTransition(using transitionContext: UIViewControllerContextTransitioning) {

        let containerView = transitionContext.containerView


        guard let fromVC = transitionContext.viewController(forKey: .from) as? animTransitionable,
            let toVC = transitionContext.viewController(forKey: .to) as? animTransitionable else {
                transitionContext.completeTransition(false)
                return
        }

        let fromViewController = transitionContext.viewController(forKey: .from)!
        let toViewController = transitionContext.viewController(forKey: .to)!

        // Plus Image
        let imageViewSnapshotPlus = UIImageView(image: fromVC.plusImageView.image)
        imageViewSnapshotPlus.contentMode = .scaleAspectFit

        //Profile Image
        let imageViewSnapshotProfile = UIImageView(image: fromVC.profileImageView.image)
        imageViewSnapshotProfile.contentMode = .scaleAspectFit

        //Background Image
        let imageViewSnapshotBackground = UIImageView(image: fromVC.backgroundImageView.image)
        imageViewSnapshotBackground.contentMode = .scaleAspectFit

        //Like Image
        let imageViewSnapshotLike = UIImageView(image: fromVC.likeImageView.image)
        imageViewSnapshotLike.contentMode = .scaleAspectFit

        //Play Image
        let imageViewSnapshotPlay = UIImageView(image: fromVC.playImageView.image)
        imageViewSnapshotPlay.contentMode = .scaleAspectFit

        //Cancel Image
        let imageViewSnapshotCancel = UIImageView(image: fromVC.cancelImageView.image)
        imageViewSnapshotCancel.contentMode = .scaleAspectFit

        //Background View With Correct Color
        let backgroundView = UIView()
        backgroundView.frame = fromVC.backgroundColor.frame
        backgroundView.backgroundColor = UIColor.white
        containerView.addSubview(backgroundView)

        // Title
        let titleLabel = duplicateLabel(label: fromVC.bigTitle)
        titleLabel.text = fromVC.bigTitle.text
        titleLabel.backgroundColor = UIColor.clear
        titleLabel.frame = containerView.convert(fromVC.bigTitle.frame, from: fromVC.bigTitle.superview)

        // Album
        let albumLabel = duplicateLabel(label: fromVC.albumLbl)
        albumLabel.text = fromVC.albumLbl.text
        albumLabel.backgroundColor = UIColor.clear
        albumLabel.frame = containerView.convert(fromVC.albumLbl.frame, from: fromVC.albumLbl.superview)


        // Year
        let yearLabel = duplicateLabel(label: fromVC.yearLbl)
        yearLabel.text = fromVC.yearLbl.text
        yearLabel.backgroundColor = UIColor.clear
        yearLabel.frame = containerView.convert(fromVC.yearLbl.frame, from: fromVC.yearLbl.superview)

        // Cell Background
        let cellBackground = UIView()
        cellBackground.frame =  containerView.convert(fromVC.cellBackground.frame, from: fromVC.cellBackground.superview)
        cellBackground.backgroundColor = fromVC.cellBackground.backgroundColor
        cellBackground.layer.cornerRadius = fromVC.cellBackground.layer.cornerRadius
        cellBackground.layer.masksToBounds = fromVC.cellBackground.layer.masksToBounds


        containerView.addSubview(fromViewController.view)
        containerView.addSubview(toViewController.view)

        // Background Cell
        containerView.addSubview(cellBackground)

        // Top
        containerView.addSubview(imageViewSnapshotProfile)
        containerView.addSubview(imageViewSnapshotBackground)
        containerView.addSubview(imageViewSnapshotPlus)

        // Down
        containerView.addSubview(imageViewSnapshotPlay)
        containerView.addSubview(imageViewSnapshotCancel)
        containerView.addSubview(imageViewSnapshotLike)


        // Title Label
        containerView.addSubview(titleLabel)
        containerView.addSubview(albumLabel)
        containerView.addSubview(yearLabel)

        containerView.bringSubview(toFront: imageViewSnapshotPlus)


        fromViewController.view.isHidden = true
        toViewController.view.isHidden = true

        // TOP
        imageViewSnapshotPlus.frame = containerView.convert(fromVC.plusImageView.frame, from: fromVC.plusImageView.superview)
        imageViewSnapshotProfile.frame = containerView.convert(fromVC.profileImageView.frame, from: fromVC.profileImageView.superview)
        imageViewSnapshotBackground.frame = containerView.convert(fromVC.backgroundImageView.frame, from: fromVC.backgroundImageView.superview)


        // BOTTOM
        imageViewSnapshotCancel.frame = containerView.convert(fromVC.cancelImageView.frame, from: fromVC.cancelImageView.superview)
        imageViewSnapshotPlay.frame = containerView.convert(fromVC.playImageView.frame, from: fromVC.playImageView.superview)
        imageViewSnapshotLike.frame = containerView.convert(fromVC.likeImageView.frame, from: fromVC.likeImageView.superview)


        let frameBackground: CGRect =  containerView.convert(toVC.backgroundColor.frame, from: toVC.backgroundColor.superview)

        // TOP
        let frameProfile: CGRect = containerView.convert(toVC.profileImageView.frame, from: toVC.profileImageView.superview)
        let frameBackgroundImage: CGRect = containerView.convert(toVC.backgroundImageView.frame, from: toVC.backgroundImageView.superview)
        let framePlus: CGRect = containerView.convert(toVC.plusImageView.frame, from: toVC.plusImageView.superview)

        // BOTTOM
        let framePlay: CGRect = containerView.convert(toVC.playImageView.frame, from: toVC.playImageView.superview)


        // Animators
        let animator1 = {
            UIViewPropertyAnimator(duration: 0.5, dampingRatio: 0.8) {

                let backgroundX = cellBackground.frame.minX + (cellBackground.frame.width * 5 / 100)
                let backgroundWidth = cellBackground.frame.width - (cellBackground.frame.width * 10 / 100)

                // BACKGROUND
                cellBackground.frame = CGRect(x: backgroundX , y: cellBackground.frame.minY + (cellBackground.frame.minY * 5 / 100), width: backgroundWidth, height: cellBackground.frame.height - (cellBackground.frame.height * 10 / 100))

                // LABEL
                titleLabel.transform = CGAffineTransform(scaleX: 0.8, y: 0.8)
                titleLabel.frame = CGRect(x: titleLabel.frame.minX , y: titleLabel.frame.minY + 15, width: titleLabel.frame.width, height: titleLabel.frame.height)

                // TOP
                imageViewSnapshotPlus.frame = CGRect(x: cellBackground.frame.maxX - (imageViewSnapshotPlus.frame.width * 20 / 100) - 40  , y: cellBackground.frame.minY + (imageViewSnapshotPlus.frame.height * 20 / 100) + 10, width: imageViewSnapshotPlus.frame.width - (imageViewSnapshotPlus.frame.width * 20 / 100), height: imageViewSnapshotPlus.frame.height - (imageViewSnapshotPlus.frame.height * 20 / 100))

                imageViewSnapshotProfile.frame = CGRect(x: cellBackground.frame.minX - (imageViewSnapshotProfile.frame.width * 20 / 100) + 30  , y: cellBackground.frame.minY + (imageViewSnapshotProfile.frame.height * 20 / 100) + 10, width: imageViewSnapshotProfile.frame.width - (imageViewSnapshotProfile.frame.width * 20 / 100), height: imageViewSnapshotProfile.frame.height - (imageViewSnapshotProfile.frame.height * 20 / 100))

                // LAbels
                albumLabel.frame = CGRect(x: imageViewSnapshotProfile.frame.maxX + 15 , y: imageViewSnapshotProfile.frame.minY + 3, width: albumLabel.frame.width, height: albumLabel.frame.height)
                albumLabel.sizeToFit()

                yearLabel.frame = CGRect(x: imageViewSnapshotProfile.frame.maxX + 15 , y: imageViewSnapshotProfile.frame.minY + 23, width: yearLabel.frame.width, height: yearLabel.frame.height)
                yearLabel.sizeToFit()


                // Image Background
                let widthBackground = (imageViewSnapshotBackground.frame.width - (imageViewSnapshotBackground.frame.width * 20 / 100) )
                let heightBackground = (imageViewSnapshotBackground.frame.height - (imageViewSnapshotBackground.frame.height * 20 / 100) )
                let midPostionPlayButton = imageViewSnapshotPlay.frame.width - (imageViewSnapshotPlay.frame.width * 20 / 100)

                imageViewSnapshotBackground.frame = CGRect(x:  cellBackground.frame.midX - (widthBackground / 2) , y: cellBackground.frame.maxY - (heightBackground)  , width: widthBackground, height: imageViewSnapshotBackground.frame.height - (imageViewSnapshotBackground.frame.height * 20 / 100))

                imageViewSnapshotPlay.frame = CGRect(x:  cellBackground.frame.midX - (midPostionPlayButton / 2), y: cellBackground.frame.maxY  - imageViewSnapshotPlay.frame.height - 10, width: imageViewSnapshotPlay.frame.width - (imageViewSnapshotPlay.frame.width * 20 / 100), height: imageViewSnapshotPlay.frame.width - (imageViewSnapshotPlay.frame.width * 20 / 100))

                imageViewSnapshotCancel.frame = CGRect(x: cellBackground.frame.midX - (midPostionPlayButton / 2) - imageViewSnapshotCancel.frame.width - 30, y: cellBackground.frame.maxY - (imageViewSnapshotCancel.frame.height * 2), width: imageViewSnapshotCancel.frame.width - (imageViewSnapshotCancel.frame.width * 20 / 100), height: imageViewSnapshotCancel.frame.height - (imageViewSnapshotCancel.frame.height * 20 / 100))

                imageViewSnapshotLike.frame = CGRect(x: cellBackground.frame.midX + (midPostionPlayButton / 2)  + (imageViewSnapshotLike.frame.width * 20 / 100) + 30, y: cellBackground.frame.maxY - (imageViewSnapshotLike.frame.height * 2) , width: imageViewSnapshotLike.frame.width - (imageViewSnapshotLike.frame.width * 20 / 100), height: imageViewSnapshotLike.frame.height - (imageViewSnapshotLike.frame.height * 20 / 100))


            }
        }()

        // Animators
        let animator2 = {
            //UIViewPropertyAnimator(duration: 0.5, dampingRatio: 0.6) {
            UIViewPropertyAnimator(duration: 0.3, curve: .easeOut) {

                cellBackground.frame = CGRect(x: frameBackground.minX , y: frameBackground.minY, width: UIScreen.main.bounds.width, height: frameBackground.height)
                cellBackground.layer.cornerRadius = 0

                // Label
                titleLabel.transform = CGAffineTransform(scaleX: 1.0, y: 1.0)
                titleLabel.frame = containerView.convert(toVC.bigTitle.frame, from: toVC.bigTitle.superview)

                albumLabel.transform = CGAffineTransform(scaleX: 1.0, y: 1.0)
                albumLabel.frame = containerView.convert(toVC.albumLbl.frame, from: toVC.albumLbl.superview)
                albumLabel.textAlignment = .center

                yearLabel.transform = CGAffineTransform(scaleX: 1.0, y: 1.0)
                yearLabel.frame = containerView.convert(toVC.yearLbl.frame, from: toVC.yearLbl.superview)
                yearLabel.textAlignment = .center


                imageViewSnapshotCancel.frame = containerView.convert(toVC.cancelImageView.frame, from: toVC.cancelImageView.superview)
                imageViewSnapshotPlay.frame = containerView.convert(toVC.playImageView.frame, from: toVC.playImageView.superview)
                imageViewSnapshotLike.frame = containerView.convert(toVC.likeImageView.frame, from: toVC.likeImageView.superview)

                imageViewSnapshotBackground.frame = containerView.convert(toVC.backgroundImageView.frame, from: toVC.backgroundImageView.superview)


                cellBackground.layoutIfNeeded()

            }
        }()


        animator1.addCompletion { _ in
            animator2.startAnimation()

            // Group Animator
            doBezierAnimation(showLayerAnimation: false)

        }


        animator2.addCompletion {  _ in

            // Background
            cellBackground.removeFromSuperview()

            // Labels
            titleLabel.removeFromSuperview()
            albumLabel.removeFromSuperview()
            yearLabel.removeFromSuperview()

            // TOP
            imageViewSnapshotProfile.removeFromSuperview()
            imageViewSnapshotPlus.removeFromSuperview()
            imageViewSnapshotBackground.removeFromSuperview()

            // BOTTOM
            imageViewSnapshotCancel.removeFromSuperview()
            imageViewSnapshotPlay.removeFromSuperview()
            imageViewSnapshotLike.removeFromSuperview()

            fromViewController.view.removeFromSuperview()

            toViewController.view.isHidden = false

            transitionContext.completeTransition(!transitionContext.transitionWasCancelled)

        }

        animator1.startAnimation()


        func doBezierAnimation(showLayerAnimation: Bool = false) {


            // PROFILE IMAGE

            // Profile Animation
            var bezierPath = UIBezierPath()
            bezierPath.move(to: CGPoint(x: imageViewSnapshotProfile.frame.midX, y: imageViewSnapshotProfile.frame.midY))
            bezierPath.addQuadCurve(to: CGPoint(x: UIScreen.main.bounds.width / 2 , y: frameProfile.midY), controlPoint: CGPoint(x: frameProfile.midX/2, y: frameProfile.midY/2))


            var shapeLayer = CAShapeLayer()
            // The Bezier path that we made needs to be converted to a CGPath before it can be used on a layer.
            shapeLayer.path = bezierPath.cgPath
            shapeLayer.strokeColor = UIColor.blue.cgColor
            shapeLayer.fillColor = UIColor.clear.cgColor
            shapeLayer.lineWidth = 1.0

            // Enable/Disable for debug
            if showLayerAnimation {
                containerView.layer.addSublayer(shapeLayer)
            }

            let profileAnimationPosition = CAKeyframeAnimation(keyPath: "position")
            profileAnimationPosition.path = bezierPath.cgPath
            // I set this one to make the animation go smoothly along the path
            profileAnimationPosition.calculationMode = kCAAnimationPaced
            profileAnimationPosition.duration = 0.3
            profileAnimationPosition.timingFunction  = CAMediaTimingFunction(name: kCAMediaTimingFunctionEaseOut)


            let profileAnimationBounds = CAKeyframeAnimation(keyPath: "bounds")
            profileAnimationBounds.duration = 0.3
            profileAnimationBounds.values = [imageViewSnapshotProfile.frame, containerView.convert(toVC.profileImageView.frame, from: toVC.profileImageView.superview)]
            profileAnimationBounds.timingFunction  = CAMediaTimingFunction(name: kCAMediaTimingFunctionEaseOut)
            profileAnimationBounds.beginTime = 0

            // Let's group the animation for position and bounds into one
            let groupProfile = CAAnimationGroup()
            groupProfile.animations = [profileAnimationPosition, profileAnimationBounds]
            groupProfile.duration = 0.3
            groupProfile.repeatCount = 0
            groupProfile.timingFunction = CAMediaTimingFunction(name: kCAMediaTimingFunctionEaseOut)
            groupProfile.isRemovedOnCompletion = false
            groupProfile.fillMode = kCAFillModeForwards

            imageViewSnapshotProfile.layer.add(groupProfile, forKey: "profileAnimation")


            //--- PLUS IMAGE ---//

            // Plus ImageView Animation
            bezierPath = UIBezierPath()
            bezierPath.move(to: CGPoint(x: imageViewSnapshotPlus.frame.maxX, y: imageViewSnapshotPlus.frame.maxY))
            bezierPath.addQuadCurve(to: CGPoint(x: (UIScreen.main.bounds.width / 2) + 20, y: framePlus.maxY - 10), controlPoint: CGPoint(x:framePlus.maxX + 30, y: framePlus.maxY/4))


            shapeLayer = CAShapeLayer()

            // The Bezier path that we made needs to be converted to
            shapeLayer.path = bezierPath.cgPath
            shapeLayer.strokeColor = UIColor.blue.cgColor
            shapeLayer.fillColor = UIColor.clear.cgColor
            shapeLayer.lineWidth = 1.0

            // Enable/Disable for debug
            if showLayerAnimation {
                containerView.layer.addSublayer(shapeLayer)
            }


            let plusAnimationPosition = CAKeyframeAnimation(keyPath: "position")
            plusAnimationPosition.path = bezierPath.cgPath
            // I set this one to make the animation go smoothly along the path
            plusAnimationPosition.calculationMode = kCAAnimationPaced
            plusAnimationPosition.duration = 0.3
            plusAnimationPosition.rotationMode = kCAAnimationLinear
            plusAnimationPosition.timingFunction  = CAMediaTimingFunction(name: kCAMediaTimingFunctionEaseOut)


            let plusAnimationBounds = CAKeyframeAnimation(keyPath: "bounds")
            plusAnimationBounds.duration = 0.3
            plusAnimationBounds.values = [imageViewSnapshotPlus.frame, containerView.convert(toVC.plusImageView.frame, from: toVC.plusImageView.superview)]
            plusAnimationBounds.timingFunction  = CAMediaTimingFunction(name: kCAMediaTimingFunctionEaseOut)
            plusAnimationBounds.beginTime = 0

            // Let's group the animation for position and bounds into one
            let groupPlus = CAAnimationGroup()
            groupPlus.animations = [plusAnimationPosition, plusAnimationBounds]
            groupPlus.duration = 0.3
            groupPlus.repeatCount = 0
            groupPlus.timingFunction = CAMediaTimingFunction(name: kCAMediaTimingFunctionEaseOut)
            groupPlus.isRemovedOnCompletion = false
            groupPlus.fillMode = kCAFillModeForwards

            imageViewSnapshotPlus.layer.add(groupPlus, forKey: "doit")


        }

    }


}
以下是動畫的簡要說明:
Animator 1:製作單元格與標題縮小的動畫。
Animator 2:我們對頂部進行動畫處理,將單元格擴展到主視圖的寬度,並對標籤和 Cancel、Like、Play ImageView 進行動畫處理。
doBezierAnimation:Avatar 和 Plus ImageView 的 Bezier 和 QuadCurve 動畫。
而 Pop animator 的製作方法是一樣的,只是順序相反。我們只需要對 QuadCurve 作出改動,讓動畫更加流暢。因為程式碼幾乎一樣,所以我們不會深入探討。
來到這一步,我們已經製作好所需的一切了,只需要在兩個視圖控制器之間添加 TransitionCoordinator。
請在 MainViewController 添加以下程式碼:
let transition = TransitionCoordinator()
當單元格被點擊後,我們會將這個 transition 物件添加到 NavigationController delegate 中,執行「淡出」動畫,並將 ViewController 推到 PushedViewController。
    func tableView(_ tableView: UITableView, didSelectRowAt indexPath: IndexPath) {

        self.selectedIndexPath = indexPath

        doAnimFadeOut()

        let finalVC = PushedViewController()
        finalVC.selectedProfileImage = dictionaryDataArray[indexPath.section]["profileImage"]!
        finalVC.selectedBackgroundImage = dictionaryDataArray[indexPath.section]["backgroundImage"]!
        finalVC.mainTitle = dictionaryDataArray[indexPath.section]["title"]!
        finalVC.album = dictionaryDataArray[indexPath.section]["album"]!
        finalVC.year = dictionaryDataArray[indexPath.section]["year"]!
        finalVC.topHexColor = dictionaryDataArray[indexPath.section]["hexBackgroundColor"]!


        navigationController?.delegate = transition

        DispatchQueue.main.asyncAfter(deadline: .now() + (Double(self.tableView.visibleCells.count) * 0.15 )) { // change 2 to desired number of seconds
            self.navigationController?.pushViewController(finalVC, animated: true)
        }

    }
讓我們看一下 TransitionCoordinator 的程式碼:
// NavigationController Delegate for Transition Coordinator
class TransitionCoordinator: NSObject, UINavigationControllerDelegate {
    func navigationController(_ navigationController: UINavigationController,
                              animationControllerFor operation: UINavigationControllerOperation,
                              from fromVC: UIViewController,
                              to toVC: UIViewController) -> UIViewControllerAnimatedTransitioning? {

        switch operation {
        case .push:
            return PushAnimator()
        case .pop:
            return PopAnimator()
        default:
            return nil
        }

    }

}
此類別設置 NavigationController delegate,並檢查我們正在執行哪種類型的操作:如果正在執行 push,它就會回傳一個 PushAnimator() 物件;而如果是 pop,它就會回傳一個 PopAnimator() 物件。
總結
這個轉場效果剛開始接觸可能有點困難,但請相信我,這實作起來很簡單! 希望你喜歡這篇文章!
如果你有任何評論、問題或建議,請隨時在下面留言!
你可以在這裡下載 Github 原始碼。