
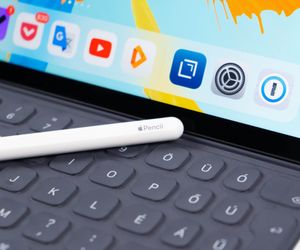
在 2018 年 10 月,Apple 推出了全新的 iPad Pro 和 Apple Pencil 2.0。不同於上一代的 Apple Pencil,這次官方還為開發者提供了一些有趣的 API 應用方式,以增強 App 的功能與使用者體驗 (User Experience)。在本篇教學中,我將讓你了解如何讓你的 App 支援 Apple Pencil。
來開始吧!
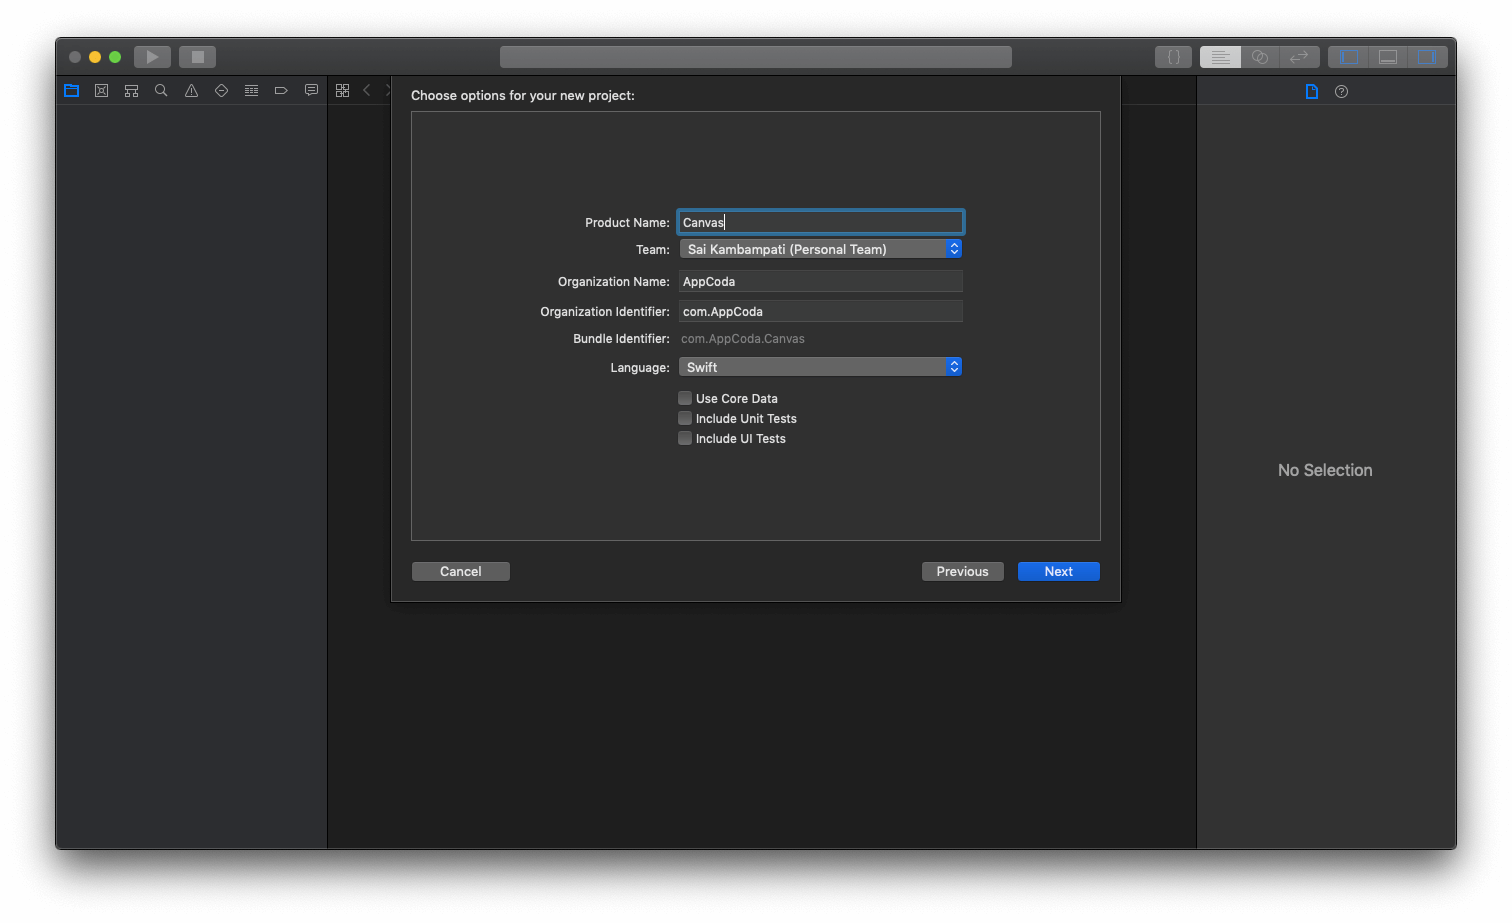
我們將會建立一個名為 Canvas 的 App,透過這個 App,使用者每次用 Apple Pencil 點擊兩下後,就可以從 Bored Elon Musk 這個模擬帳號看到有趣的創意想法。首先,打開 Xcode,然後選擇 “New Project”。再選擇 “Single View App”,並為專案命名。
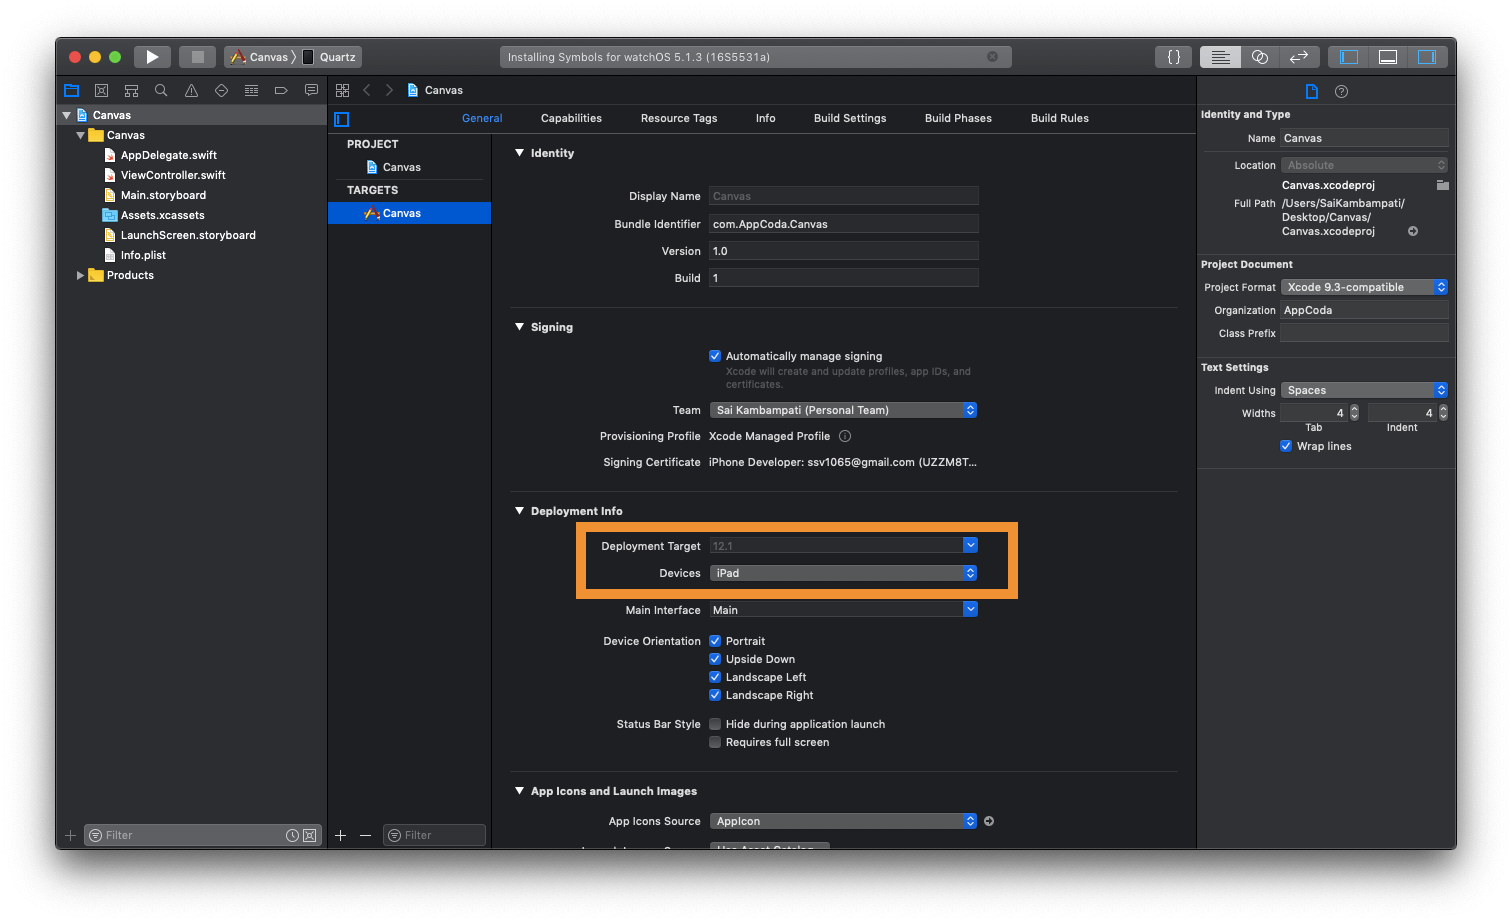
在開始前,我們需要做些重要的設定。因為目前只有 iPad 支援 Apple Pencil,所以我們需要確認專案是設定在 iPad 上開發,而不是 Universal。
設定使用者介面 (User Interface)
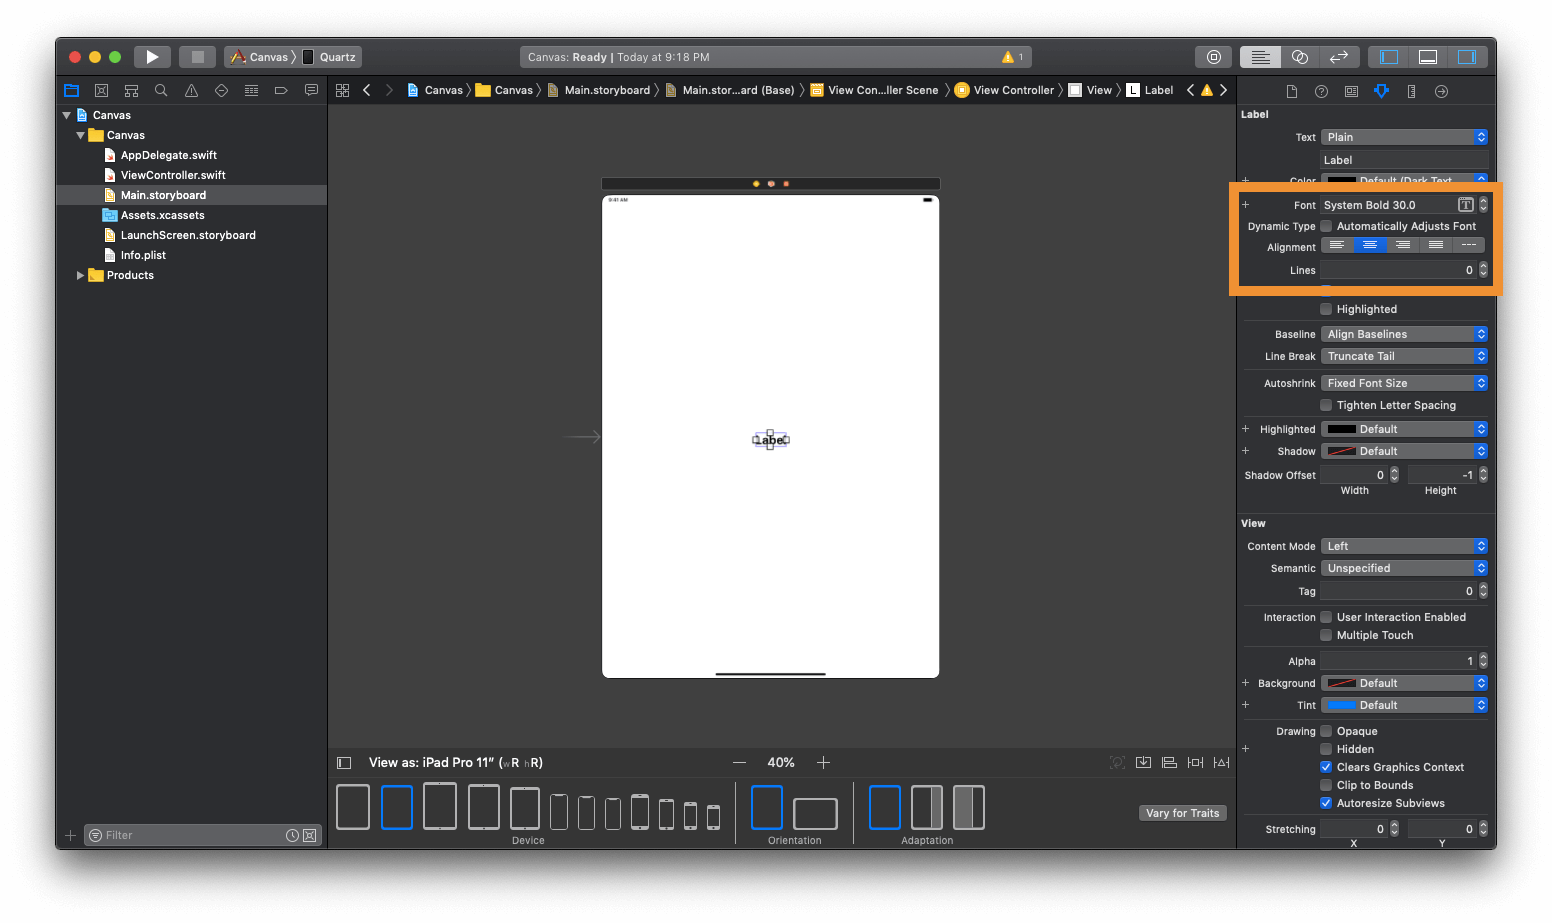
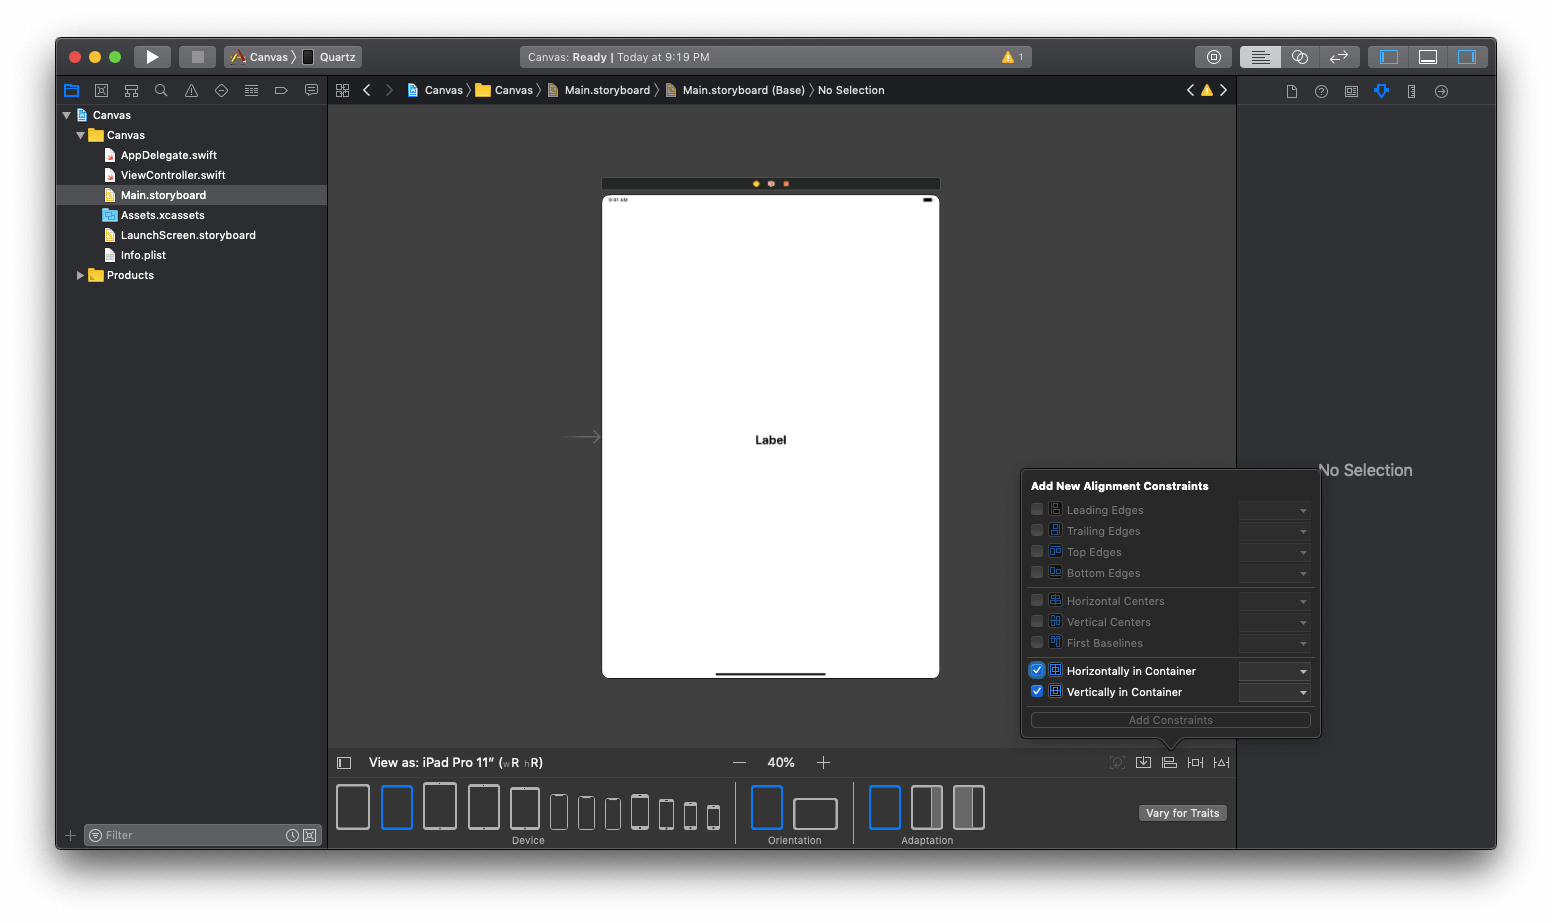
首先,我們會設計 App 的使用者介面。到 Main.storyboard 並拉一個標籤 (label) 到 View Controller,把 Font Size 設為 30,Style 設為 bold,Line 設為 0。
接著,我們需要設定佈局約束條件 (constraint)。在右下方點選 Align 按鈕,勾選 “Horizontally in Container” 和 “Vertically in Container” 選項。
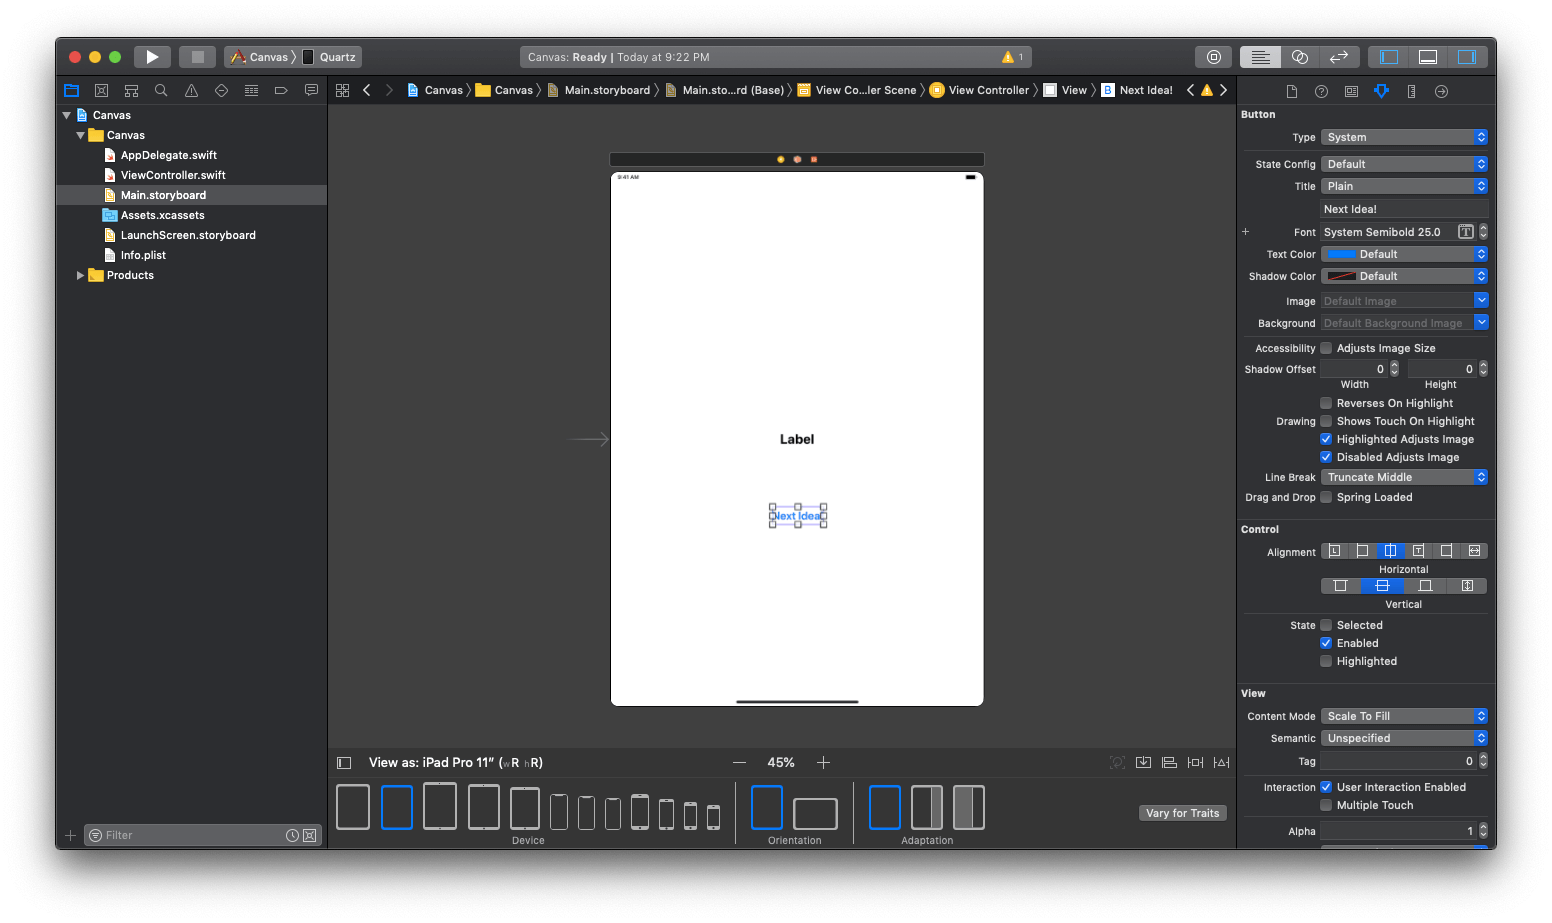
我們差不多完成了。然後,從元件庫拖曳一個按鈕,並將按鈕的標題設為 “Next Idea!”,Font 設為 “Semibold 25″。
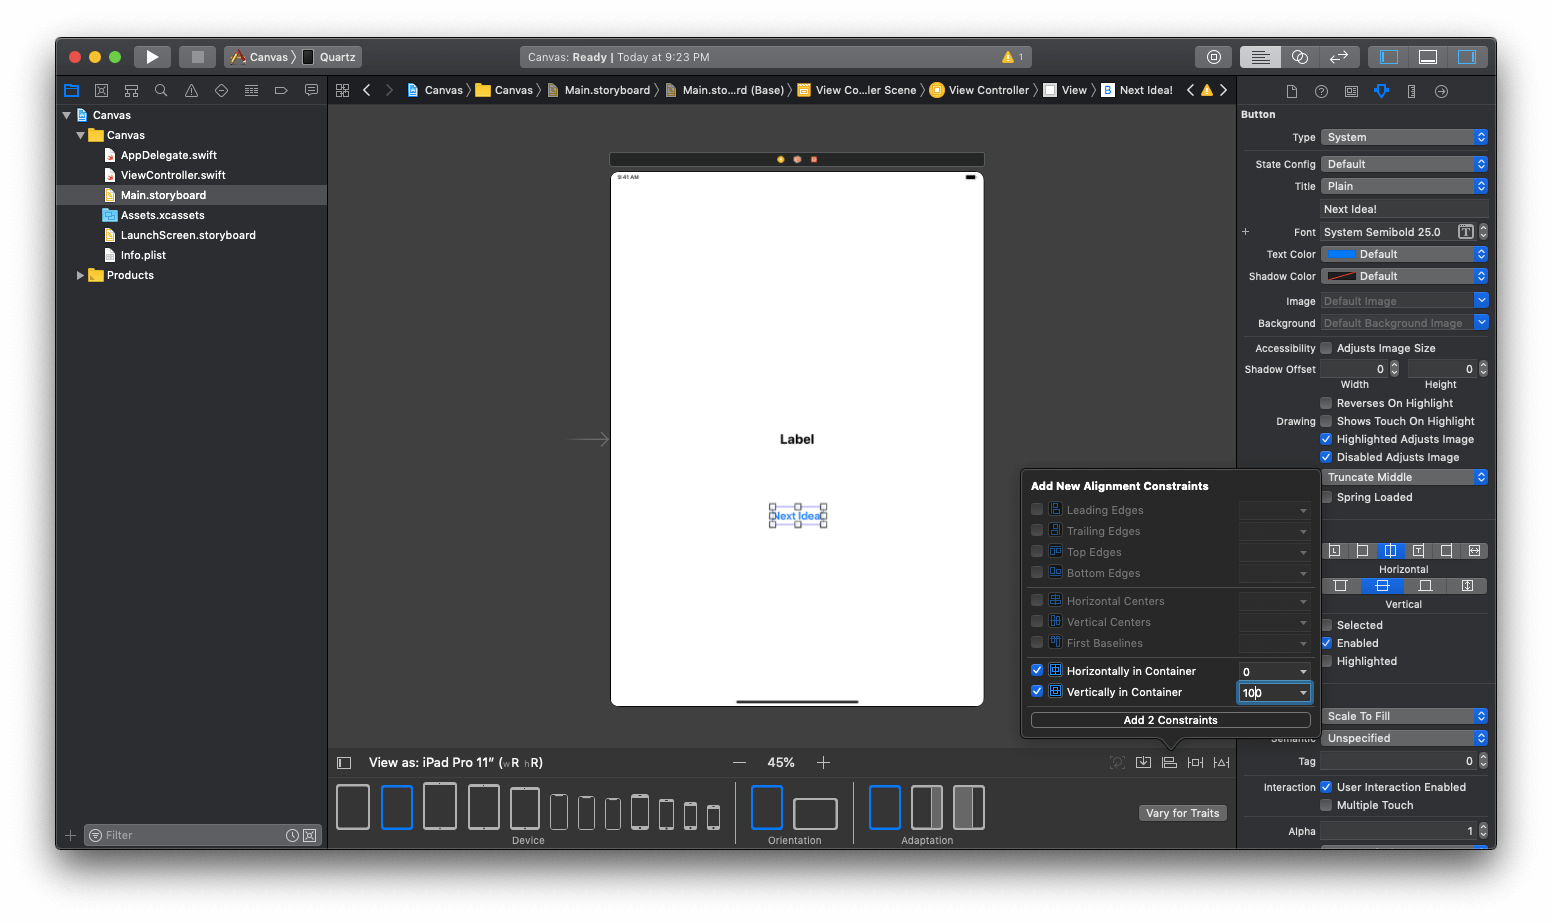
最後,點選 Align 按鈕,勾選 “Horizontally in Container” 和 “Vertically in Container” 的選項。在 “Vertically in Container” 中,把值設為 100,這樣一來按鈕就不會緊貼上一個標籤。此外,將按鈕的 Alpha 設為 0,讓它在默認情況下不可見 (Invisible),我等下會再解釋這樣做的原因。
現在,把 UI 元件和程式碼連結在一起吧!在 ViewController.swift 建立兩個 outlet,然後將它們和 UI 元件連結。
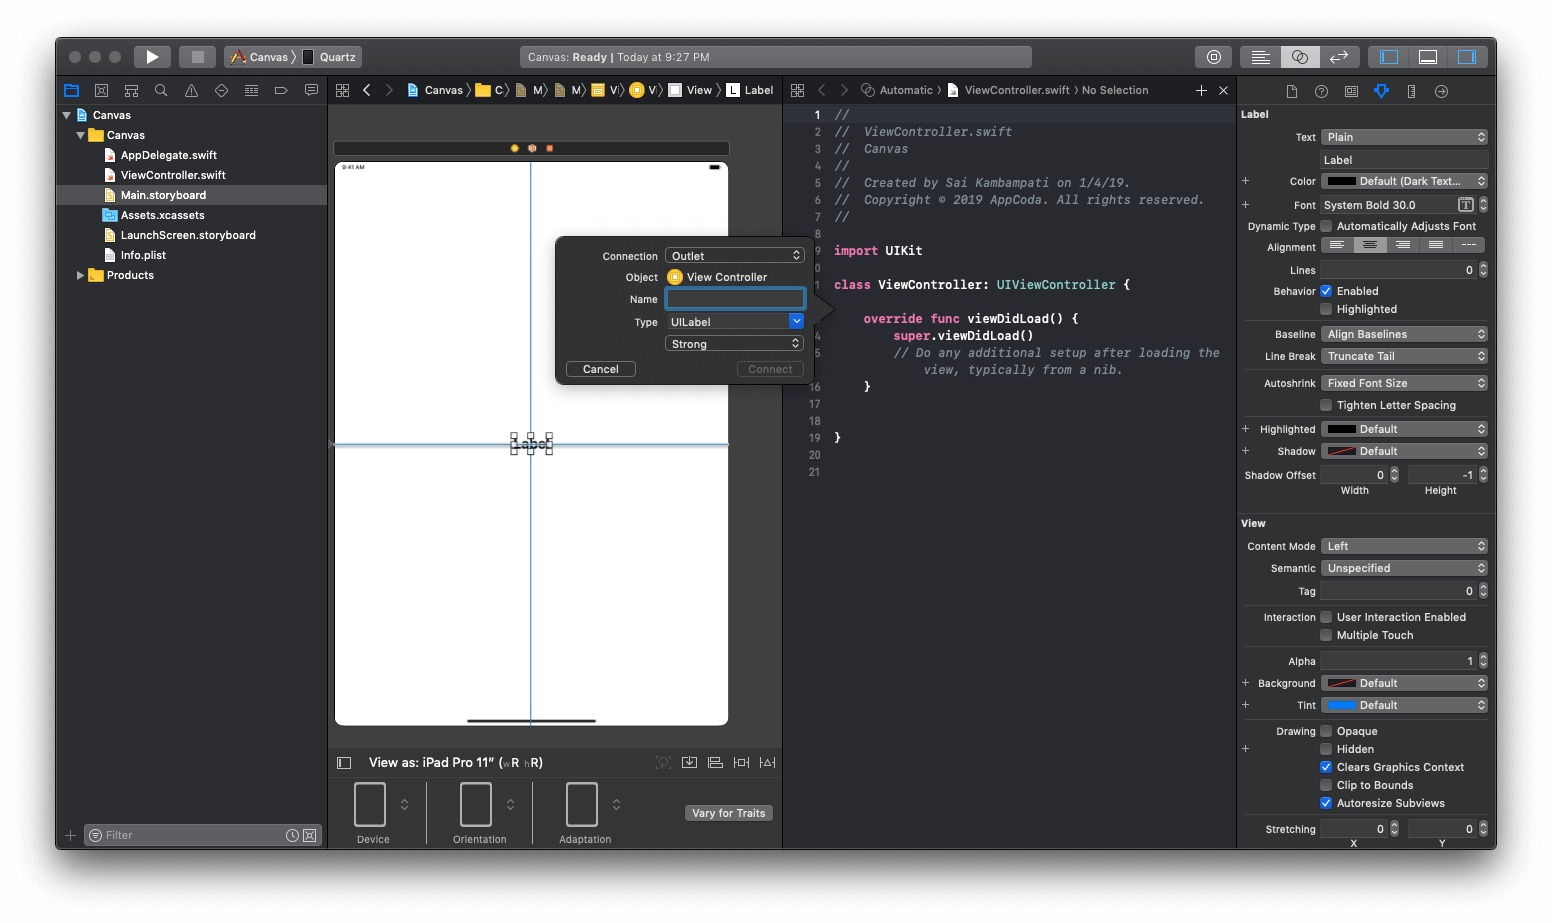
現在我有兩個 outlets,名為 ideaLabel 和 ideaButton,而 ideaLabel 將會顯示我們的創意想法。如果使用沒有 Apple Pencil,或是不支援 Apple Pencil,我們就會展示 ideaButton,讓使用者仍然可以使用這個 App。
這就是我們 App 的基本 UI,讓我們看看程式碼的部分!
編寫程式碼支援 Apple Pencil 2
首先,宣告一個序列來存放創意想法。在 viewDidLoad 方法內插入下列程式碼:
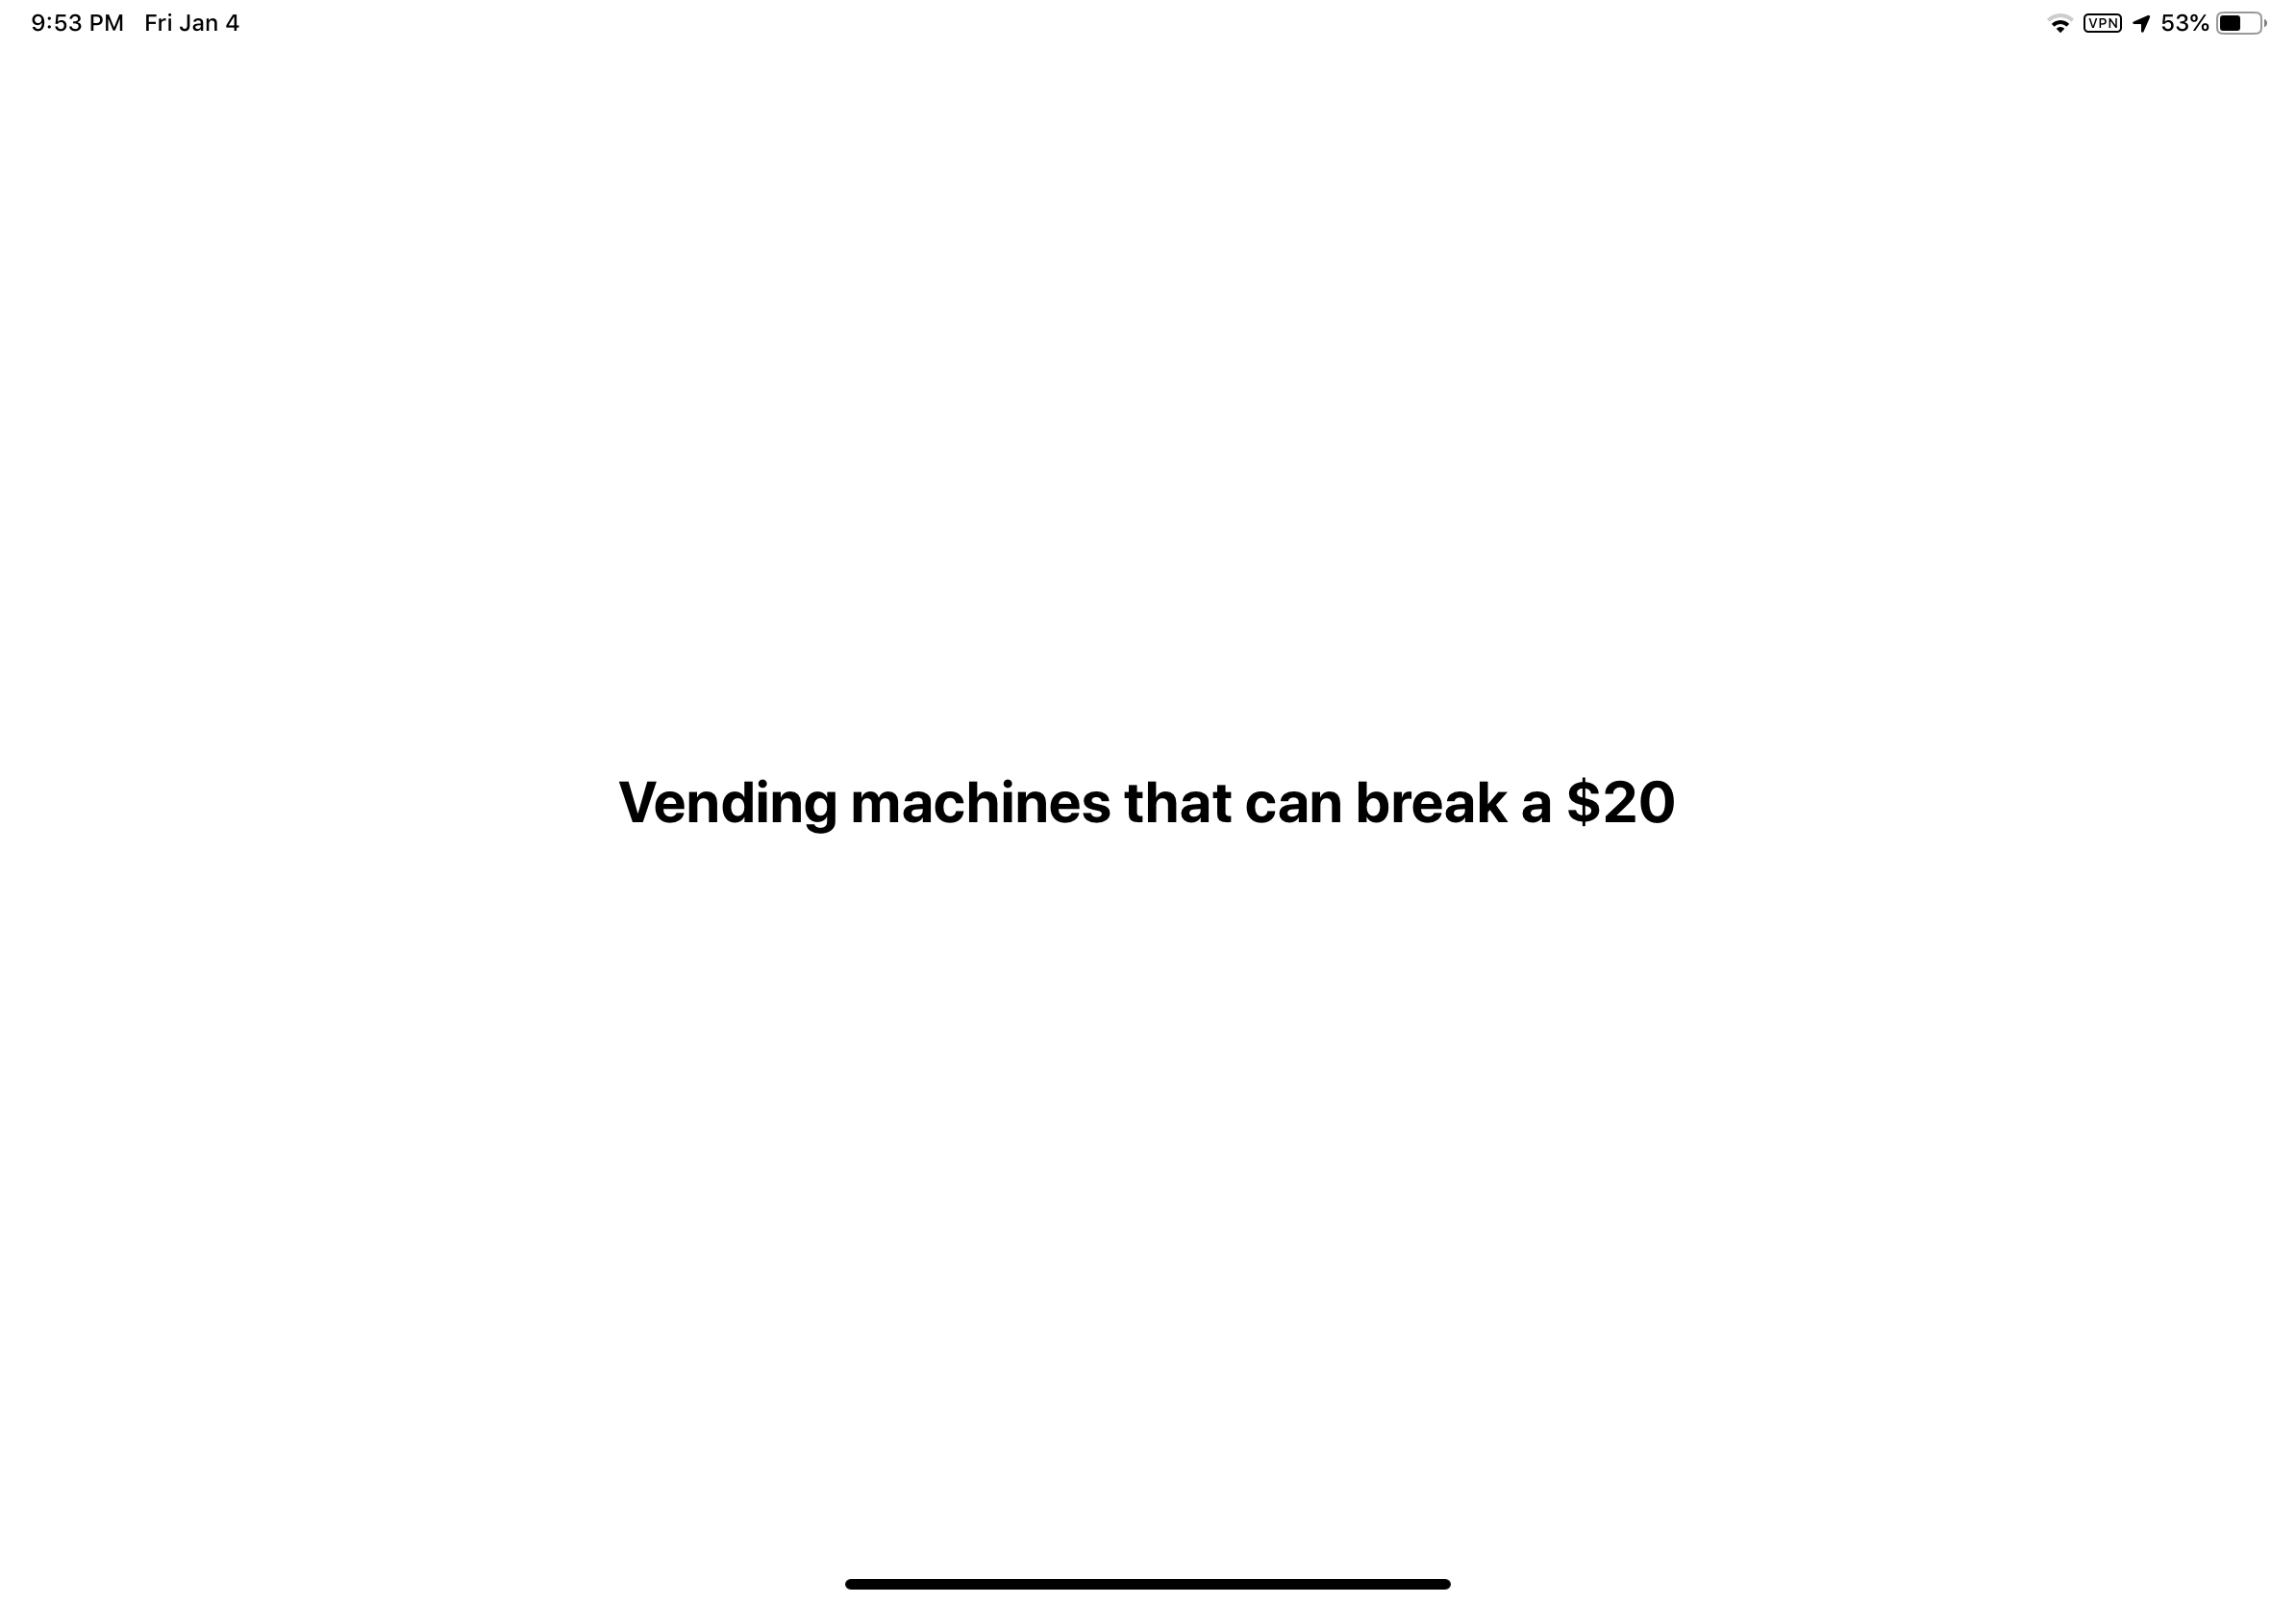
let ideas = ["Email app that anonymously pings all your coworkers after New Year’s", "Self-imposed ads reminding you of your to-do list", "Anti-bacterial gel dispensing doorknobs.", "Vending machines that can break a $20", "Routers that work."]
我已經寫了幾個想法,你也可以再加入自己的想法!
接著,當 View 讀取時,我們需要改變標籤內的文字。我們會隨意選取一個想法,然後將它放到標籤內,這個步驟可以很簡單地用一行程式碼來完成。將 viewDidLoad 方法更新為:
override func viewDidLoad() {
    super.viewDidLoad()
    ideaLabel.text = (ideas.randomElement()!)
}
這會將 ideaLabel 的文本設置為序列中的隨機字串組合。
現在,來執行 App 作測試。若果一切順利,當你每次開啟這個 App 時,標籤內容都會改變。
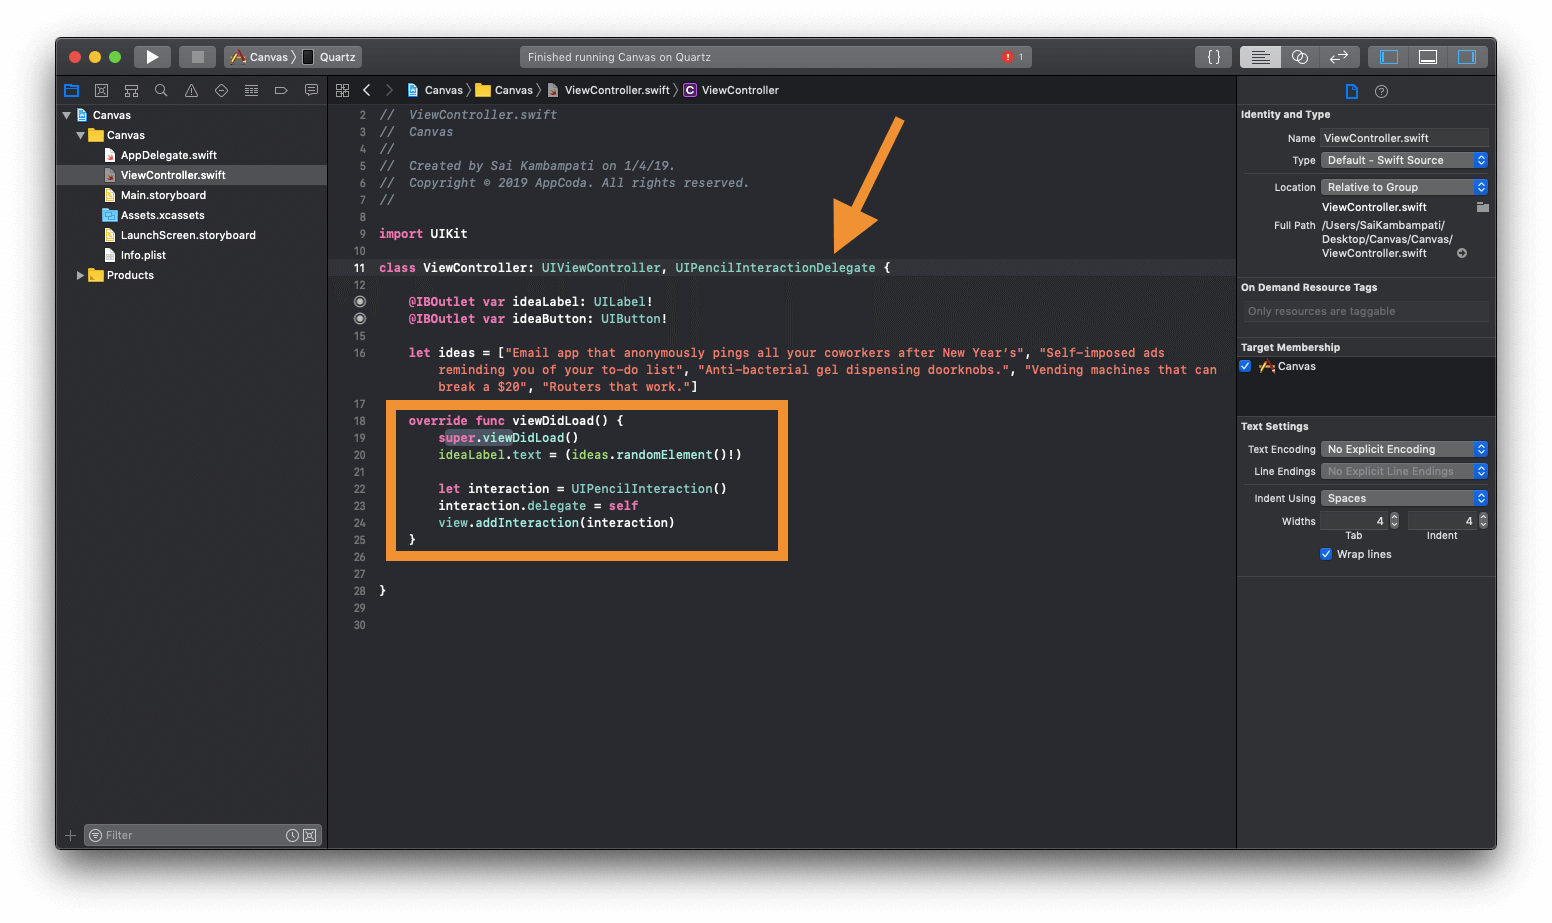
終於來到最刺激的部分了!我們將要與 Apple Pencil 互動,來偵測雙點擊的動作。為了完成這個實作,你所需要做的就只是設定先 Pencil 互動的委派。在 viewDidLoad 方法內插入下列程式碼:
let interaction = UIPencilInteraction()
interaction.delegate = self
view.addInteraction(interaction)
基本上,我們為 UIPencilInteraction 類別建立一個名為 interaction 的常數 (constant),並設定它的委派 (delegation) 為 self。然後,我們將這個常數加到 view。然而,一插入程式碼,你很快就會發現 Xcode 出現錯誤。這是因為 ViewController 類別並不符合 UIPencilInteractionDelegate 協定。要修復這個錯誤,讓我們調用 ViewController 類別的委派。
如果此時我們再來執行 App,你會發現甚麼都沒改變。這是因為我們還沒編寫雙點擊動作的程式碼。現在,在 ViewController 類別內建立 pencilInteractionDidTap 方法:
func pencilInteractionDidTap(_ interaction: UIPencilInteraction) {
    switch UIPencilInteraction.preferredTapAction {
    case .ignore:
        ideaButton.alpha = 1
    case .showColorPalette:
        ideaLabel.text = (ideas.randomElement()!)
    case .switchEraser:
        ideaLabel.text = (ideas.randomElement()!)
    case .switchPrevious:
        ideaLabel.text = (ideas.randomElement()!)
    default:
        break
    }
}
當 Apple Pencil 2 連結到 iPad Pro 上時,使用者可以選擇想執行的功能:
- 忽略點擊動作 (Ignore the tap)
- 開啟調色盤 (Show the color palette)
- 轉換成橡皮擦模式 (Switch to an eraser)
- 轉換到上一個使用的工具 (Switch to the last used tool)
這些功能是因為 Apple Pencil 經常被用在繪圖 App 而設定的。然而,你也可以讓它執行更多功能,所以,你必須要讓使用者清楚知道點擊後會發生甚麼事。
在上面的程式碼中,除非 Apple Pencil 的設定設為 ignore,不然當 App 偵測到有點擊動作時,ideaLabel 的內容就會有所變動。而如果它真的設定為 ignore,我們可以推斷使用者將不會使用 Apple Pencil。在這個情況下,我們會把 ideaButton 的 Alpha 設為 1 時,讓它變成可見 (Visible)。
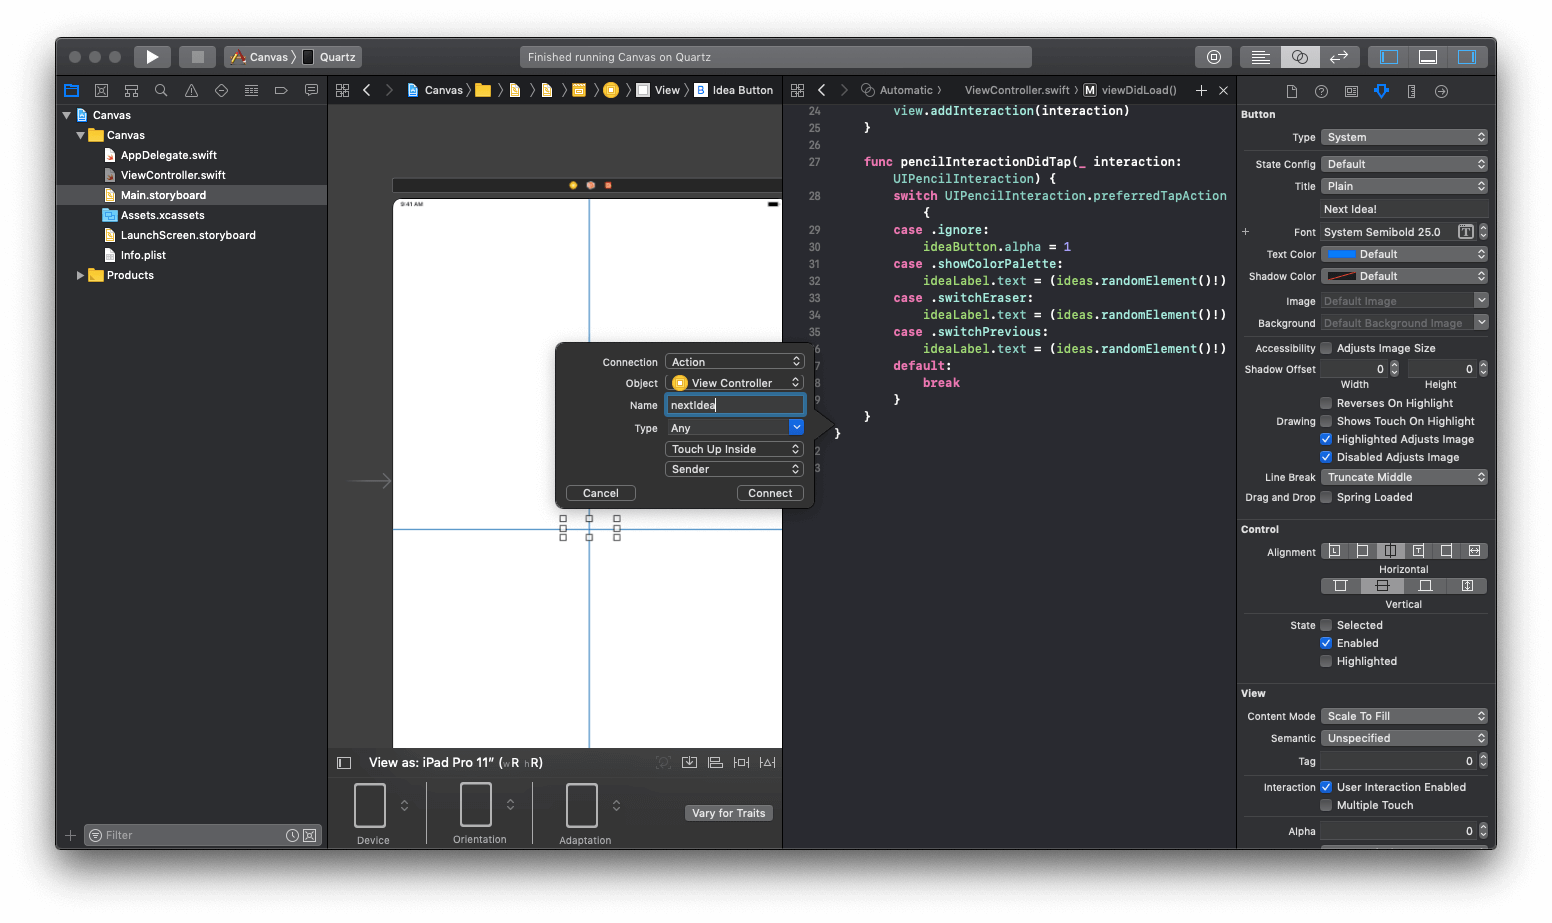
如果你執行程式碼,所有東西都應該如預期中執行,除了一個功能,就是點擊 Next Idea! 按鈕時甚麼都沒有發生。這是因為我們尚未將它和 IBAction 連結在一起。只要把它們連結在一起,此功能就應該能正常執行了。
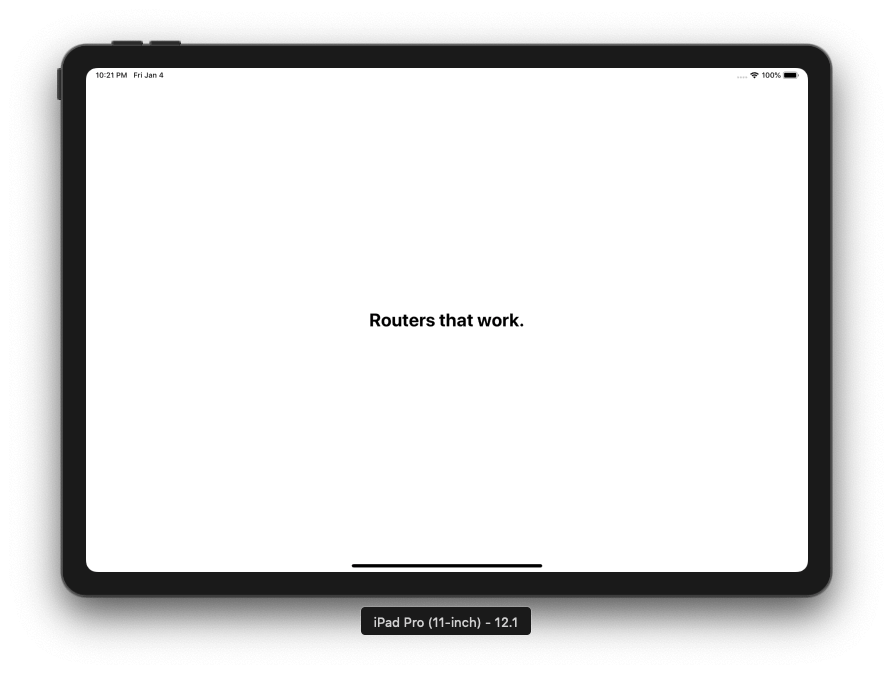
經過調整後,再執行這個 App 作測試。現在,所有功能都應該能完美地執行!
我明白用擷圖的方式來說明這個 App 的功能很難,所以我拍了一段影片讓你看看這個 App 是如何執行的,不要忘了來看一下喔!
總結
對 iPad Pro 使用者而言,Apple Pencil 無疑是一個非常好用的工具。對於開發者而言,它不僅僅是一個簡單的手寫筆。雖然本教程的內容是非常基礎,旨在讓你知道如何讓你的 iPad App 支援 Apple Pencil。如你所見,這一點非常簡單,你只要記得在為 iPad Pro 和 Apple Pencil 開發時,調用 UIPencilInteractionDelegate即可。
在開發這個新功能時,如果遇到任何問題,歡迎在下面留言與我分享。如果你有興趣了解更多 iPad Pro 和 Apple Pencil 的開發資訊,建議你可以看看下面這兩段影片:
你可以在 GitHub 上找到完整的 Xcode 專案。
原文:How to Add Apple Pencil Support to your iPad Apps