在 WWDC 2017 中,Apple 發表了許多令開發者們為之振奮的新框架(Framework) 及 API 。而在這之中,最引人注目的莫過於 Core ML 了。藉由 Core ML,你可以為你的 App 添增機器學習(Machine Learning)的能力。而最棒的是你不需要深入的了解關於神經網絡(Neural Network)以及機器學習(Machine Learning)的相關知識。接下來我們將會使用 Apple 開發者網站上提供的 Core ML 模型來製作範例 App。話不多說,Let’s Start To Learn Core ML!
什麼是 Core ML
根據 Apple 官方說明:
Core ML lets you integrate a broad variety of machine learning model types into your app. In addition to supporting extensive deep learning with over 30 layer types, it also supports standard models such as tree ensembles, SVMs, and generalized linear models. Because it’s built on top of low level technologies like Metal and Accelerate, Core ML seamlessly takes advantage of the CPU and GPU to provide maximum performance and efficiency. You can run machine learning models on the device so data doesn’t need to leave the device to be analyzed.
Core ML 是在今年 WWDC 中發表的全新機器學習框架,將會隨著 iOS 11 正式發佈。藉著 Core ML,你可以將機器學習整合進自己的 App 之中。 在這邊我們先停一下,什麼是機器學習(Machine Learning)呢?簡單來說,機器學習是給予電腦可以在不明確撰寫程式的情況下學習能力的應用。而一個完成訓練的模型便是指將資料經由演算法結合後的成果。

作為開發者,我們主要關心的是如何使用機器學習模型來做出有趣的玩意。幸運的是,Apple 讓 Core ML 可以很簡單的將不同的機器學習模型整合進我們的 App 中。如此一來一般的開發者們也將能夠製作出圖像識別、語言處理、輸入預測等等功能。
聽起來是不是很酷呢?讓我們開始吧。
範例 App 概覽
接下來要製作的 App 相當地簡單。這個 App 能夠讓使用者拍照或是從相簿中選擇一張相片,然後機器學習演算法將會試著辨識出相片中的物品是什麼。雖然可能無法每次都識別成功,但你可以藉此思考出如何在你 App 裡使用 Core ML。
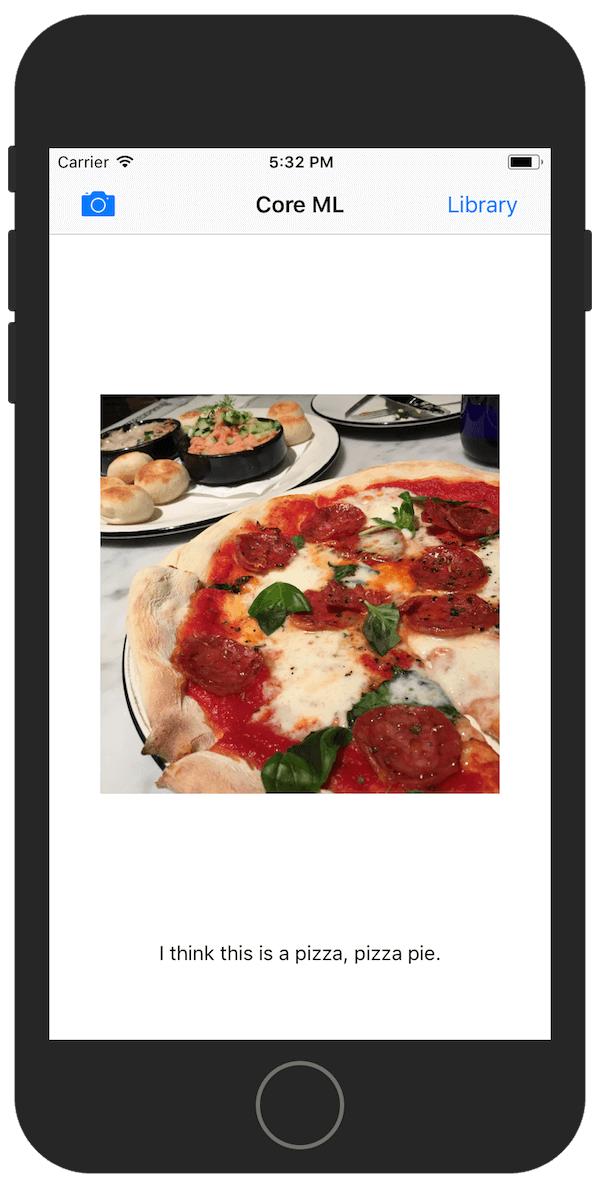
現在就開始吧!
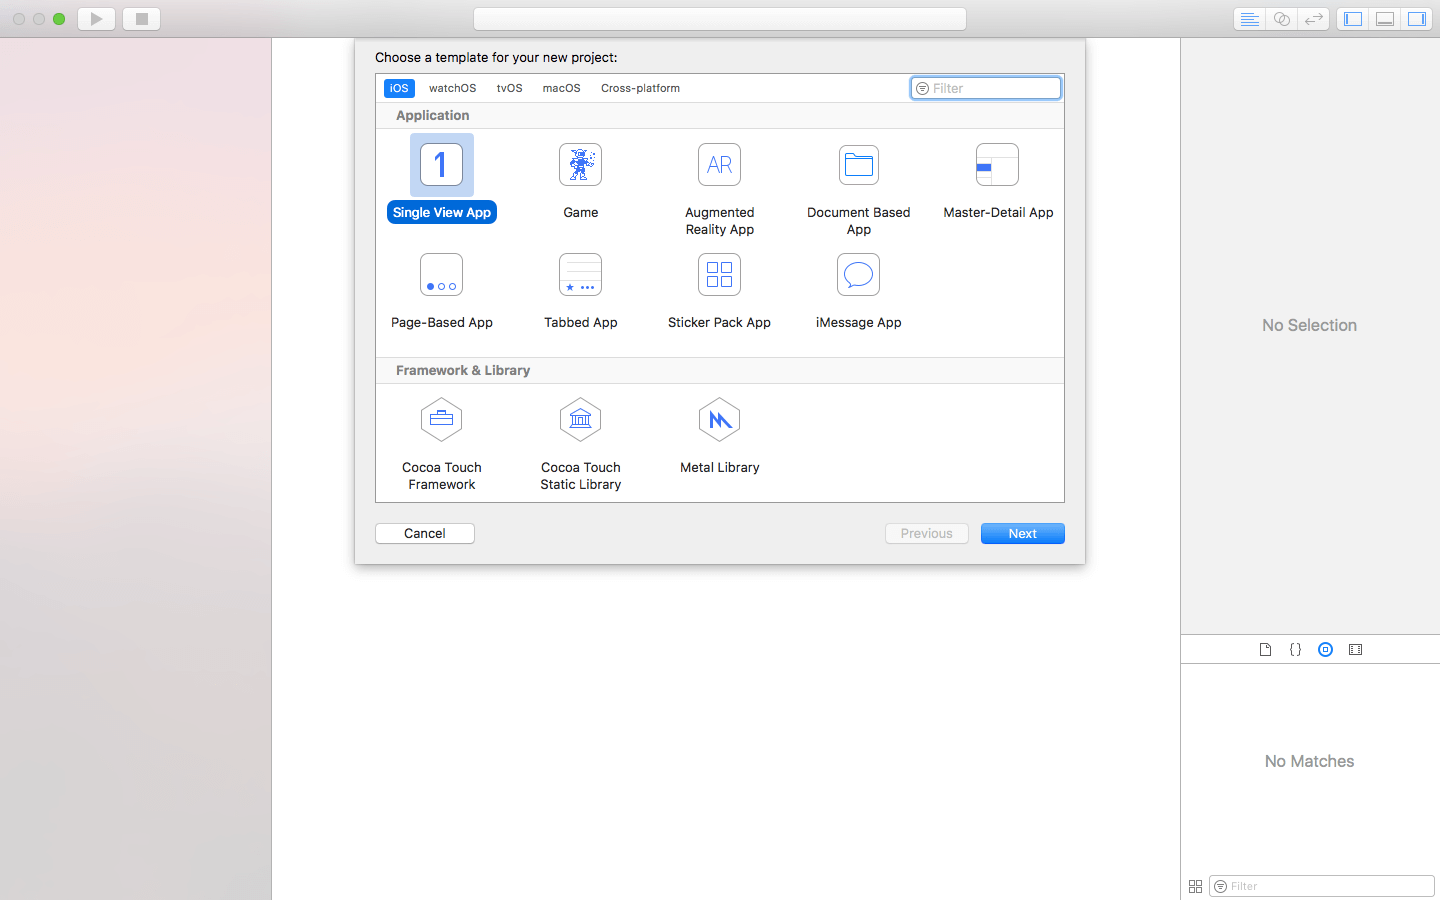
首先,開啟 Xcode 9 然後建立一個新專案。選擇 Single View App,接著確認程式語言為 Swift。
製作使用者介面
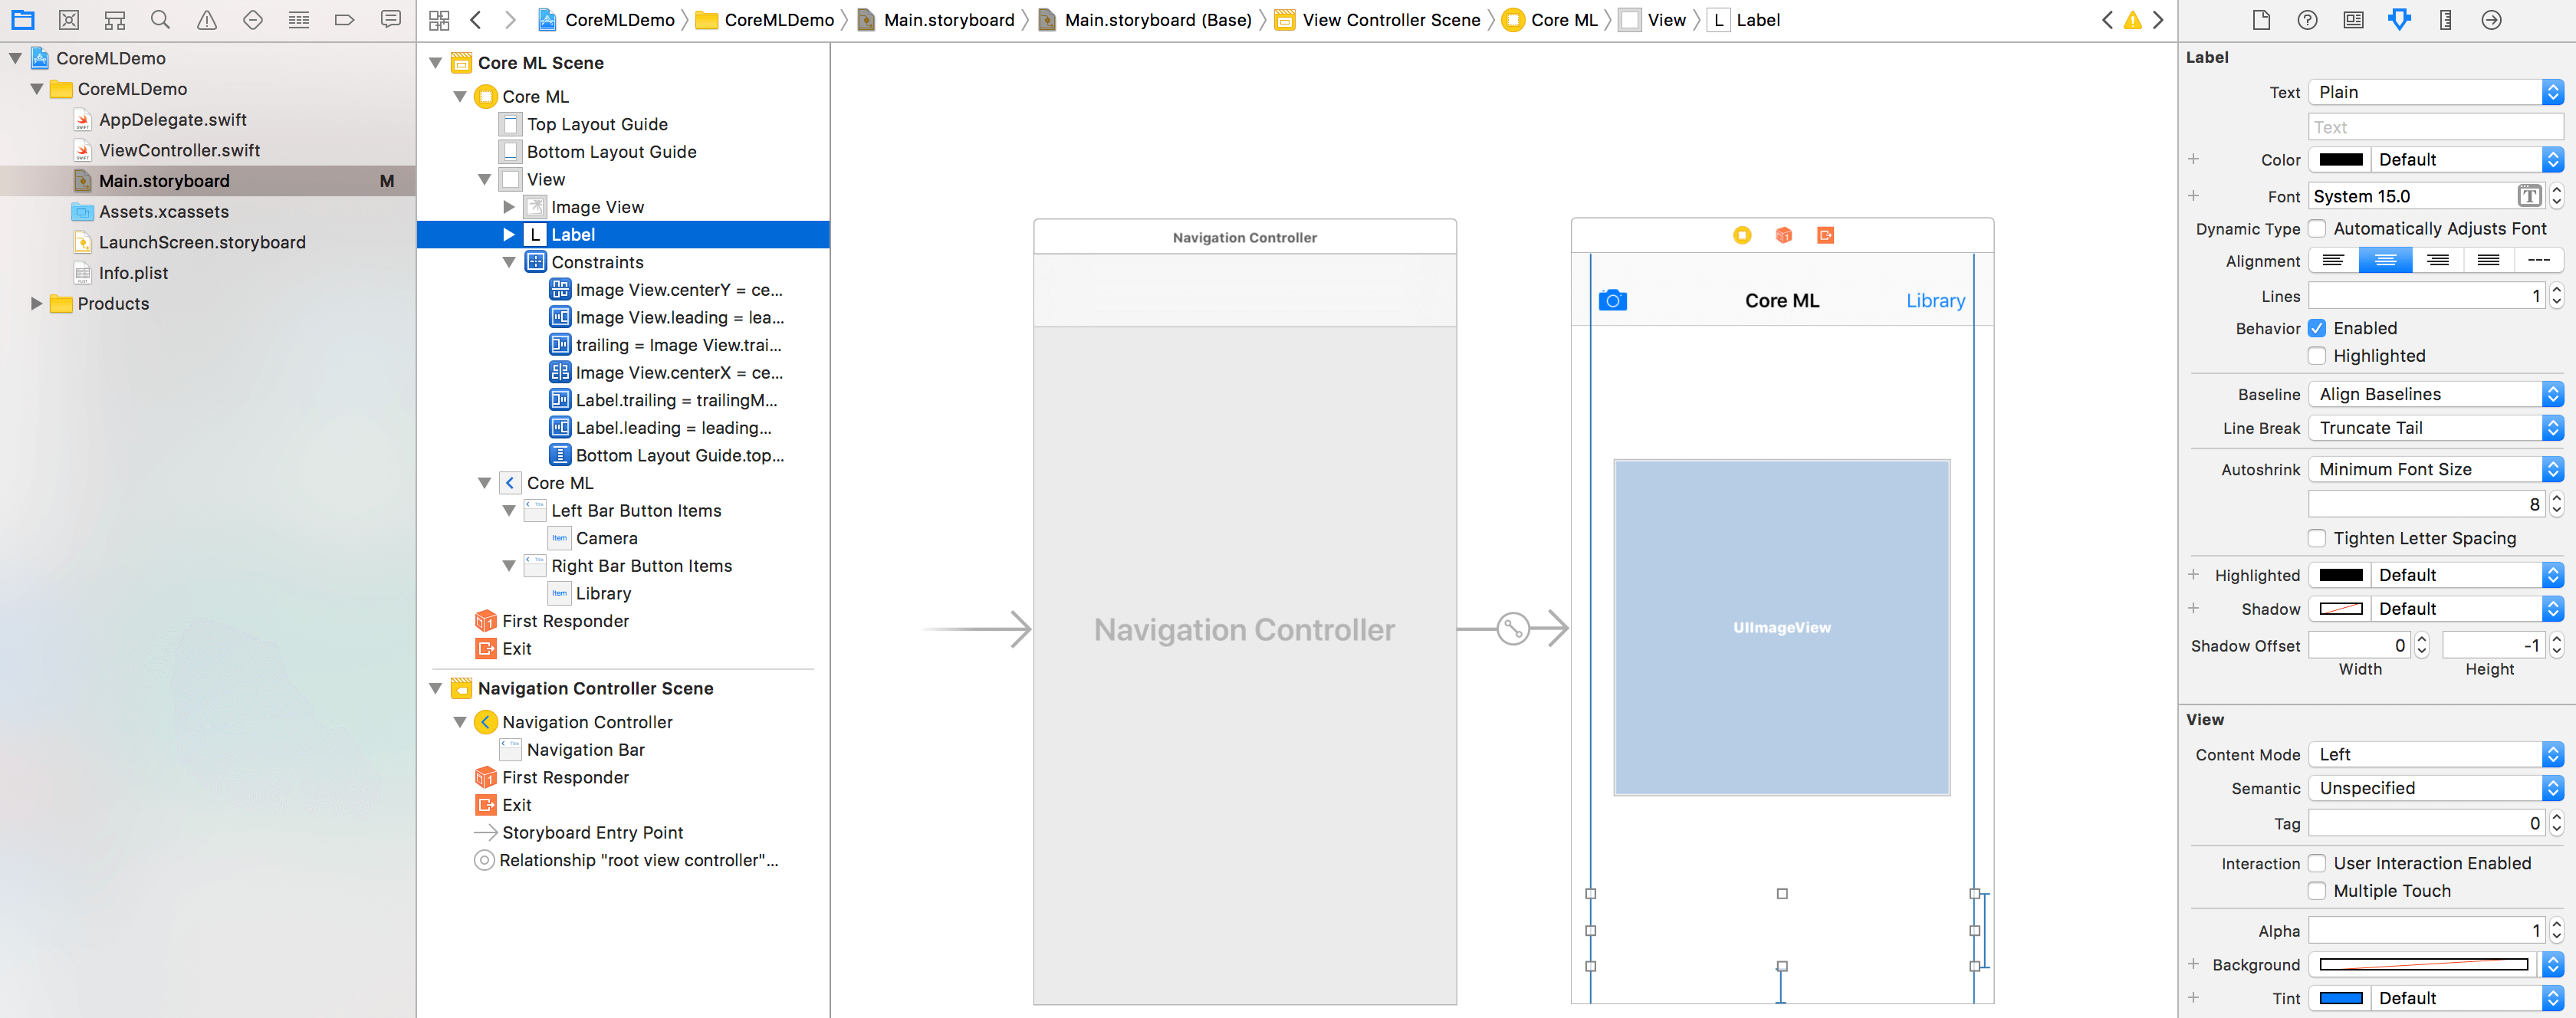
一開始我們要做的是打開 Main.storyboard 然後加入幾個 UI 元件到 View 之中。因此我們先點選 StoryBoard 中的 ViewController,然後到 Xcode 的功能列中點選 Editor-> Embed In-> Navigation Controller。當完成後你會看到 Navigation Bar 出現在 View 之上,接著我們將這個 Navigation Bar 的標題命名為 Core ML(或是任何你覺得適合的文字)。

接下來,拖曳兩個按鈕到 Navigation Bar 裡頭,一個放在標題左邊一個放右邊。接著點選左邊的按鈕然後到右側的 Attributes Inspector 裡將按鈕由 System Item 改為 「Camera」。右邊的按鈕則修改文字為 「Library」。這兩個按鈕的用途是讓使用者可以從相簿中選取相片或開啟相機拍照。
最後我們還需要加入兩個元件,分別是 UILabel 及 UIImageView。拖曳 UIImageView 到 View 裡設定垂直水平置中以及長寬為 299,讓 UIImageView 看起來是個正方形。現在輪到 UILabel,將其放入到 View 的底部並延伸兩端到 View 的兩側。這樣我們完成這個 App 的 UI 了。
雖然沒有提到設定這些 View 的 Auto Layout,但很推薦你嘗試設定 Auto Layout 以避免 UI 元件的錯置。如果你不了解如何設定,也可以將 Storyboard 的尺寸設定為你要運行的裝置尺寸。
實作相機以及相簿功能
現在我們已經完成 UI 了,接下來往實作功能的方向前進吧。在這個段落中,我們將會實作相簿以及相機按鈕功能。首先在 ViewController.swift 中,我們要先調用 UINavigationControllerDelegate ,因為後續的 UIImagePickerController 會需要用到這部份。
class ViewController: UIViewController, UINavigationControllerDelegate
接著為畫面上的 UILabel 及 UIImageView 加上 IBoutlet。為了方便起見,我將 UIImageView 命名為 imageView,UILabel 則命名為 classifier。完成後的程式碼應該會如下面所呈現的樣子:
import UIKit

class ViewController: UIViewController, UINavigationControllerDelegate {
    @IBOutlet weak var imageView: UIImageView!
    @IBOutlet weak var classifier: UILabel!

     override func viewDidLoad() {
        super.viewDidLoad()
    }

    override func didReceiveMemoryWarning() {
        super.didReceiveMemoryWarning()
    }
}
接下來,你需要為兩個按鈕分別建立 IBAction 。請將以下的 Action 方法加入至 Viewcontroller 中吧:
@IBAction func camera(_ sender: Any) {

    if !UIImagePickerController.isSourceTypeAvailable(.camera) {
        return
    }

    let cameraPicker = UIImagePickerController()
    cameraPicker.delegate = self
    cameraPicker.sourceType = .camera
    cameraPicker.allowsEditing = false

    present(cameraPicker, animated: true)
}

@IBAction func openLibrary(_ sender: Any) {
    let picker = UIImagePickerController()
    picker.allowsEditing = false
    picker.delegate = self
    picker.sourceType = .photoLibrary
    present(picker, animated: true)
}
到這邊我們先了解一下上述的 Action 方法。我們各產生了一個 UIImagePickerController 常數,然後將其設定為不允許編輯圖像(不論是相機拍攝或是相簿選取),接著將 Delegate 指向為自己。最後呈現 UIImagePickerController 給使用者。
因為我們尚未將 UIImagePickerControllerDelegate 的方法們加入至 ViewController.swift 中,所以會發生錯誤。我們另外建立 Extension 來調用 delegate:
extension ViewController: UIImagePickerControllerDelegate {
    func imagePickerControllerDidCancel(_ picker: UIImagePickerController) {
        dismiss(animated: true, completion: nil)
    }
}
上面的程式碼處理了使用者取消選取圖像的動作,同時也指派了 UIImagePickerControllerDelegate 的類別方法到我們的 Swift 檔案中。現在,你的程式碼會如同下面所示:
import UIKit

class ViewController: UIViewController, UINavigationControllerDelegate {

    @IBOutlet weak var imageView: UIImageView!
    @IBOutlet weak var classifier: UILabel!

    override func viewDidLoad() {
        super.viewDidLoad()
        // Do any additional setup after loading the view, typically from a nib.
    }

    override func didReceiveMemoryWarning() {
        super.didReceiveMemoryWarning()
        // Dispose of any resources that can be recreated.
    }

    @IBAction func camera(_ sender: Any) {

        if !UIImagePickerController.isSourceTypeAvailable(.camera) {
            return
        }

        let cameraPicker = UIImagePickerController()
        cameraPicker.delegate = self
        cameraPicker.sourceType = .camera
        cameraPicker.allowsEditing = false

        present(cameraPicker, animated: true)
    }

    @IBAction func openLibrary(_ sender: Any) {
        let picker = UIImagePickerController()
        picker.allowsEditing = false
        picker.delegate = self
        picker.sourceType = .photoLibrary
        present(picker, animated: true)
    }

}

extension ViewController: UIImagePickerControllerDelegate {
    func imagePickerControllerDidCancel(_ picker: UIImagePickerController) {
        dismiss(animated: true, completion: nil)
    }
}
現在回頭確認一下 Storyboard 上的 UI 元件是否有與 Outlet 辨識及 Action 方法確實連結。
為了使用手機上的相機以及相簿,還有一項必需要做的事。前往 Info.plist 然後新增 Privacy – Camera Usage Description 及 Privacy – Photo Library Usage Description。從 iOS 10 開始,你需要添註說明為何你的 App 需要使用相機及相簿功能。

好了,現在你已經準備好前往本篇教學的核心部分了。再次提醒,如果你不想重頭建立範例 App 的話,可以下載此份檔案。
整合 Core ML Data 模型
現在讓我們轉換一下開始整合 Core ML 資料模型到我們的 App。如同早先提到的,我們需要一份預先訓練的資料模型來與 Core ML 合作。雖然你也可以自己建立一份資料模型,但在本次範例裡我們會使用由 Apple 開發者網站所提供預先訓練完畢的資料模型。
前往 Apple 開發者網站的 Machine Learning 頁面然後拉到最底下,你會找到四個已預先訓練好的 Core ML 資料模型。
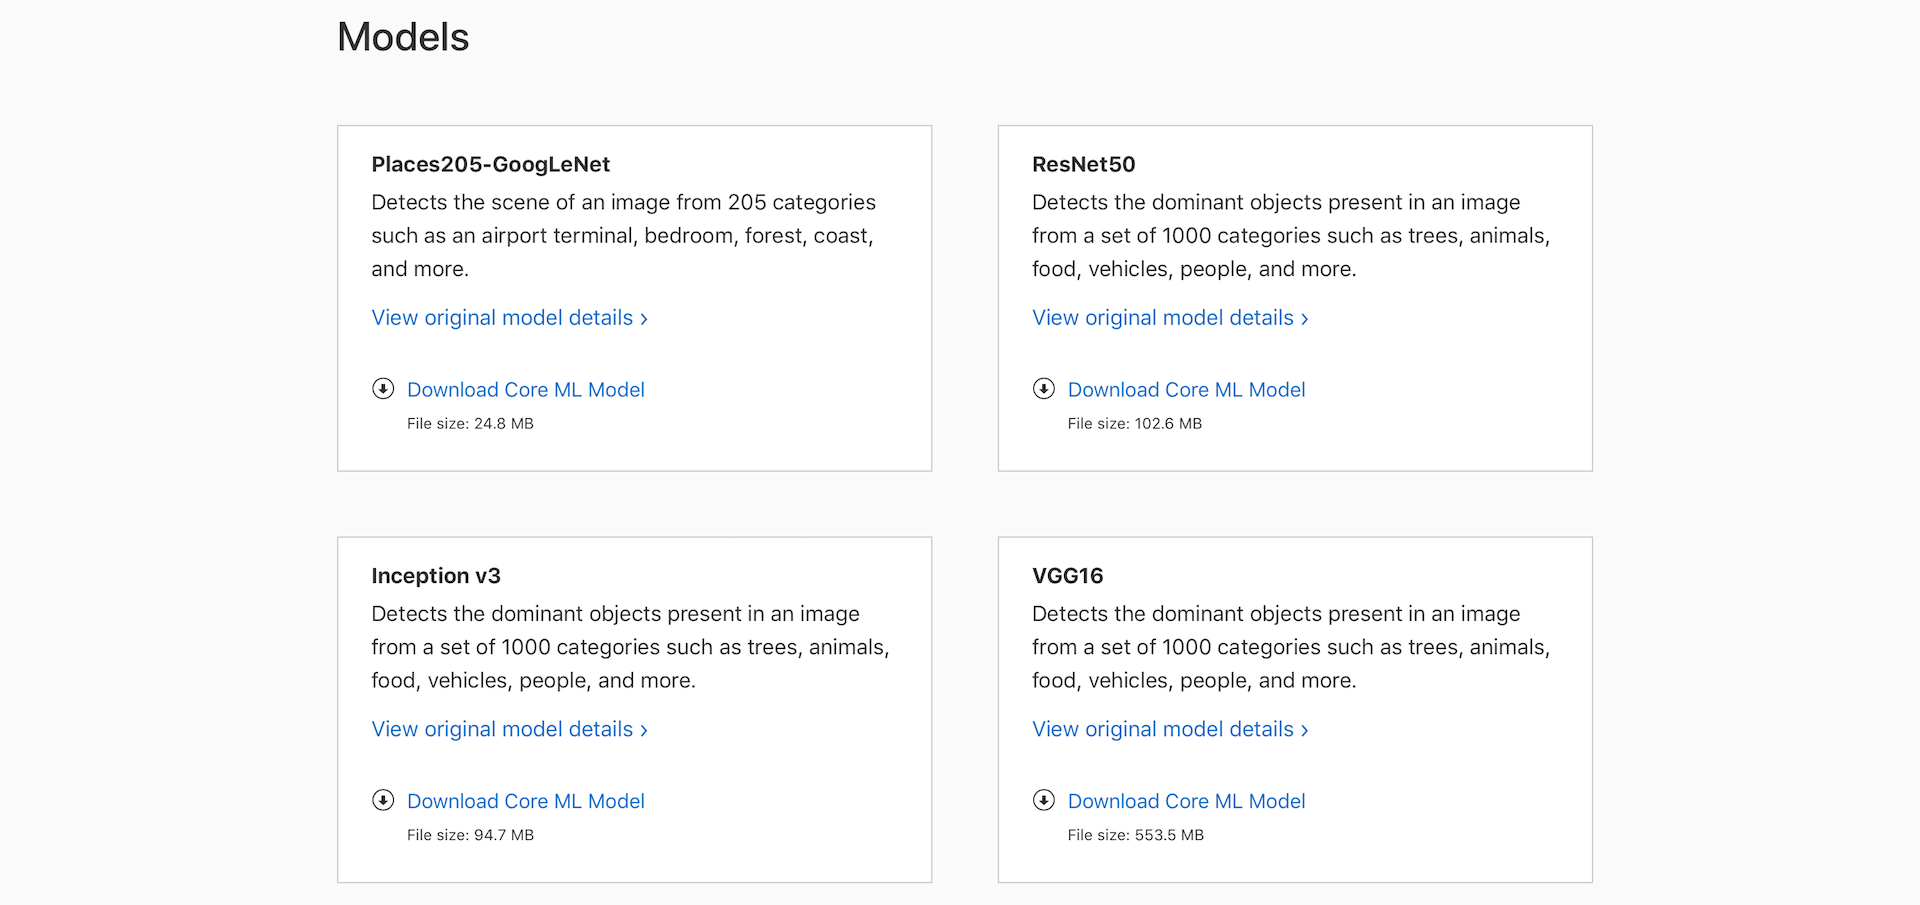
在本次教學裡,我們使用了 Inception v3 模型。當然,你也可以程式其他另外三種的資料模型。當你下載完 Inception v3 後,將它放入 Xcode 專案中,然後看一下他顯示了哪些東西。

從上面的畫面中,你可以看到資料模型的類型也就是神經網絡(Neural Networks)的分類器。其他你需要注意的資訊有模型評估參數(Model Evaluation Parameters),這告訴你模型放入的是什麼,輸出的又是什麼。以這來說,這個模型可以放入一張 299×299 的圖像,然後回傳給你這張圖像最有可能的分類以及每種分類的可能性。
另外一個你會注意到的是模型的類別(Model Class)。這個模型類別(Inceptionv3)是由機器學習模型中產生出來並且可以讓我們直接在程式碼裡使用。如果點擊 Inceptionv3 旁的箭頭,你可以看到這個類別的原始碼。
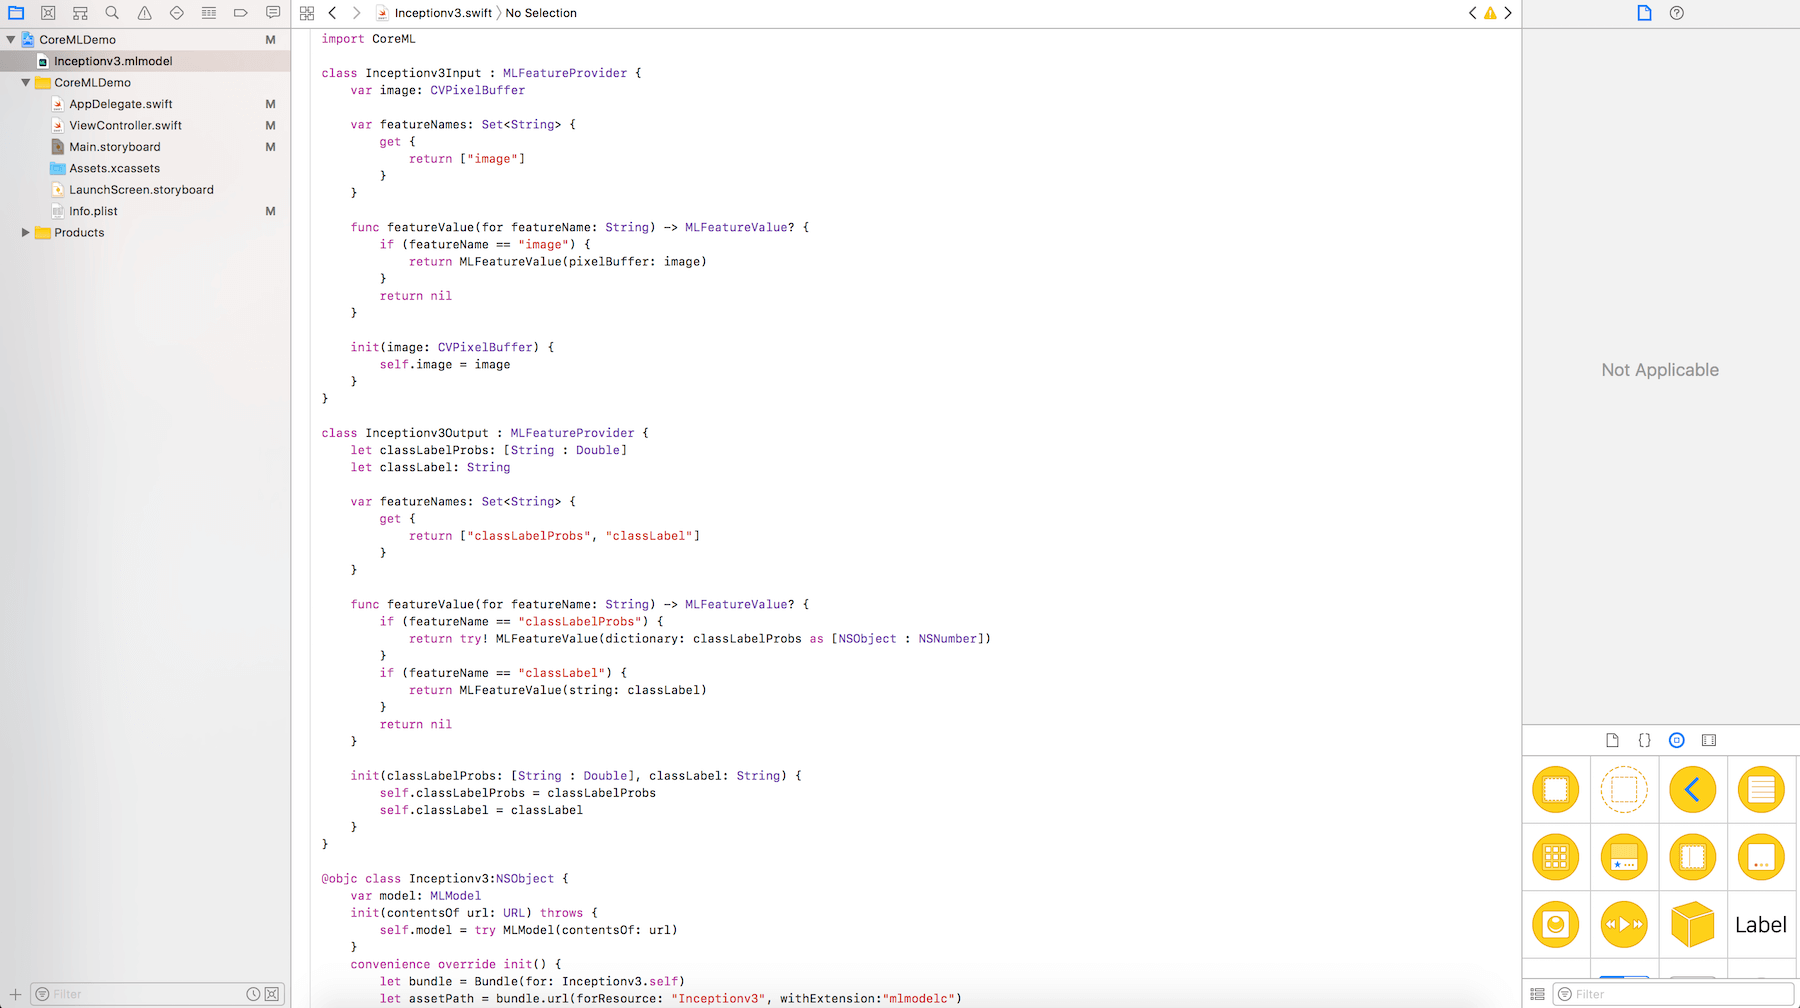
現在,讓我們把資料模型加入至我們的程式碼中吧。回到 ViewController.swift,將 CoreML 引入:
import CoreML
接著,為 Inceptionv3 宣告一個 model 變數並且在 viewWillAppear() 中初始化。
var model: Inceptionv3!

override func viewWillAppear(_ animated: Bool) {
    model = Inceptionv3()
}
我知道你現在在想什麼。
「為何我們不更早一點初始化呢?」
「在 viewWillAppear 中定義的要點是什麼?」
這要點是當你的 App 試著識別你的圖像裡有哪些物件時,會快上許多。
現在,回頭看一下 Inceptionv3.mlmodel,我們看到這個模型只能放入尺寸為 299x299 的圖像。所以,我們該如何讓一張圖像符合這樣的尺寸呢?這就是我們接下來要做的。
圖像轉換
在 ViewController.swift 的 Extension 中,添加下述的程式碼。在新增的程式碼裡,我們實作了 imagePickerController(_:didFinishPickingMediaWithInfo) 來處理選取完照片的後續動作。
extension ViewController: UIImagePickerControllerDelegate {
    func imagePickerControllerDidCancel(_ picker: UIImagePickerController) {
        dismiss(animated: true, completion: nil)
    }

    func imagePickerController(_ picker: UIImagePickerController, didFinishPickingMediaWithInfo info: [String : Any]) {
        picker.dismiss(animated: true)
        classifier.text = "Analyzing Image..."
        guard let image = info["UIImagePickerControllerOriginalImage"] as? UIImage else {
            return
        }

        UIGraphicsBeginImageContextWithOptions(CGSize(width: 299, height: 299), true, 2.0)
        image.draw(in: CGRect(x: 0, y: 0, width: 299, height: 299))
        let newImage = UIGraphicsGetImageFromCurrentImageContext()!
        UIGraphicsEndImageContext()

        let attrs = [kCVPixelBufferCGImageCompatibilityKey: kCFBooleanTrue, kCVPixelBufferCGBitmapContextCompatibilityKey: kCFBooleanTrue] as CFDictionary
        var pixelBuffer : CVPixelBuffer?
        let status = CVPixelBufferCreate(kCFAllocatorDefault, Int(newImage.size.width), Int(newImage.size.height), kCVPixelFormatType_32ARGB, attrs, &pixelBuffer)
        guard (status == kCVReturnSuccess) else {
            return
        }

        CVPixelBufferLockBaseAddress(pixelBuffer!, CVPixelBufferLockFlags(rawValue: 0))
        let pixelData = CVPixelBufferGetBaseAddress(pixelBuffer!)

        let rgbColorSpace = CGColorSpaceCreateDeviceRGB()
        let context = CGContext(data: pixelData, width: Int(newImage.size.width), height: Int(newImage.size.height), bitsPerComponent: 8, bytesPerRow: CVPixelBufferGetBytesPerRow(pixelBuffer!), space: rgbColorSpace, bitmapInfo: CGImageAlphaInfo.noneSkipFirst.rawValue) //3

        context?.translateBy(x: 0, y: newImage.size.height)
        context?.scaleBy(x: 1.0, y: -1.0)

        UIGraphicsPushContext(context!)
        newImage.draw(in: CGRect(x: 0, y: 0, width: newImage.size.width, height: newImage.size.height))
        UIGraphicsPopContext()
        CVPixelBufferUnlockBaseAddress(pixelBuffer!, CVPixelBufferLockFlags(rawValue: 0))
        imageView.image = newImage
    }
}
在上述程式碼中被標記起來的部分:
- 第 7-11 行: 我們從
info這個 Dictionary (使用UIImagePickerControllerOriginalImage這個 key)裡取回了選取的的圖像。同時我們讓UIImagePickerController在我們選取圖像後消失。 - 第 13-16 行: 因為我們使用的模型只接受
299x299的尺寸,所以將圖像轉換為正方形,並將這個新的正方形圖像指定給另個常數newImage。 - 第 18-23 行: 我們把
newImage轉換為CVPixelBuffer。 給對於CVPixelBuffer不熟悉的人, CVPixelBuffers 是一個將像數(Pixcel)存在主記憶體裡的圖像緩衝器。你可以從這裡了解更多關於CVPixelBuffers的資訊 - 第 31-32 行: 然後我們取得了這個圖像裡的像數並轉換為裝置的 RGB 色彩。接著把這些資料作成
CGContext。這樣一來每當我們需要渲染(或是改變)一些底層屬性時可以很輕易的呼叫使用。最後的兩行程式碼即是以此進行翻轉以及縮放。 - 第 34-38 行: 最後,我們完成新圖像的繪製並把舊的資料移除,然後將
newImage指定給imageView.image。
如果你有點不明白上面的程式碼,別擔心。這些是有點進階的 Core Image 語法,並不在這次教學範圍內。你只要明白這些是要將選取的圖像轉換為資料模型可以接受的資料即可。不過推薦你可以換個數值執行幾次,看看執行結果以更進一步的了解。
使用 Core ML
無論如何,讓我們把注意力拉回到 Core ML 上吧。我們使用 Inceptionv3 模型來作物件識別。藉由 Core ML,我們只需幾行程式碼就可以完成工作了。貼上下述的程式碼到 imageView.image = newImage 底下吧。
guard let prediction = try? model.prediction(image: pixelBuffer!) else {
    return
}

classifier.text = "I think this is a \(prediction.classLabel)."
沒錯,就是這樣!Inceptionv3 類別已經產生了名為 prediction(image:) 的方法,它被用來預測所提供的圖像裡的物件。這裡我們把 pixelBuffer 變數放入方法中,這個變數代表的是縮放後的圖像。一旦完成預測會以字串形式回傳結果,我們把 classifier 的文字內容更新為收到的結果文字。
是時候來測試我們的 App 囉!在模擬器或上手機上(需安裝 iOS 11)Build 及 Run ,接著從相簿選取或相機拍攝圖像,App 就會告訴你圖像是什麼。
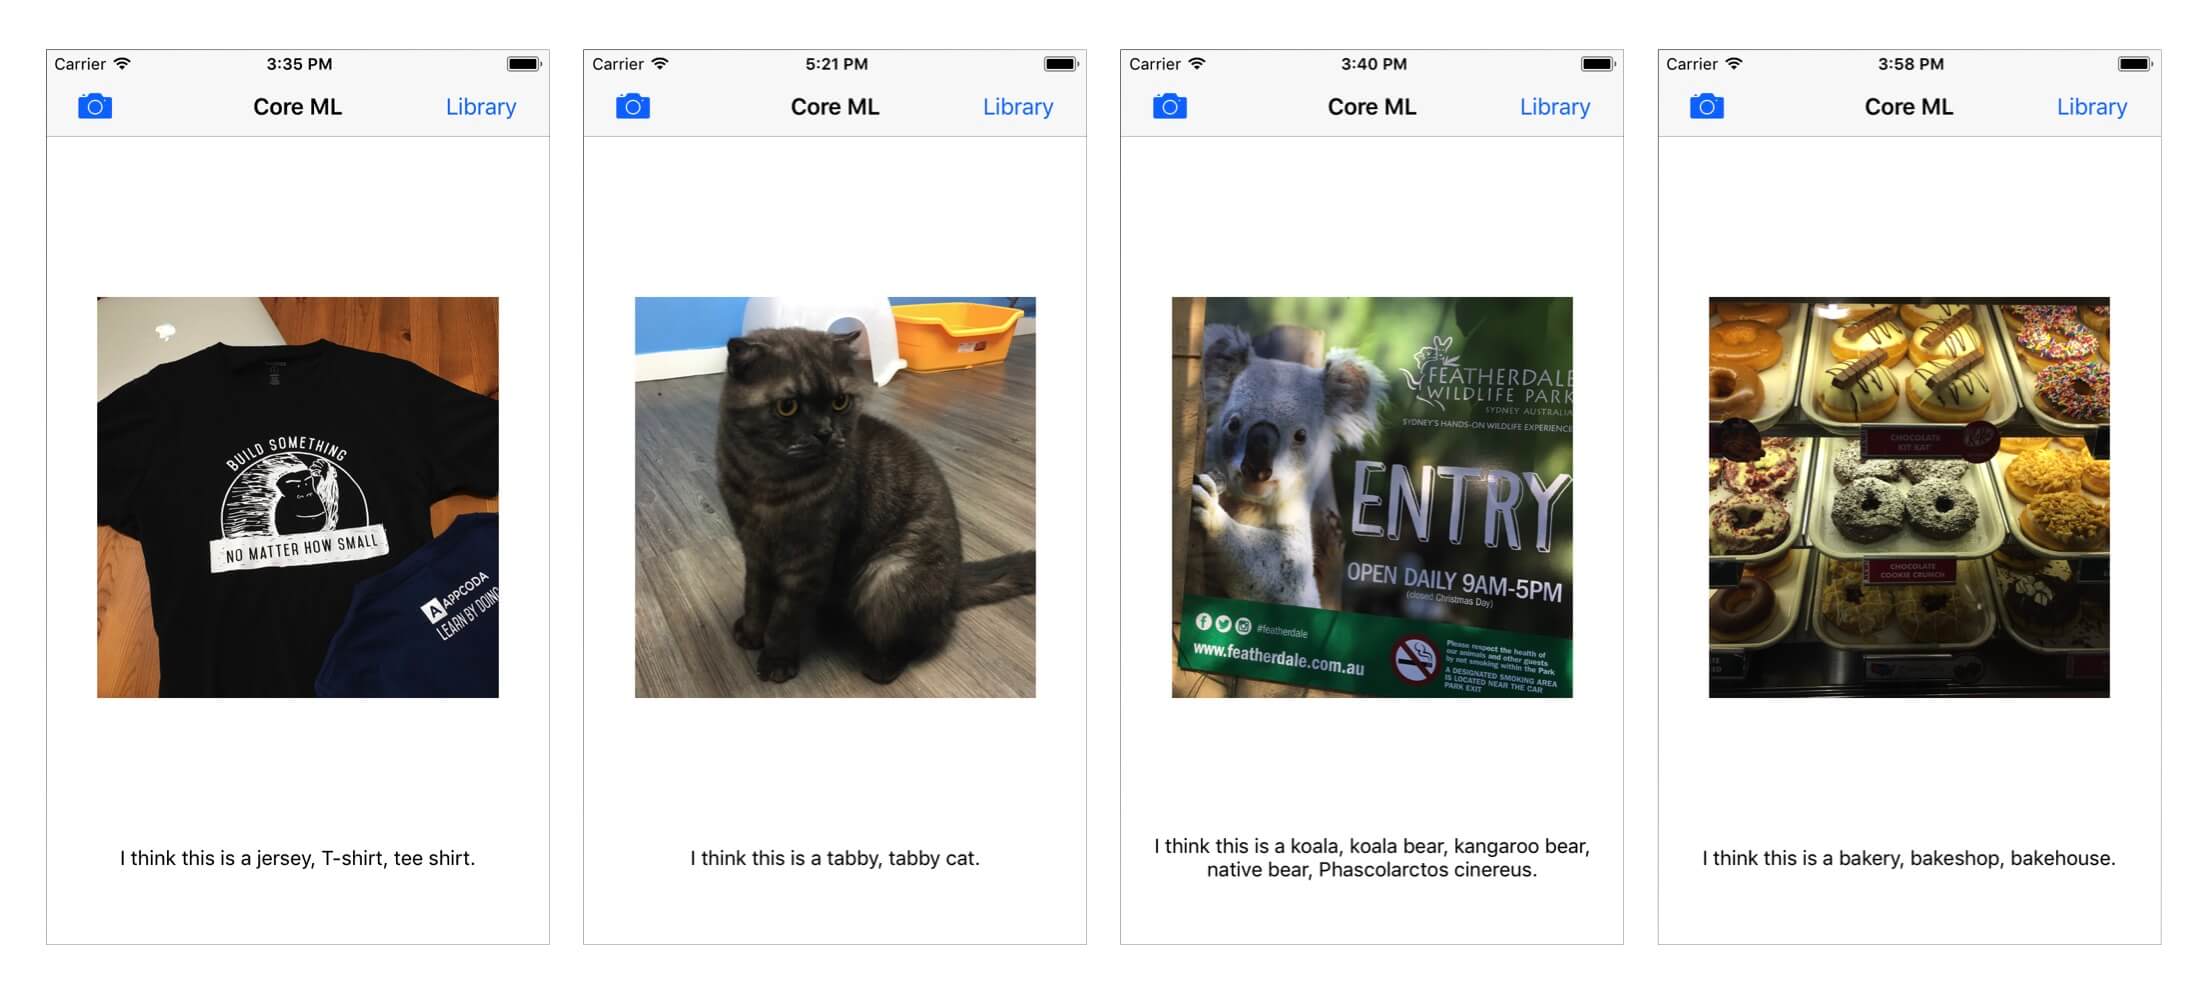
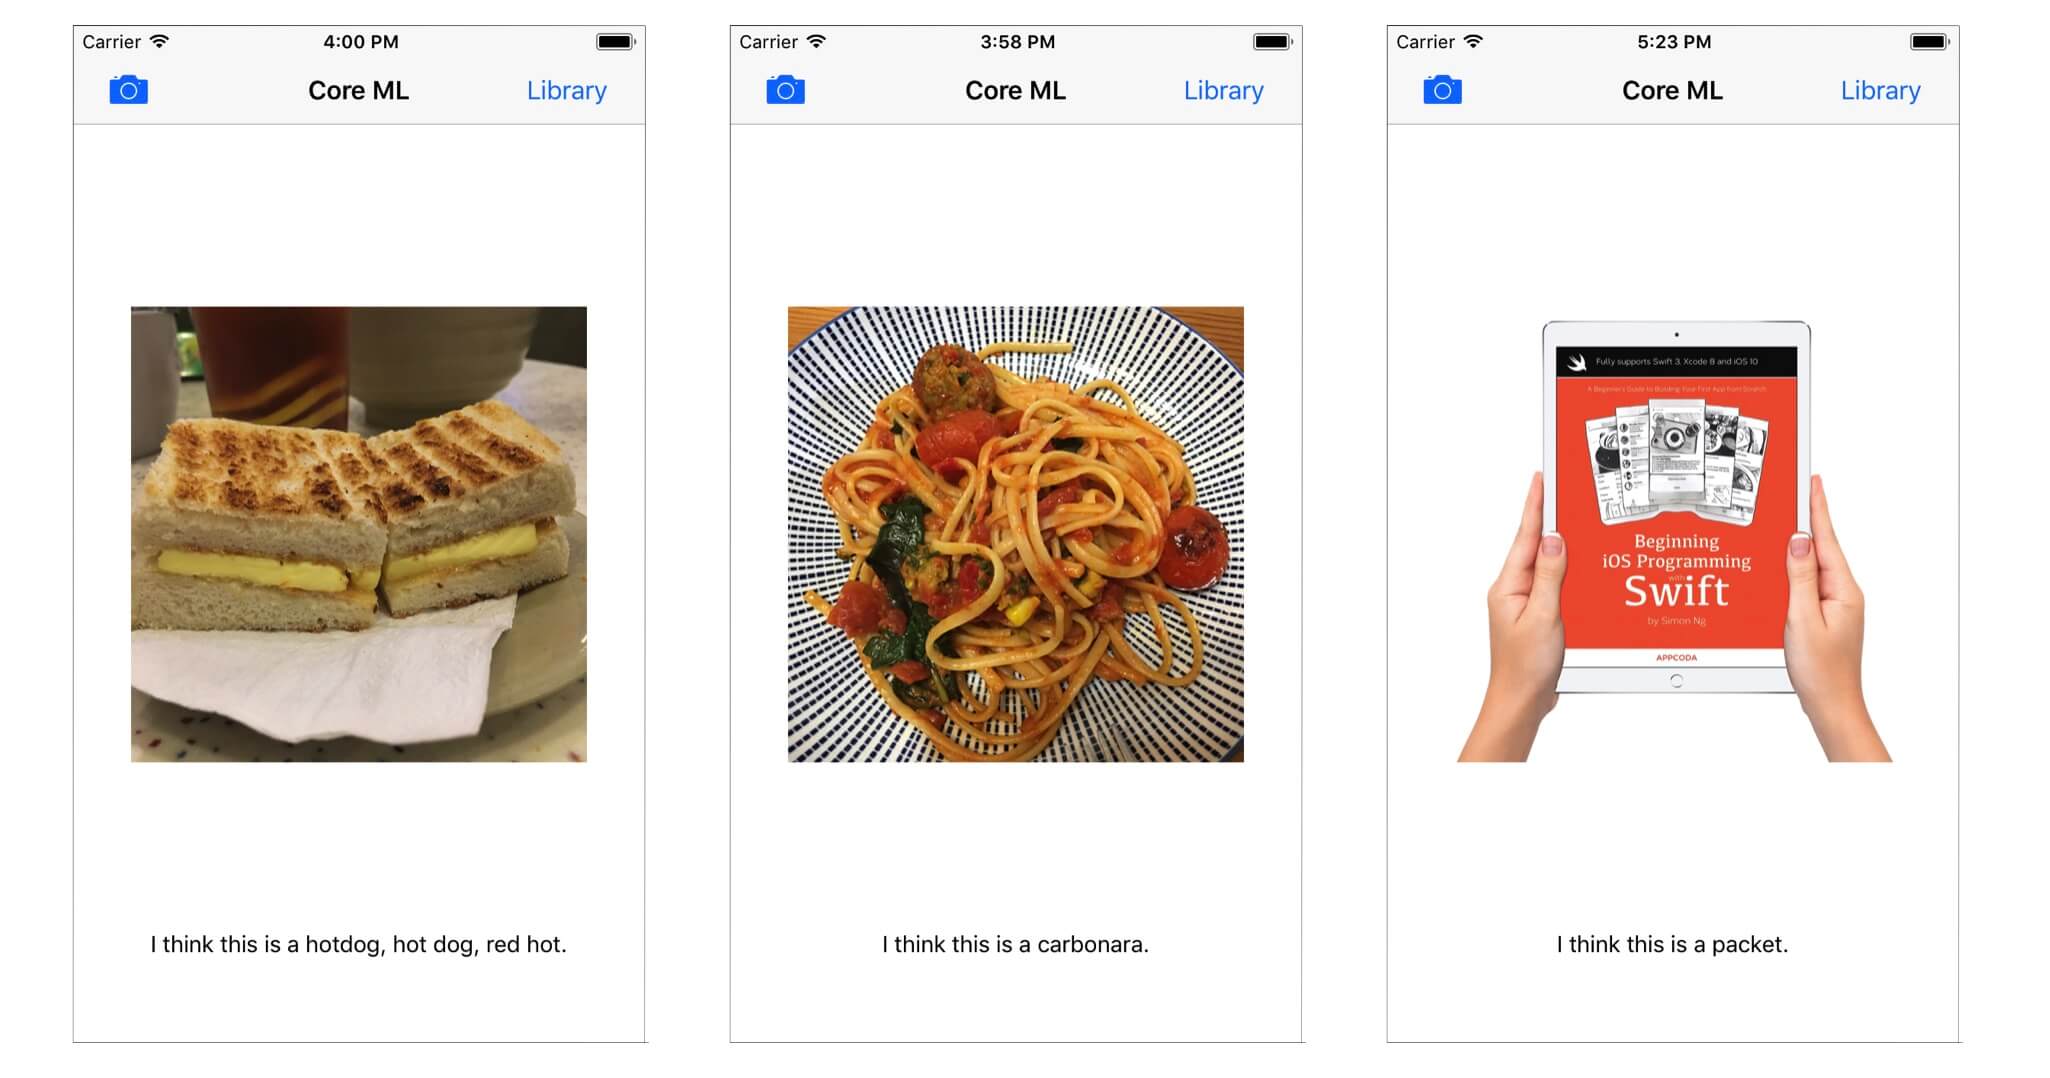
當測試 App 時,你可能注意到 App 並不能很正確的預測出內容。這並不是你的程式碼有問題,而是出在這份資料模型上。
小結
我希望你現在了解了如何將 Core ML 整合至你的 App 之中。本篇只是介紹性的教學文章,如果你對如何將其他的機器學習模型(如:Caffe、Keras、SciKit)整合至 Core ML 模型感興趣的話,敬請鎖定我們 Core ML 系列的下篇教學文章。我將會講述如何將這些模型轉換至 Core ML 模型。
如果想了解整個 Demo App 的話,你可以到 GitHub 上下載完整專案檔。
如果想知道更多關於 Core ML 的資訊,你可以參考 Core ML 官方文件。或是參考 Apple 於 WWDC 2017 上關於 Core ML 的 Session 演講:
至此,你對於 Core ML 有任何的想法嗎?歡迎分享你的意見。
原文:Introduction to Core ML: Building a Simple Image Recognition App

