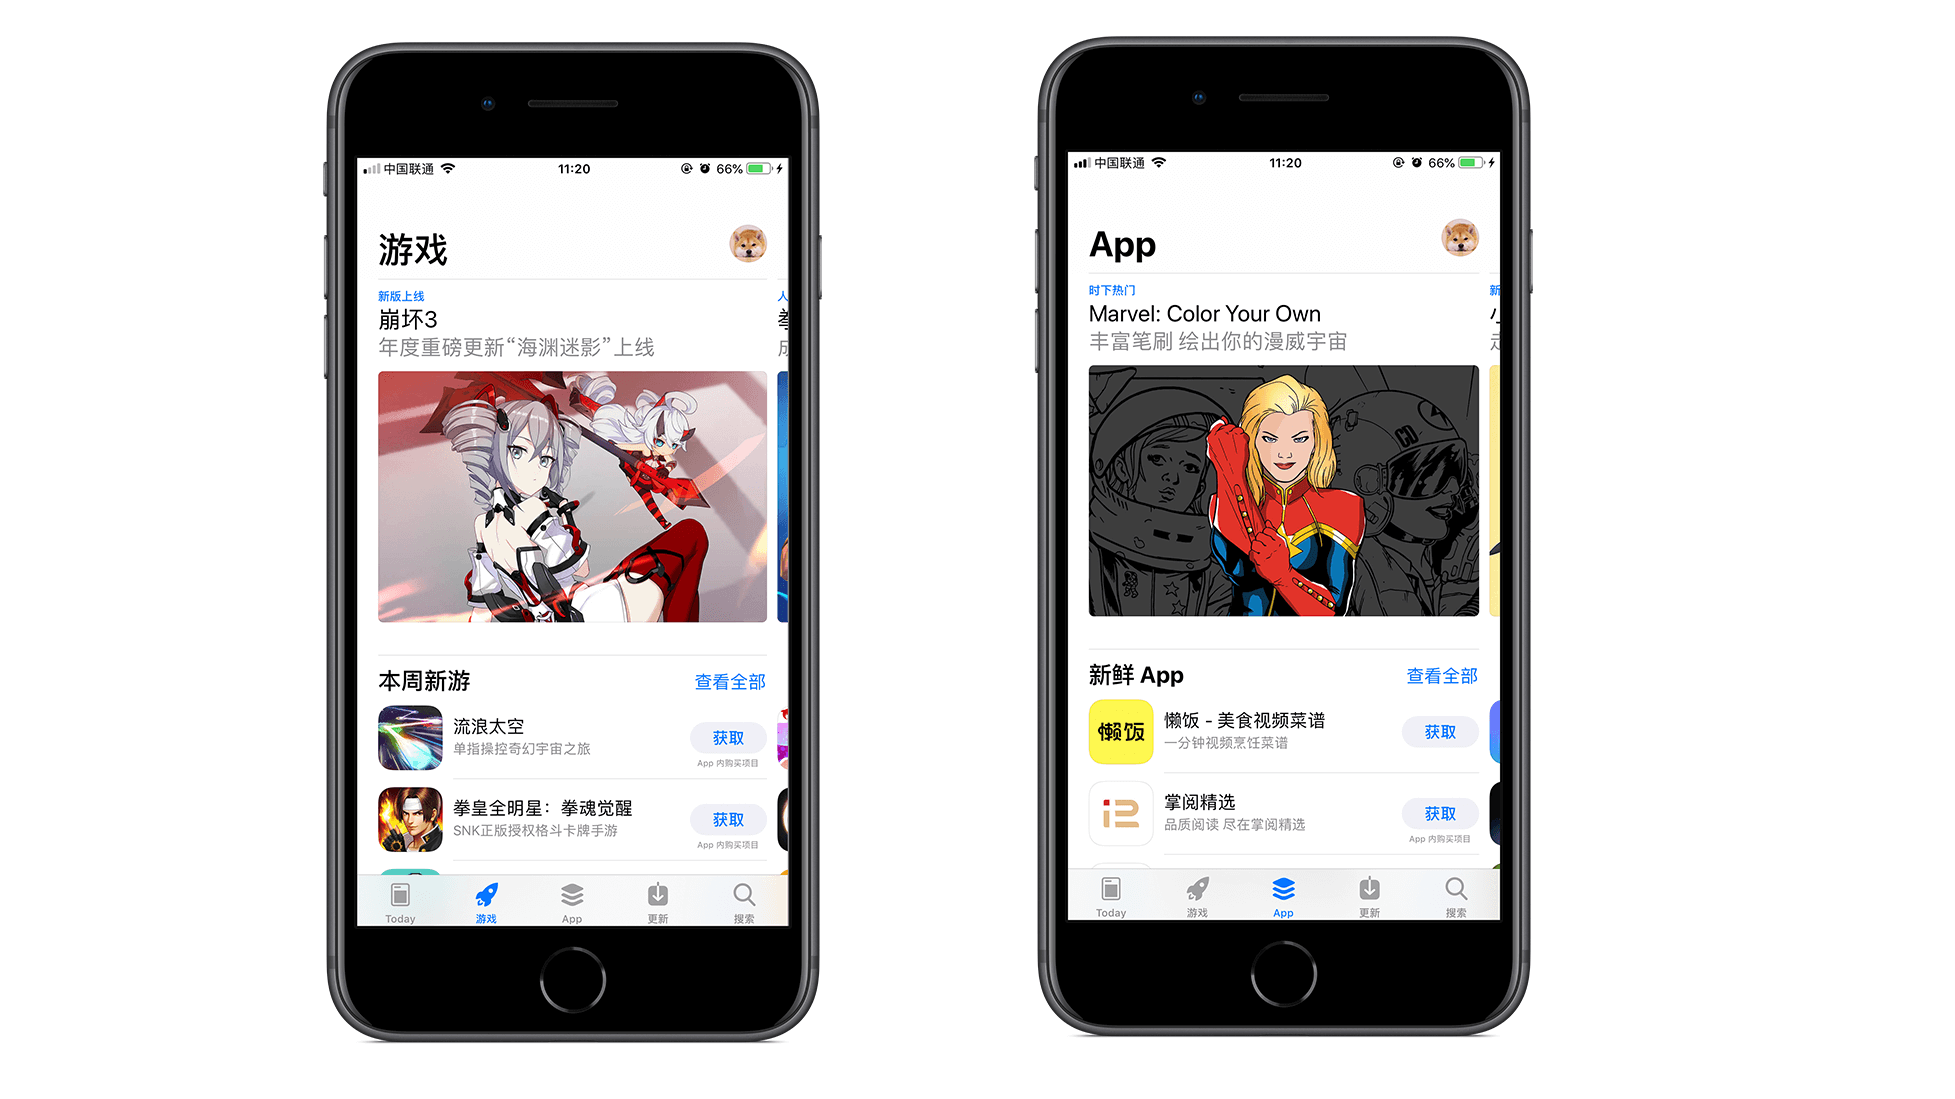
在 iPhone 和 iPad 的很多 app 裏面,我們都會看到許多用表格視圖和集合視圖制作起來的介面,大部分應該是表格視圖和集合視圖的組合介面。比如我們在 app store 裏面的遊戲欄或者 App 欄裏面會看到由表格視圖和集合視圖組合而成的漂亮介面。
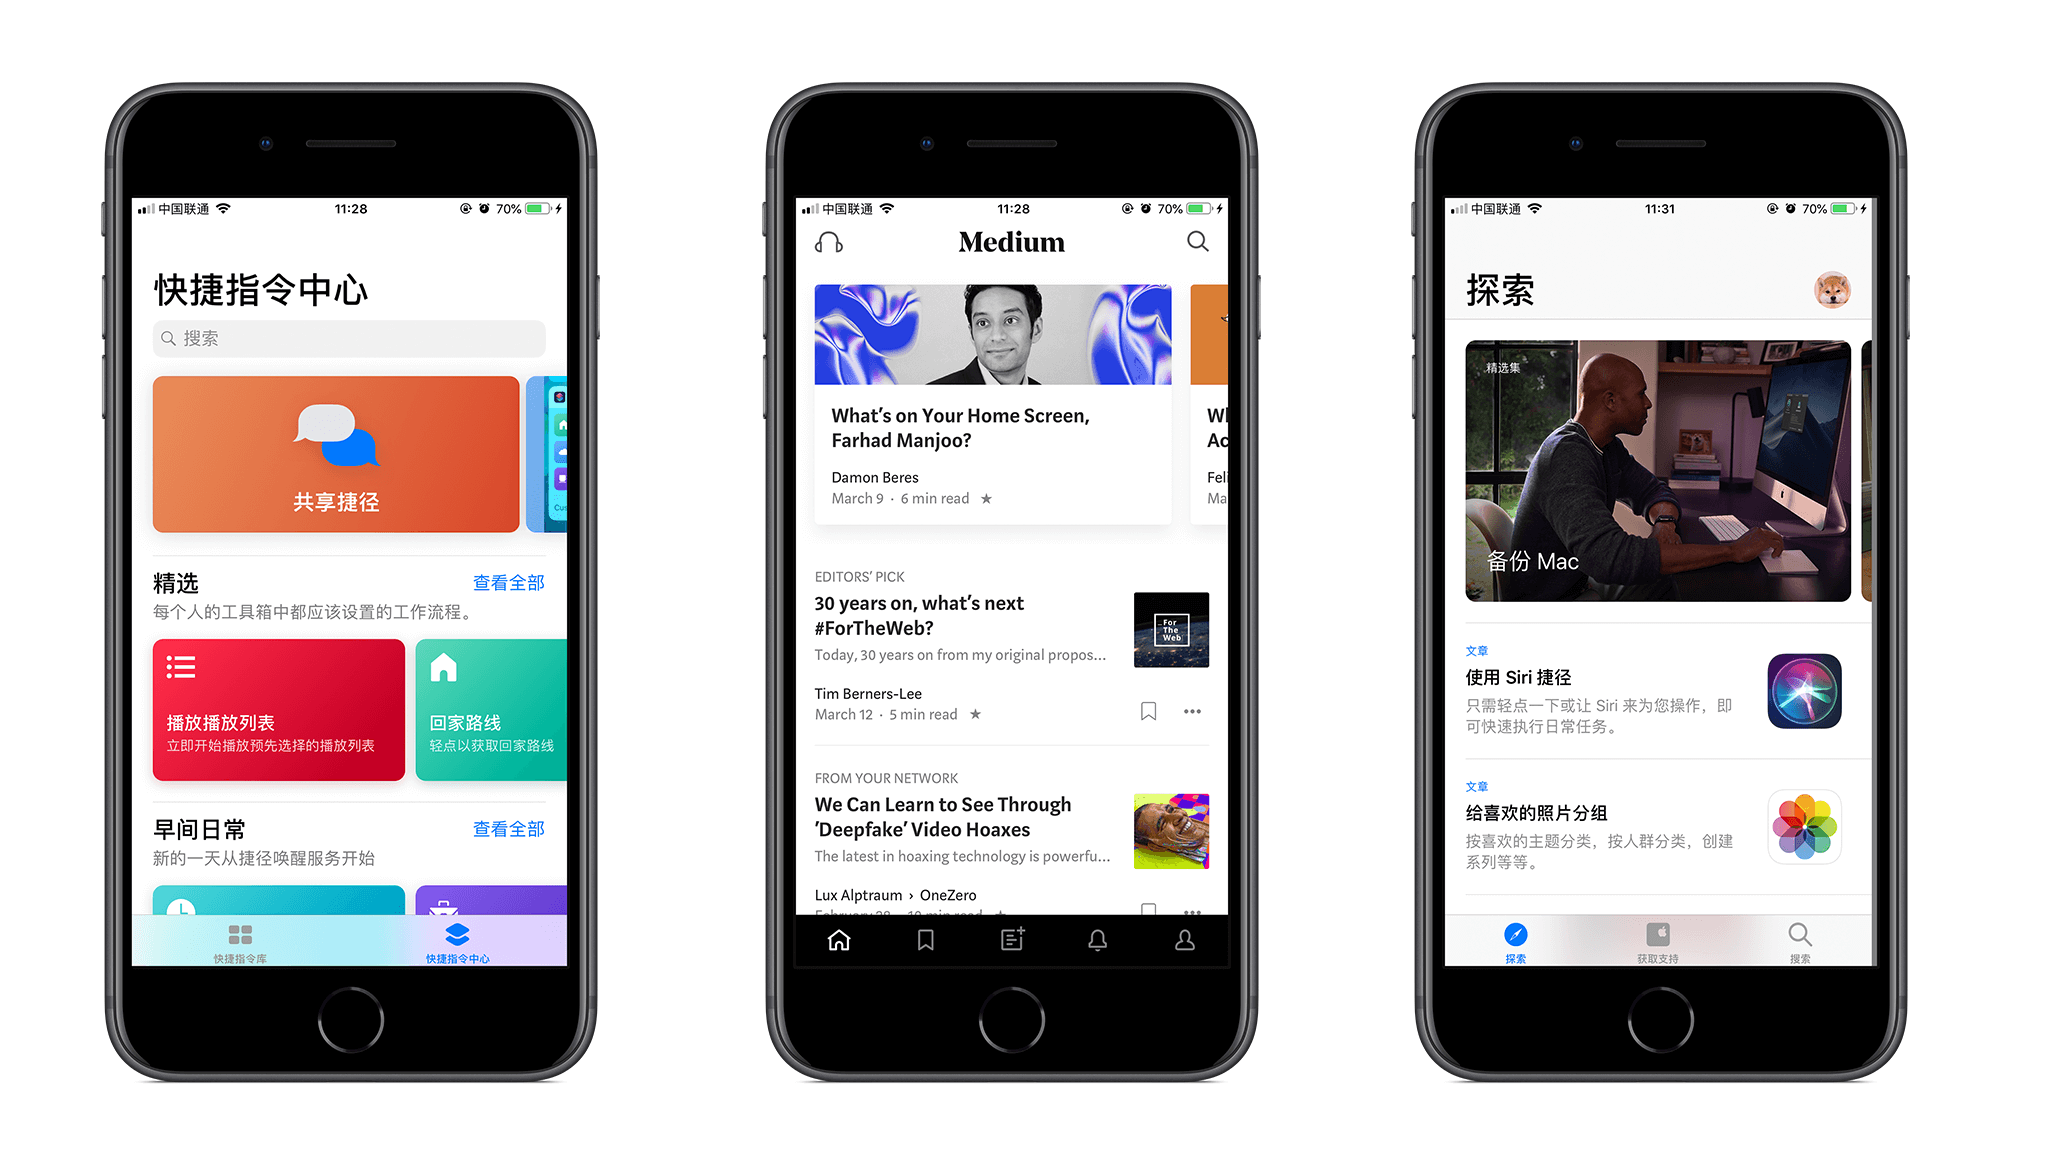
又或者,你也會在快捷指令中心、Medium 和 Apple Support 裏面看到相類似的介面。
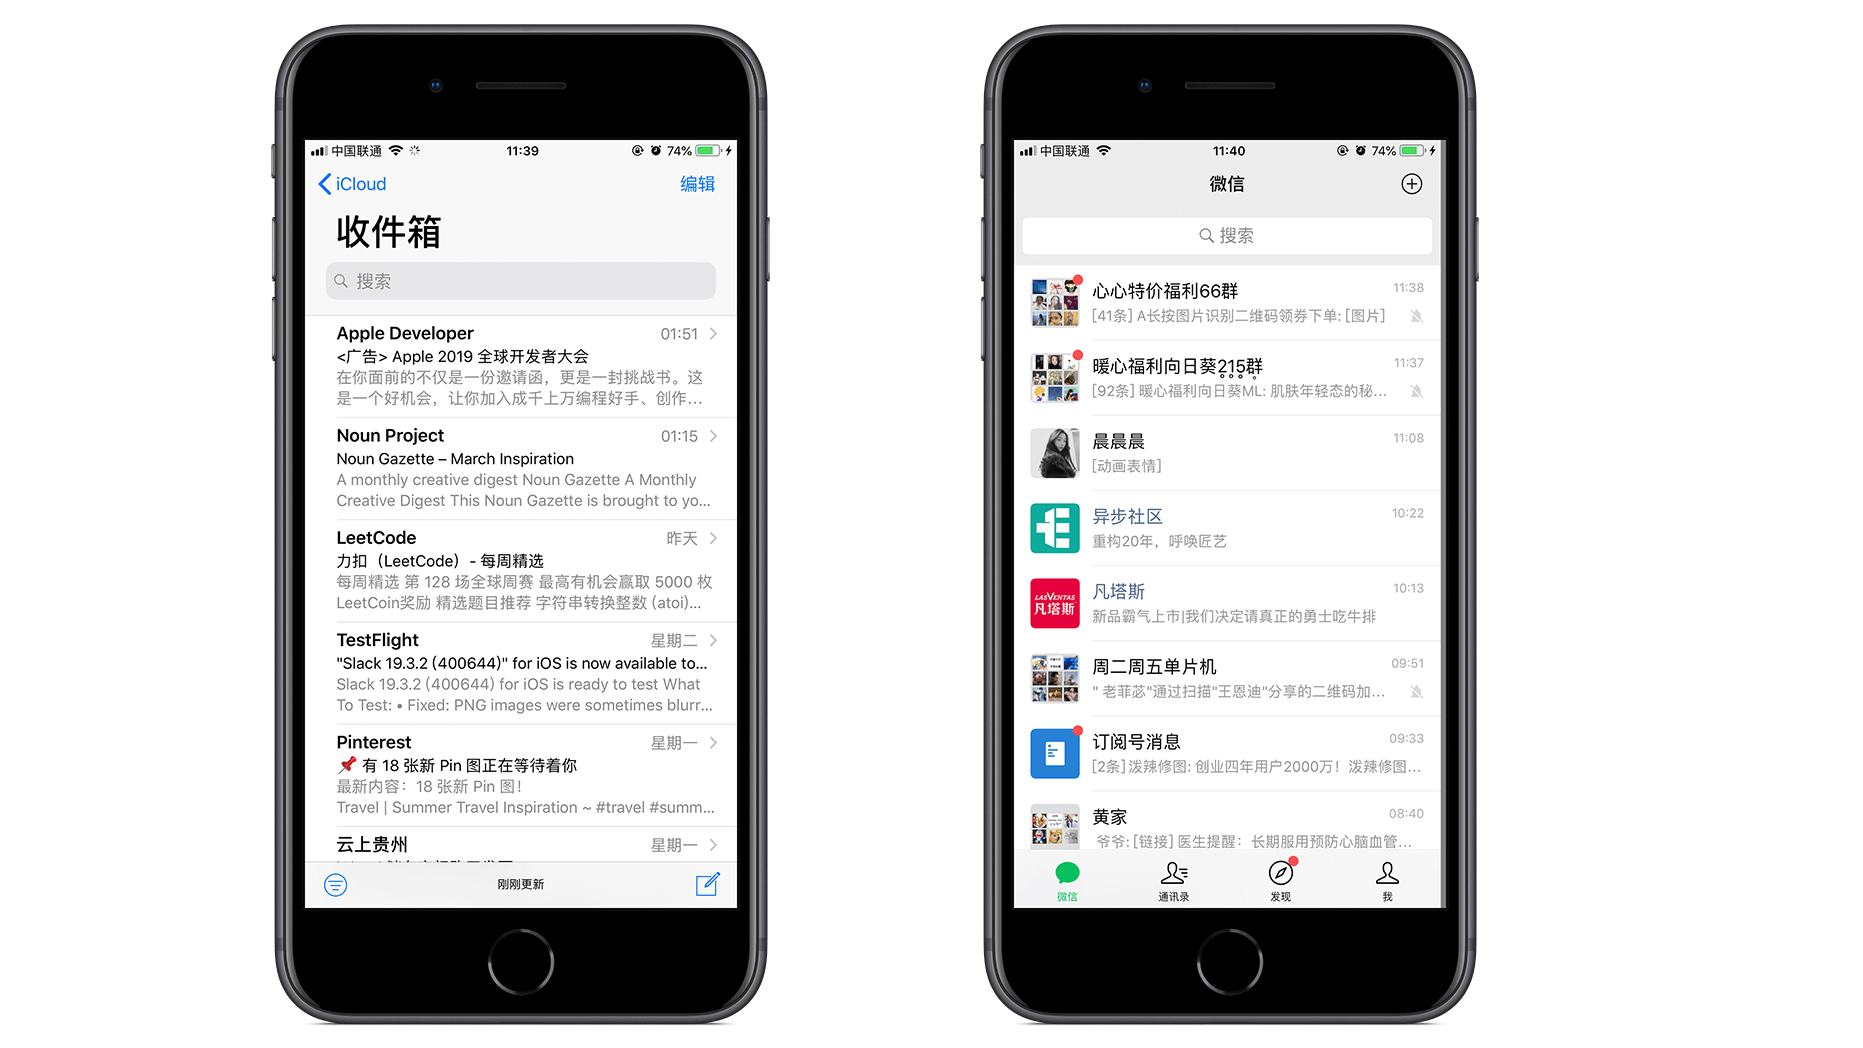
仔細分析不難發現這些介面的共同點,一般都是在表格視圖裏面添加集合視圖,但是呢,我們一般學習的表格視圖是用來展示一連串具有相同形式的介面的,就比如郵件裏面你收到的郵件的展示形式,或者微信裏面的聊天列表。
於是,我們再看一開始的那些照片,他們好像找不到甚麽相同的點,最多就是最上面的集合視圖可以找到共同點,但是集合視圖下一欄就立刻變成了表格視圖,甚至,表格視圖也有很多種形式,完全對應不起來呀,哪有甚麽共同特點?真是讓人匪夷所思。為甚麽可以實現這種介面呢?別擔心,接下來就來學學如何制作表格視圖和集合視圖並存的介面吧。
示例模型
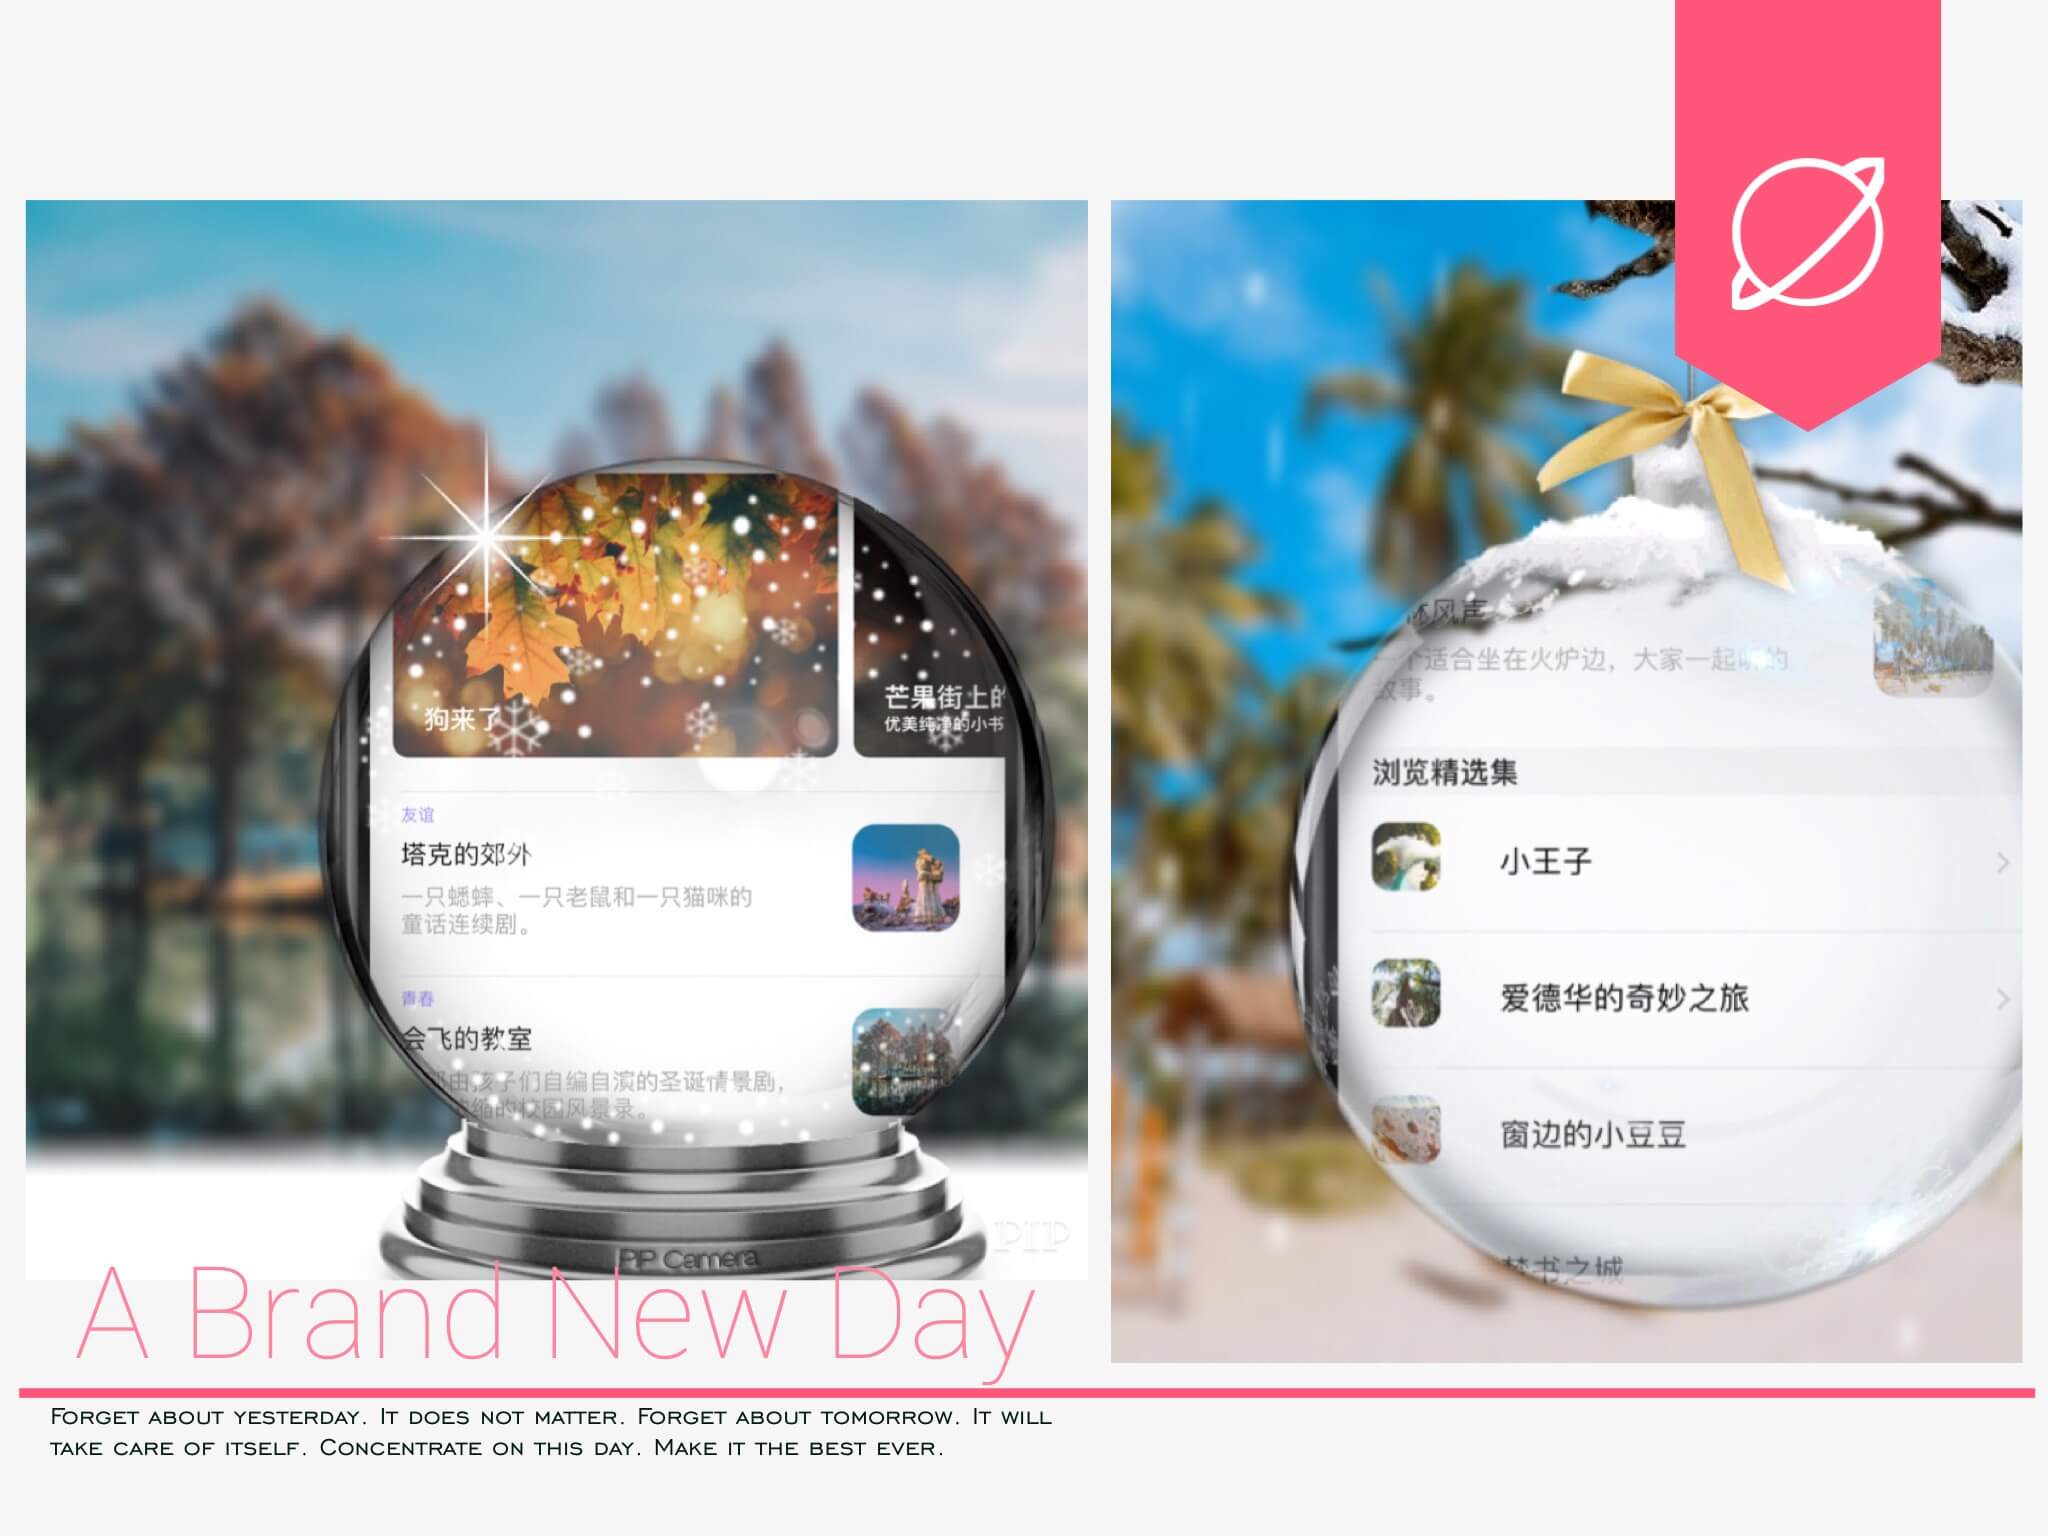
我這個介面是模仿 Apple Support 寫的,它用三種方式來呈現數據,最開始是集合視圖,第二層是一個表格視圖,第三層也是一個表格視圖,不過這兩種表格視圖裏面的介面布局不太一樣。看完我這一篇文章以後,你甚至可以自定義更多的表格視圖和集合視圖,這完全取決於你的想法。你可以在 GitHub 上面找到完整的模型示例。
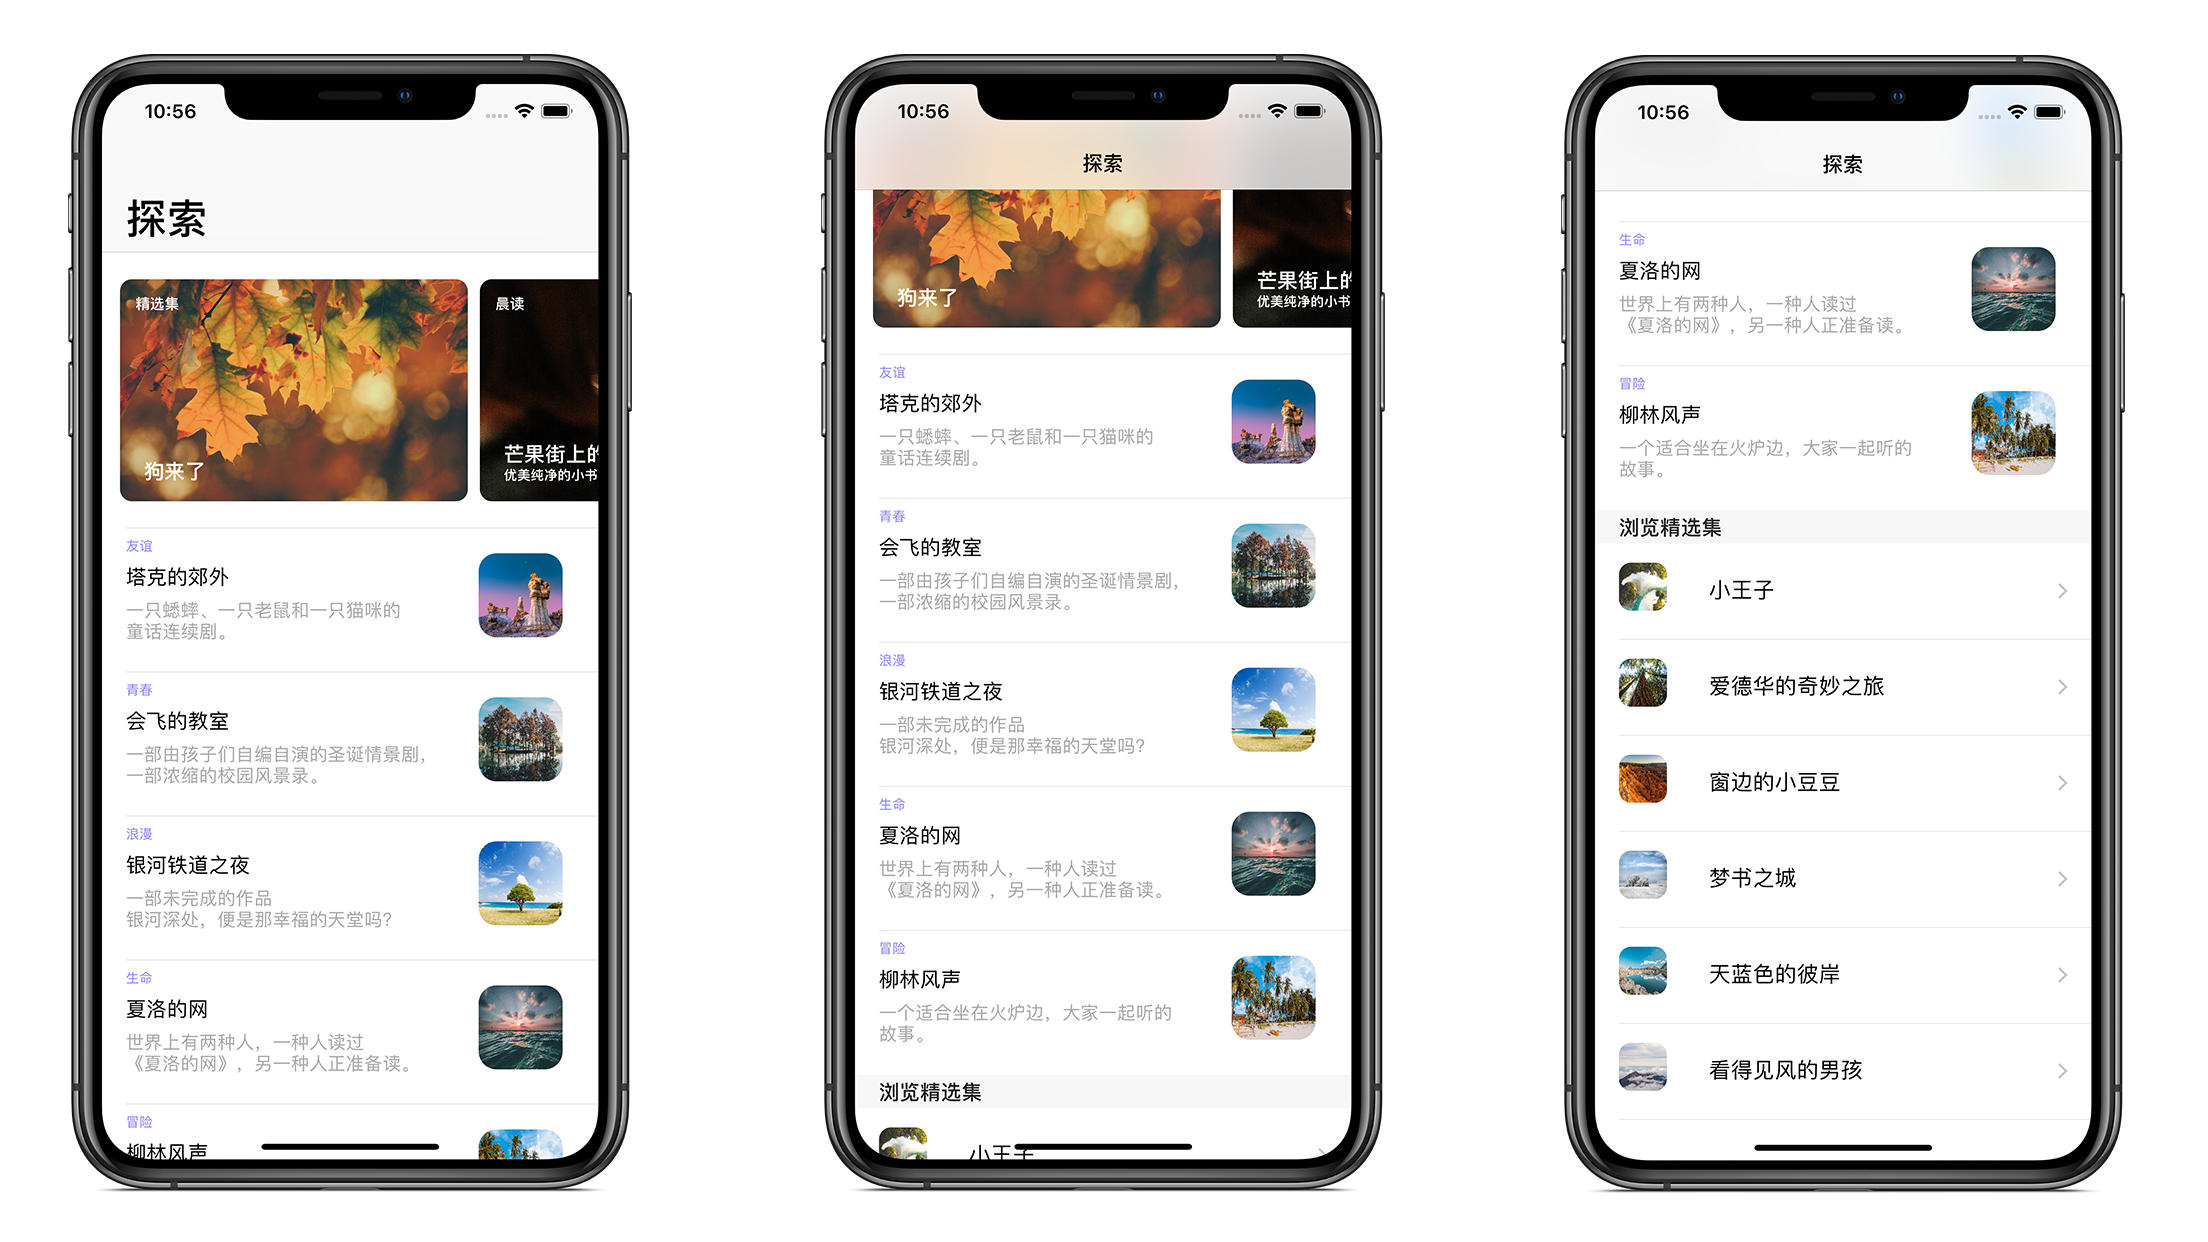
接下來我們就來學習一下吧。
制作集合視圖
我們首先來制作最開始的集合視圖,通過分析圖片,我們知道,我們需要自定義我們的集合視圖,每一個視圖裏面包含了一張照片、一個分類標簽、一個標題以及一個副標題(副標題可以沒有)。
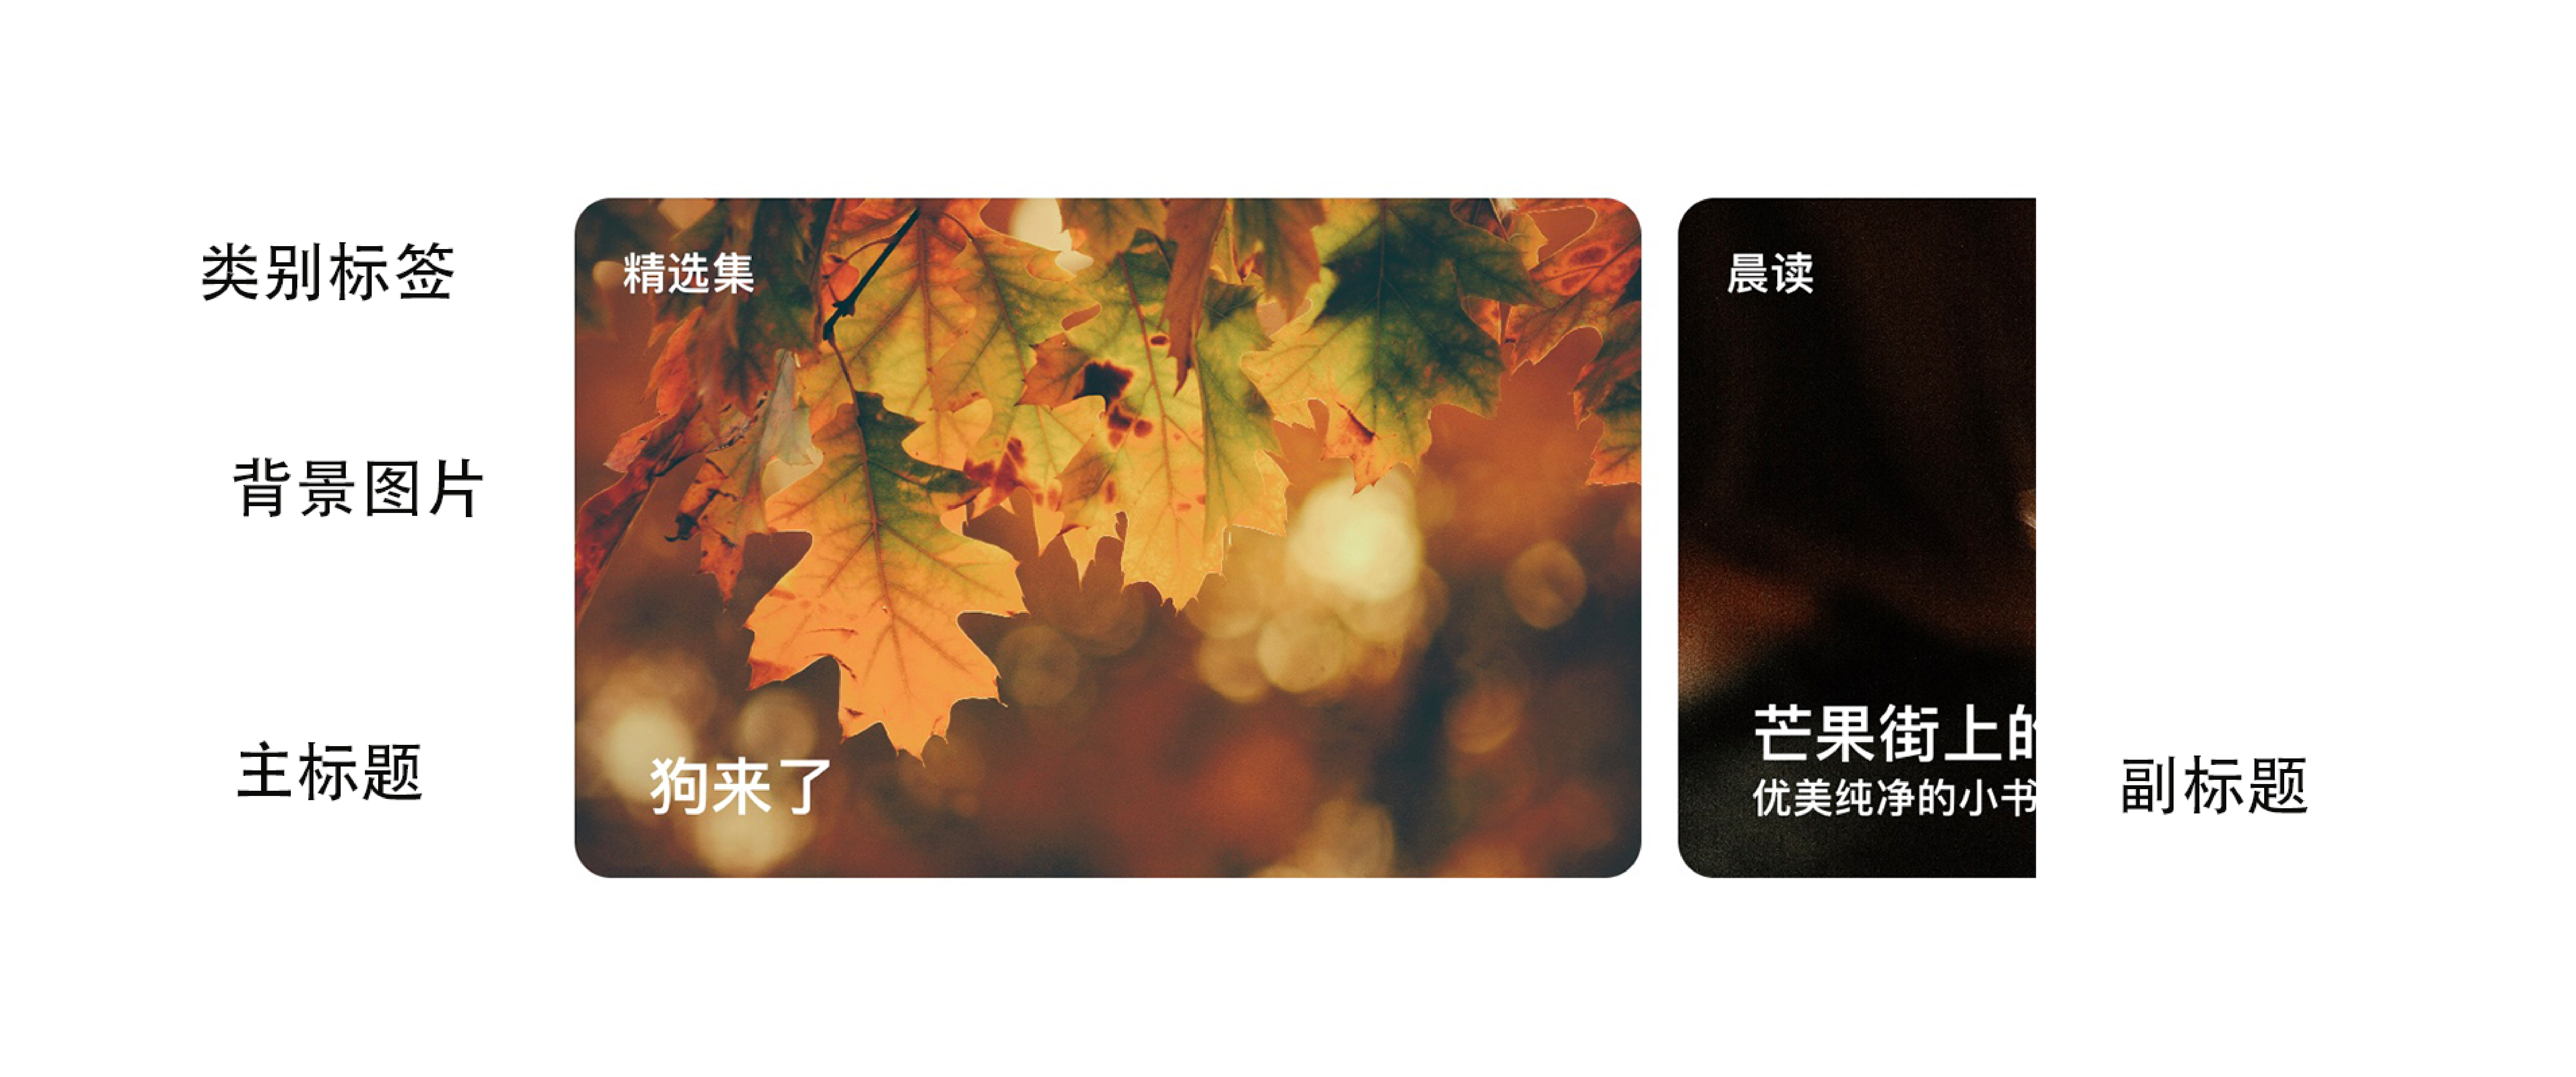
1. 添加 TableViewController
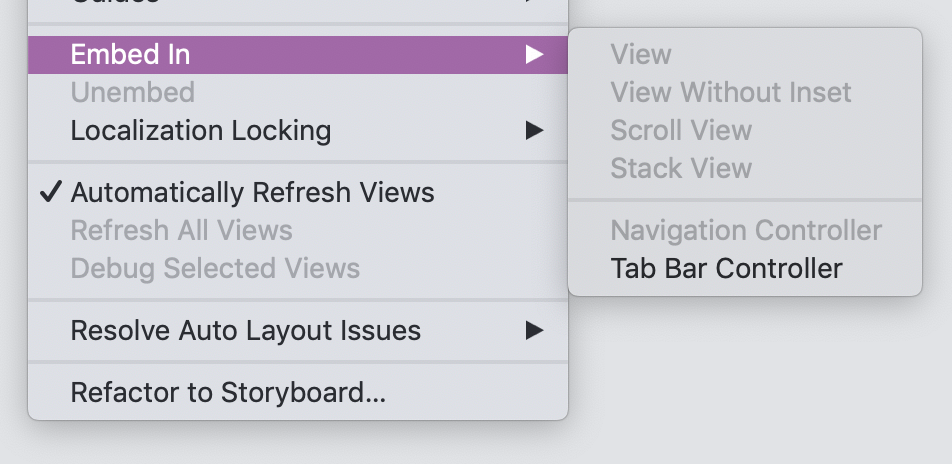
我們先在 storyboard 裏面添加一個 TableViewController,將它設為 “is initial View Controller“。然後選擇 Editor -> Embed in -> Navigation Controller。
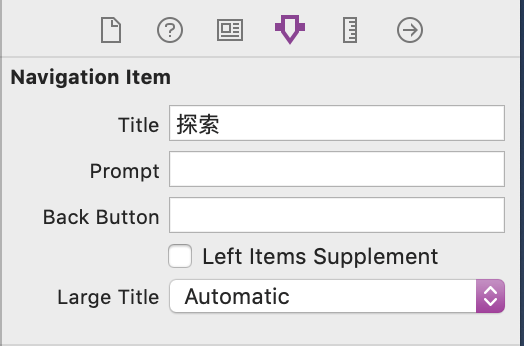
點擊 Navigation Controller,將標題設為大標題,接著點擊 tableView Controller 上的 Navigation Item,修改其標題為探索。
接著點擊 TableView 的介面,打開 Attributes inspector 介面將 content 參數修改為 Static Cells,同時將 Section 參數修改為 3。
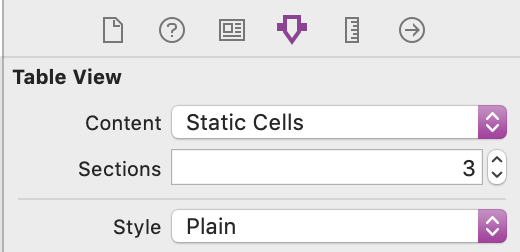
我們要使用靜態的 cell 來完成任務,第一步就是在第一個 section 裏面完成集合視圖的描繪。
打開第一個 TableView Cell 的 Size inspector,將 Row Height 修改為 230。
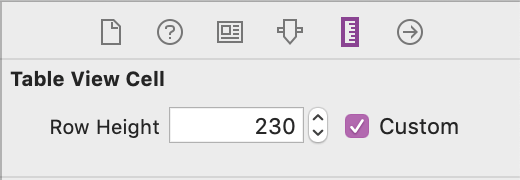
不要忘記給你的 TableView 故事面板添加類別。我這邊用的是 TableViewController.swift 來進行 TableViewController 的操作。
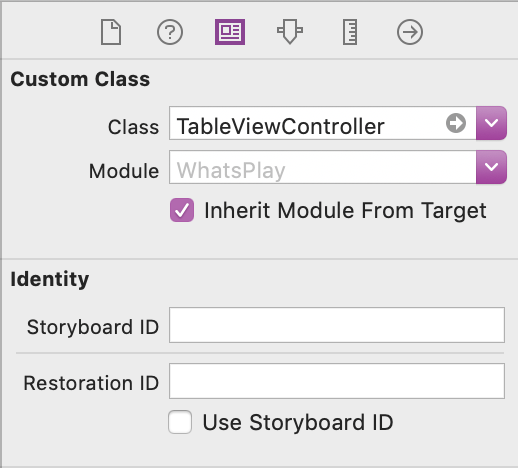
2. 給 Cell 添加 View
接著從 Library 裏面拖出一個 View 控件,放在第一個 Cell 上面。

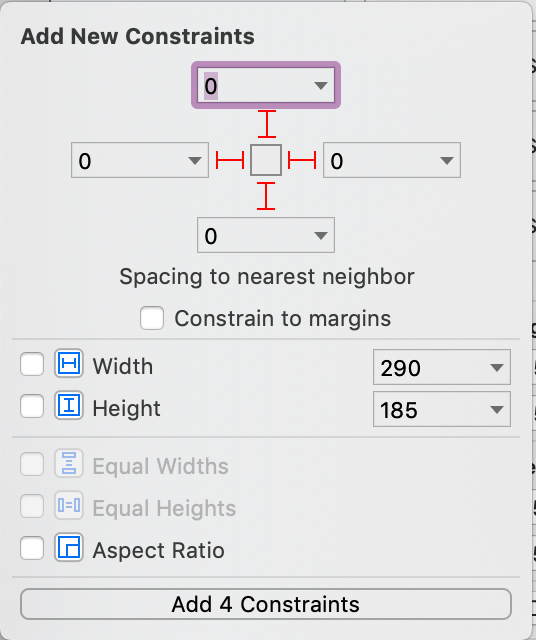
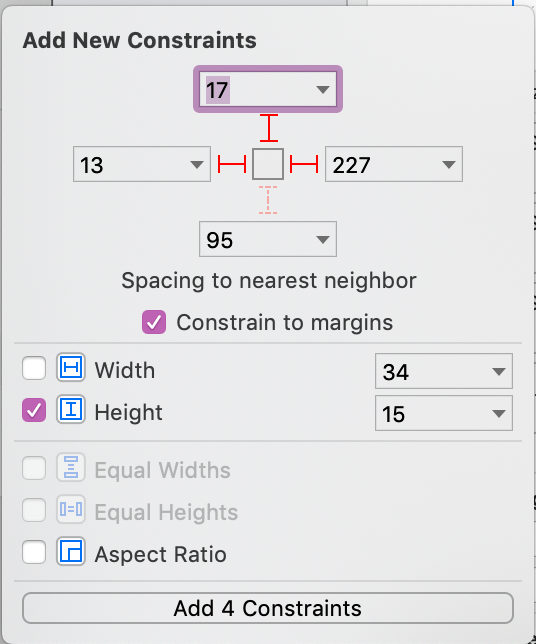
接著給 View 控件添加新的約束。
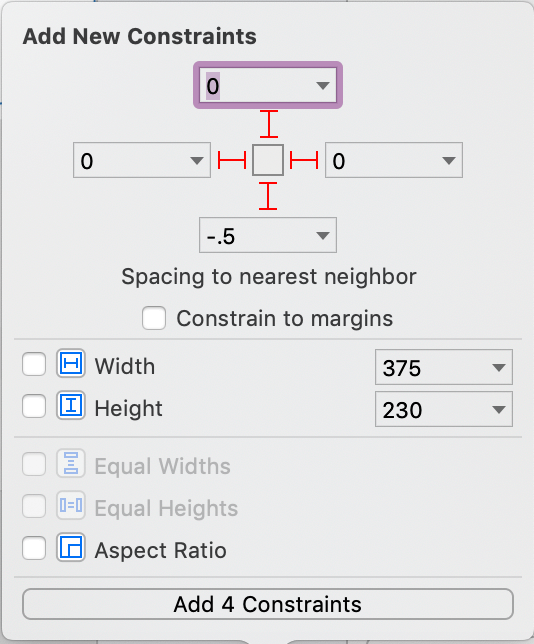
3. 給 Cell 添加 Collection View
接著,從 Library 裏面拖出 Collection View 控件,將它放在 View 上面。

像剛剛 View 一樣設置相同的約束即可,同時我們要將集合視圖的滾動方向修改為水平方向。在 Attributes inspector 裏面找到 Scroll Direction,將它修改為 Horizontal。
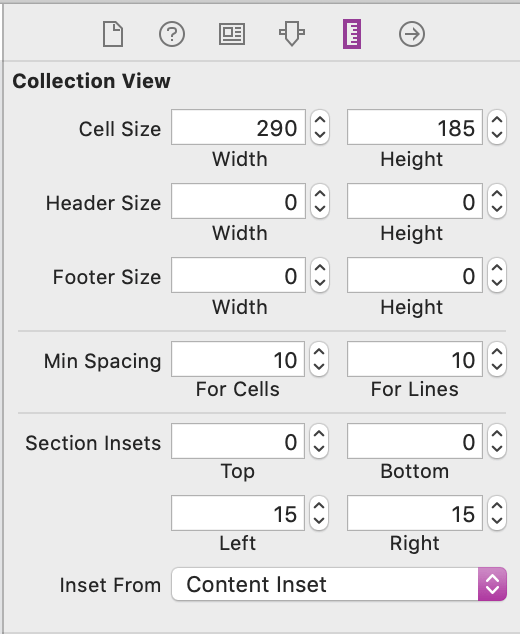
接著在 Size inspector 裏面將 Cell size 修改為 Width:290,height:185。在 Section insets 裏面修改 Left 為 15,right 為 15。
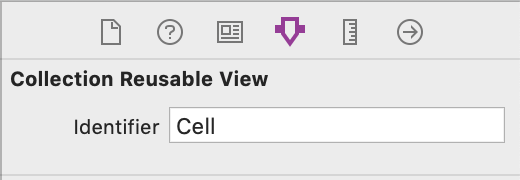
最重要的一步:點擊 Cell,打開 Attributes inspector,找到 Collection Reusable View,在 Identifier 後面寫上 Cell。
4. 添加照片控件
在 Library 裏面找到 imageView,將它拖到 Collection Cell 上面,設置它的約束。
5. 添加類別標簽與主副標題標簽
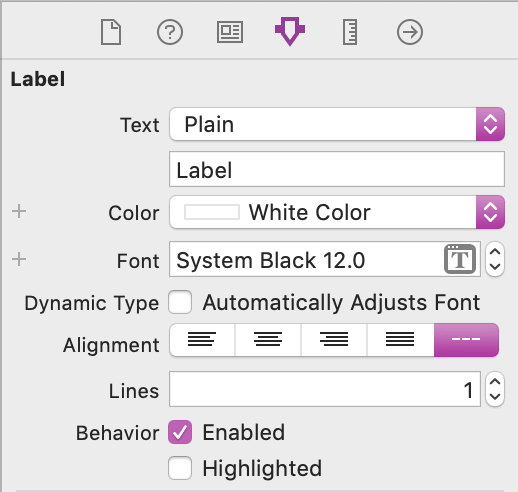
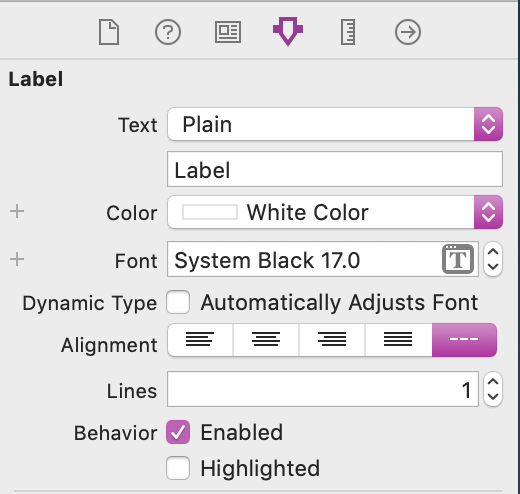
我們先來添加類別標簽。從 library 裏面拖出來一個 Label,將它拖到 imageView 上面,修改 Label 的字體和顏色等相關參數,參考示例圖片。
同樣的,給它添加一些約束。
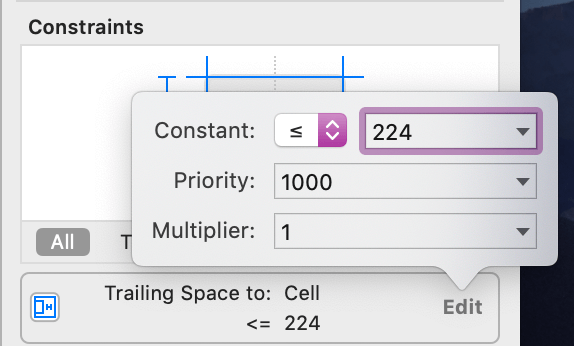
此時要注意:我們為了保證 label 可以隨著我們寫的字數而有彈性變化,就需要修改它距離 Cell 最右側的距離,我們將它修改為小於等於。
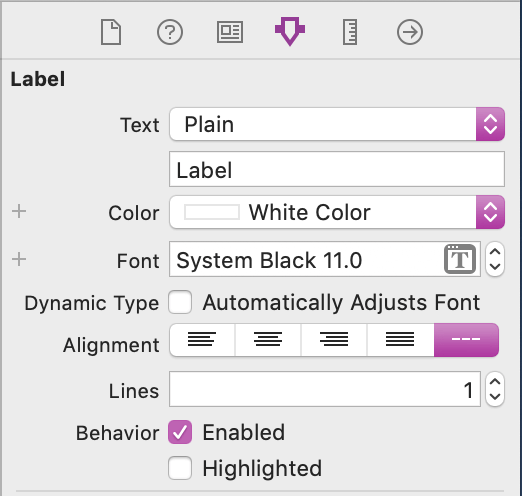
接著是我們的主副標題。拖動兩個 label 到 imageView 的左下角,將每一個 label 的顏色修改為白色,同時也根據你的想法修改字體。當然,你也可以參考我的。
接著,我們來考慮一個小細節。如果某一個 collection cell 它沒有副標題,那麽在 iPhone 上面展示的時候,副標題那一欄是沒有字的,只有主標題有字。在美觀方面,沒有副標題的那一個 Cell,它的主標題離cell的最下方比較遠,這樣並不適合。我們希望在沒有副標題的時候,主標題可以適當地下移幾公分,這樣會顯得比較好看。如圖可以看出不同之處。
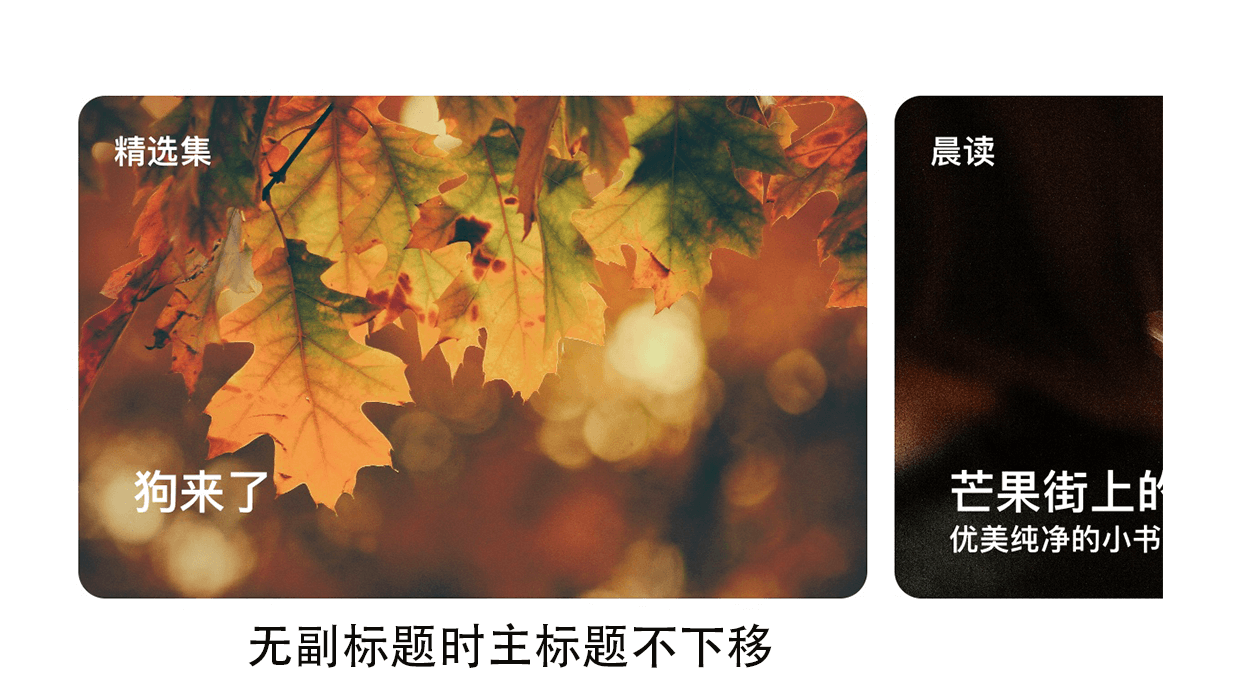

為了實現第二張圖片的功能,我們可以使用 Stack View 來完成。
按住 command 按鈕,選擇主標題 label 和副標題 label,選擇 embed in -> Stack View。
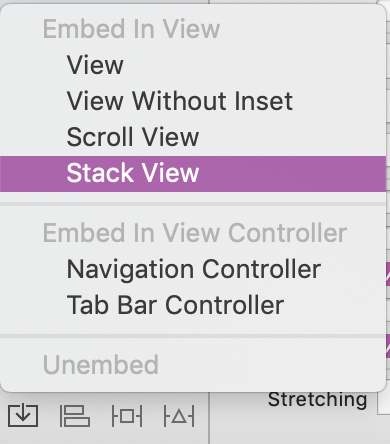
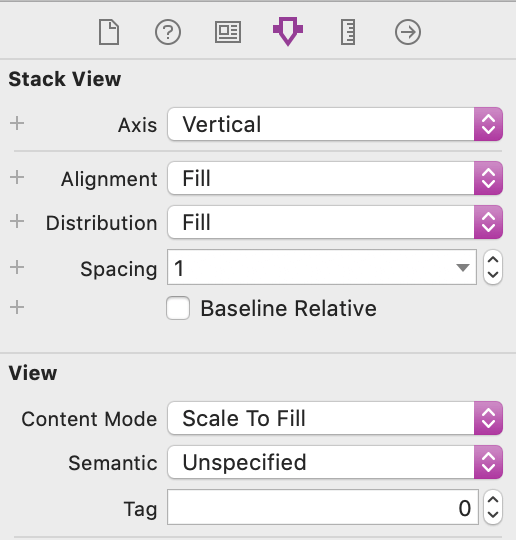
選中我們的 Stack View,打開 Attributes inspector -> View -> Content Mode -> Scale To Fill。同時將 Spacing 修改為 1。
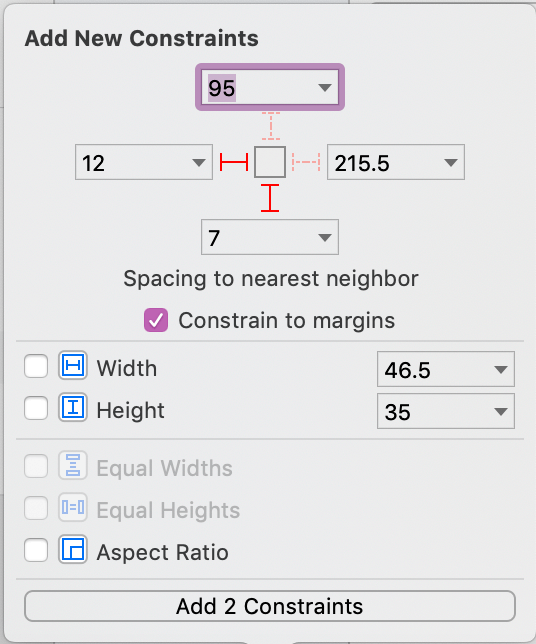
接著我們給它添加約束,只需要添加兩個約束就可以了,位置你可以自己選擇。
到此,我們 Collection View 的介面制作就完成了。此時你的 storyboard 裏面第一個 section 的介面應該和我的一樣。
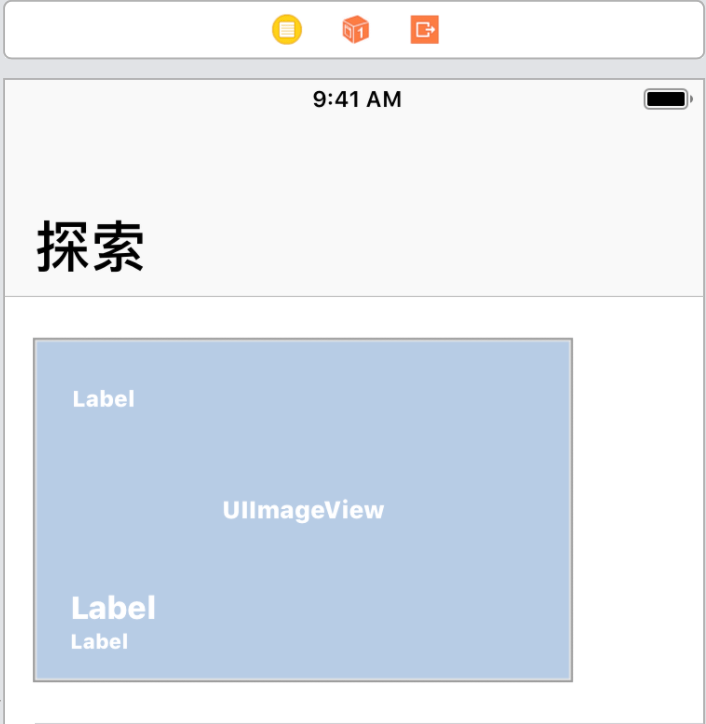
展示集合視圖的數據
下面我們來使用代碼實現集合視圖。要想實現展示數據的功能,我們需要數據源,其中所使用的圖片,你可以從 Unsplash 裏面找到。
1. 創建集合視圖數據源
新建一個 Swift 文件(command + N 即可),選擇 Swift File,點擊 Next,給它命名為 imageCollection。
打開你剛剛創建的 imageCollection.swift 文件,往裏面添加一個結構體。
import UIKit

struct imageViewCollection {
    var image: UIImage?
    var title: String = ""
    var general: String = ""
    var subTitle: String = ""
}
接著,在你的 TableViewController.swift 文件裏面寫上你的數據源:
    /**
     * 第一部分
     * 在tableViewCell裏面添加了一個collectionView,實現了4個collectionCell
     * 每一個cell裏面有一個標題,副標題,背景圖片以及分類標簽
     */

    private var images = [imageViewCollection(image: UIImage(named: "1"), title: "狗來了", general: "精選集", subTitle: ""), imageViewCollection(image: UIImage(named: "2"), title: "芒果街上的小屋", general: "晨讀",subTitle: "優美純凈的小書"), imageViewCollection(image: UIImage(named: "4"), title: "吹小號的天鵝", general: "睡前故事",subTitle: ""), imageViewCollection(image: UIImage(named: "3"), title: "時代廣場的蟋蟀", general: "下午茶",subTitle: "生命之間愛和關懷的故事")]
為了實現展示的功能,你還需要給你的 TableViewController 添加上 collection 的父類:UICollectionViewDelegate 和 UICollectionViewDataSource。
class TableViewController: UITableViewController,  UICollectionViewDelegate, UICollectionViewDataSource {

    ········

}
2. 添加 imageViewController.swift 文件
新建一個 swift 文件,File -> New -> File(或者 command + N),選擇 Cocoa Touch Class,
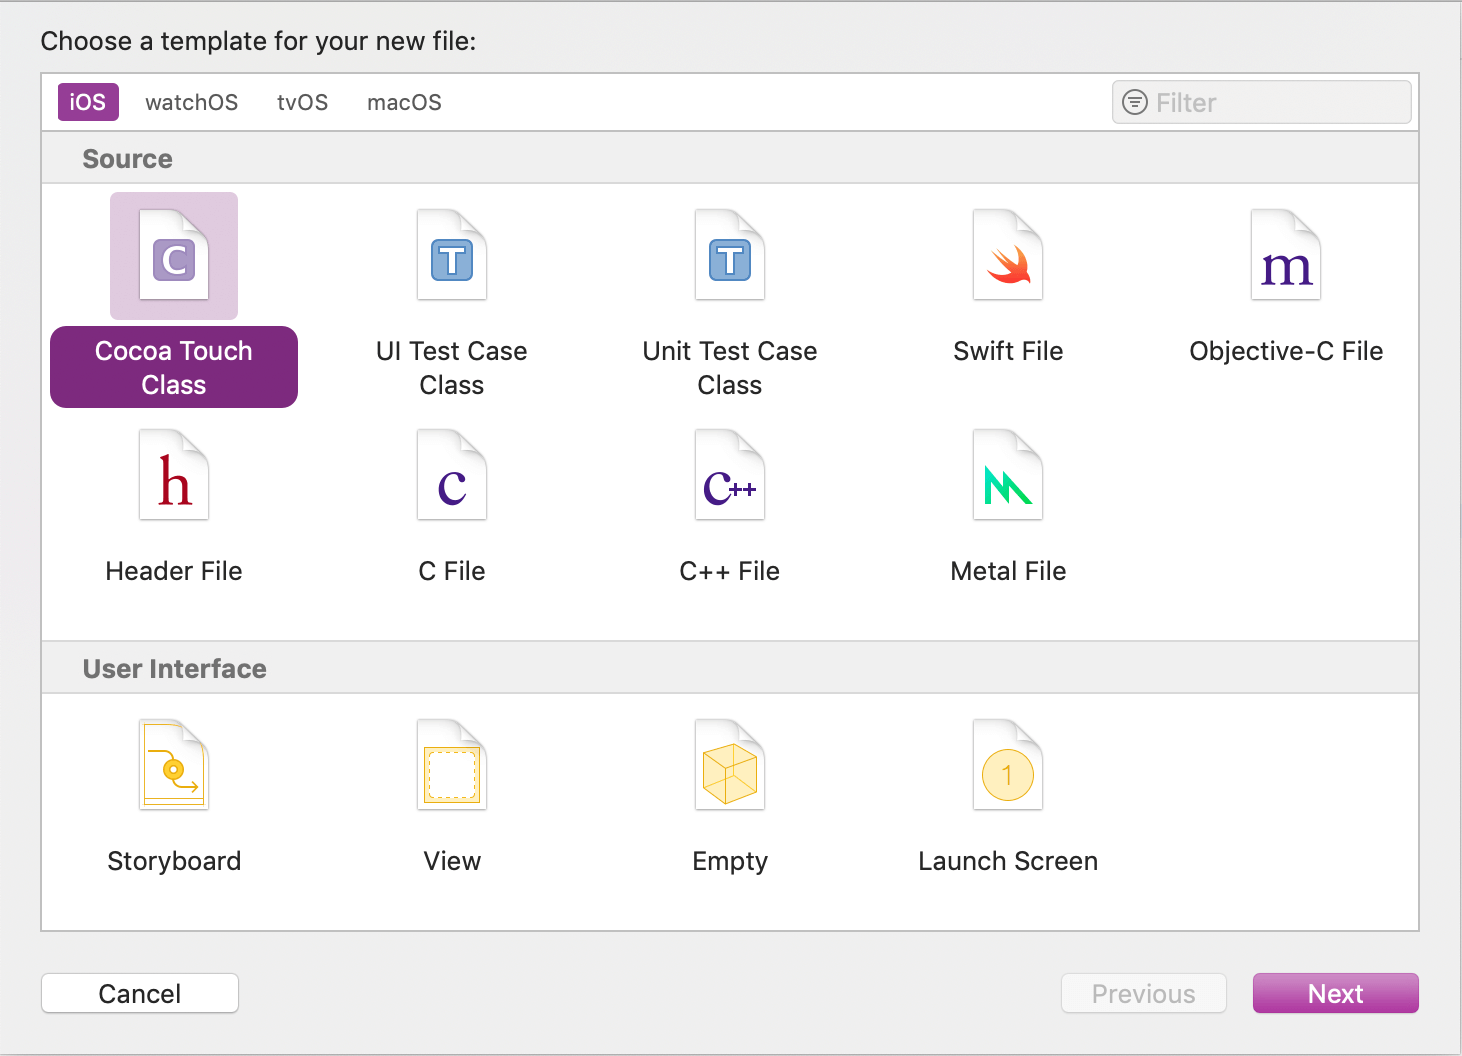
點擊 Next,選擇以 UITableViewCell 為父類,新建類的名字為 imageViewControllerTableViewCell。
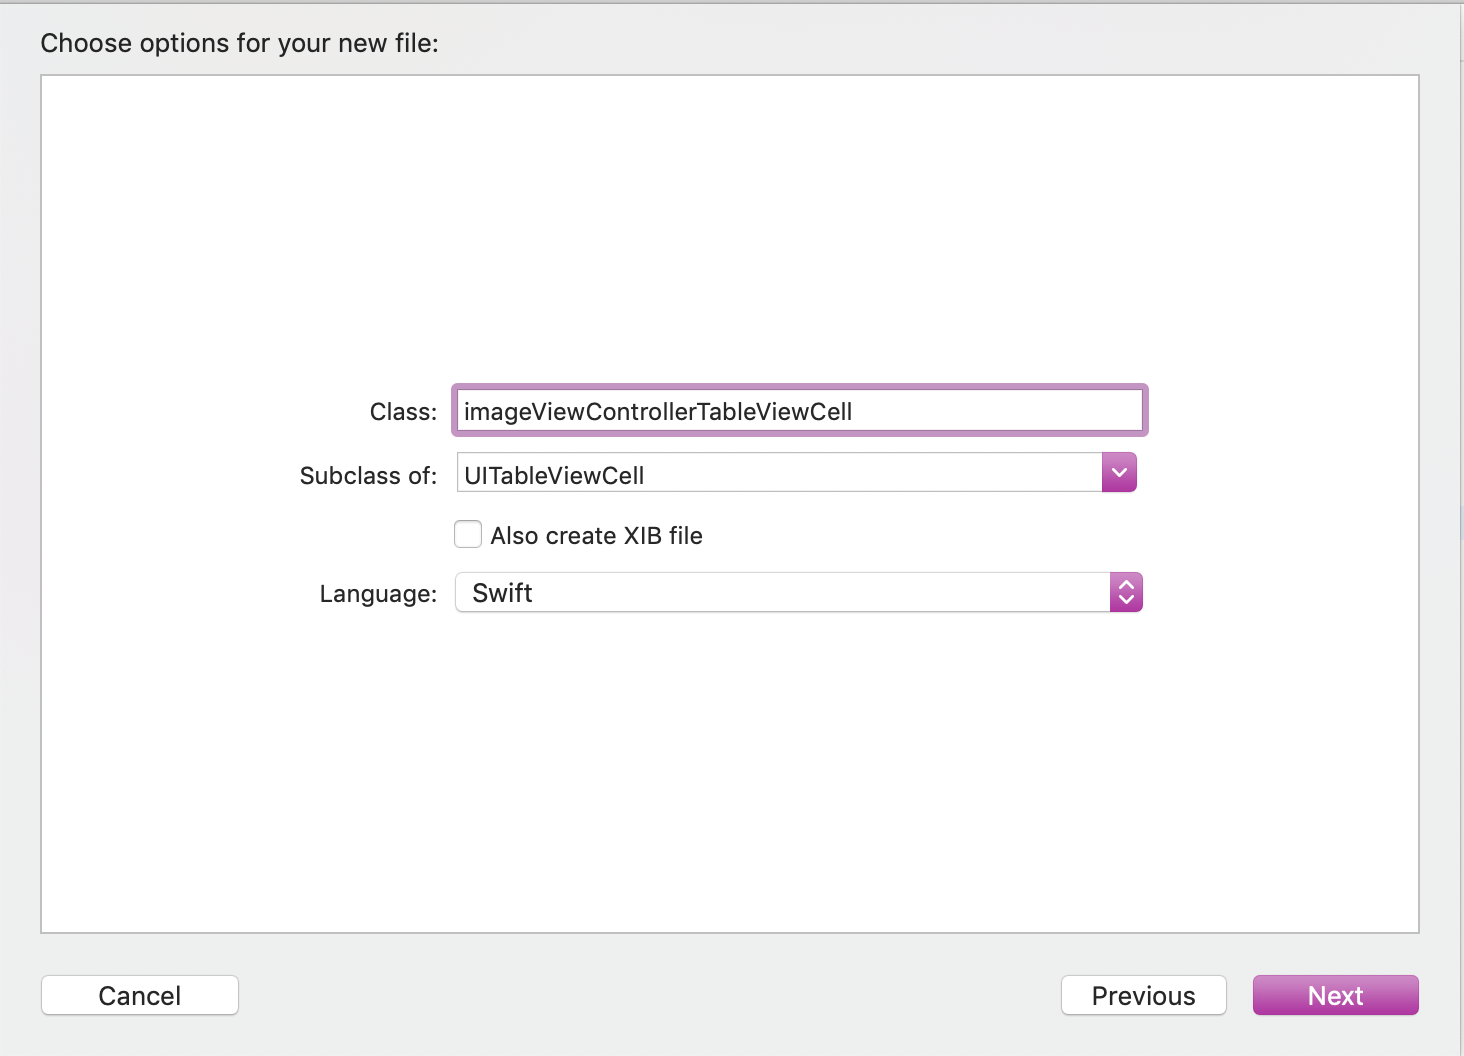
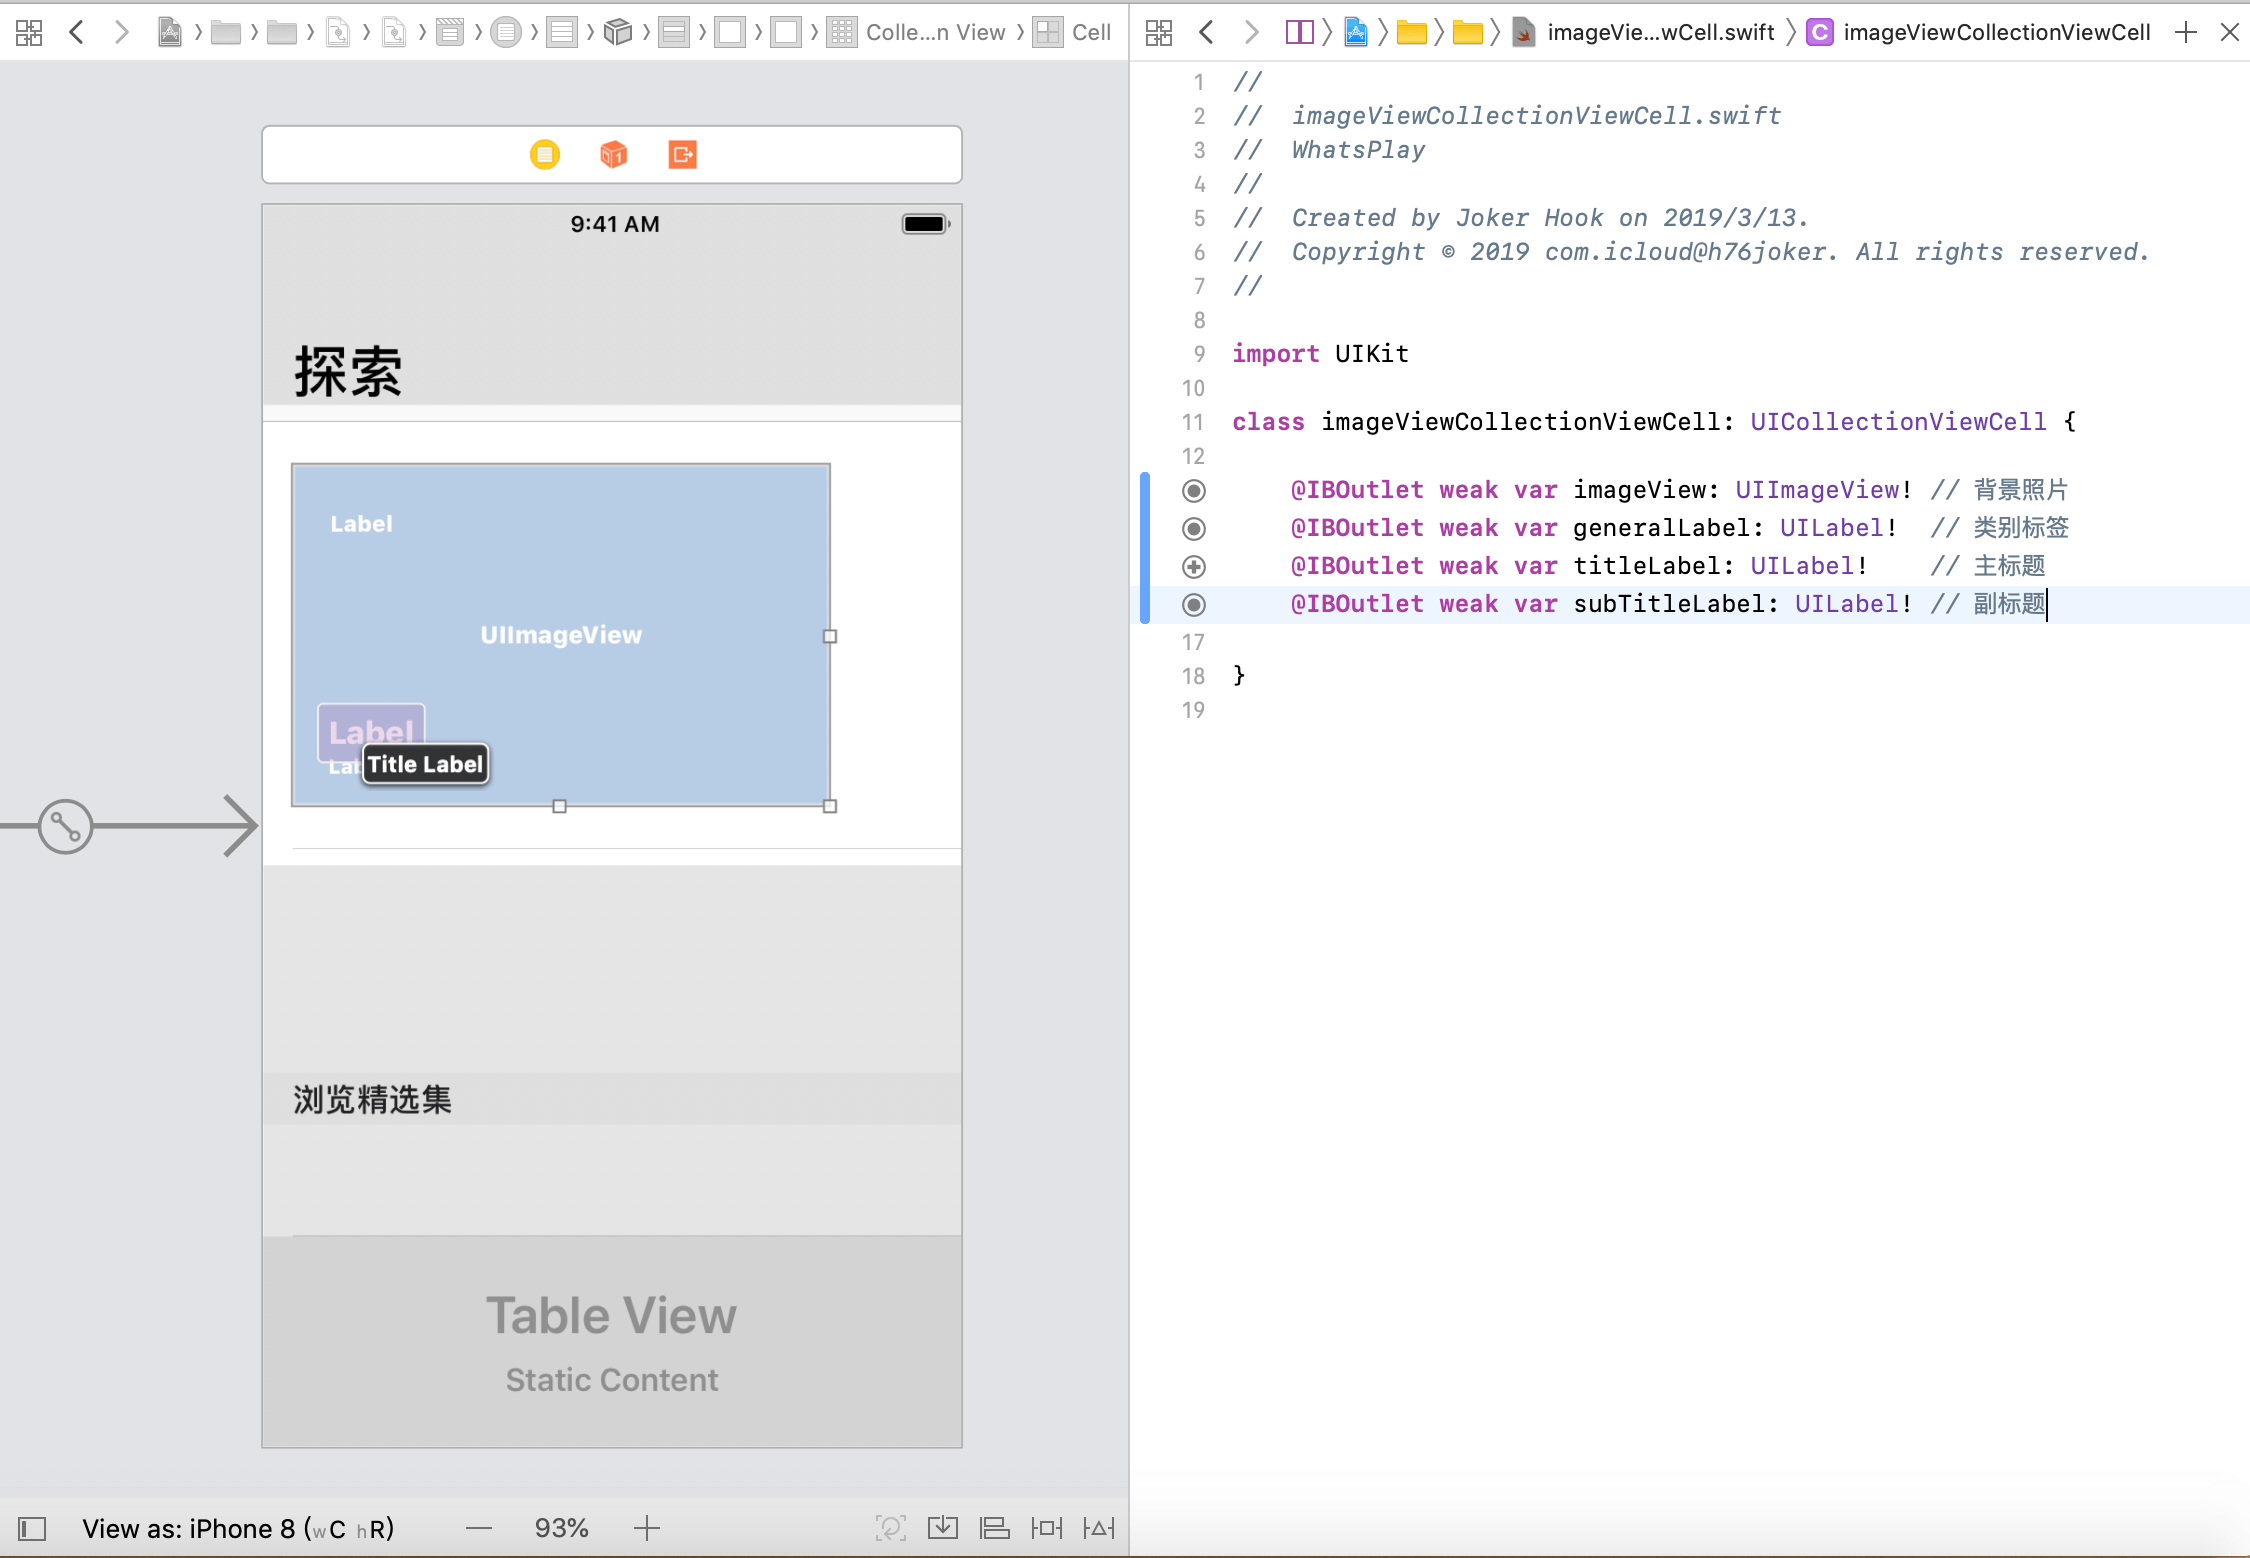
打開剛剛創建的 imageViewControllerTableViewCell.swift 文件,在裏面寫上幾個變量:
@IBOutlet weak var imageView: UIImageView! // 背景照片
@IBOutlet weak var generalLabel: UILabel!  // 類別標簽
@IBOutlet weak var titleLabel: UILabel!    // 主標題
@IBOutlet weak var subTitleLabel: UILabel! // 副標題
同時打開我們的 Main.storyboard 和 imageViewControllerTableViewCell.swift 文件,按住 control,將上述聲明的變量和故事面板裏的控件一一連線。
3. 展示我們的數據
我們還需要告訴 iPhone 我們要展示多少個集合,對此,我們在 TableViewController 裏面添加上:
func collectionView(_ collectionView: UICollectionView, numberOfItemsInSection section: Int) -> Int {
    return images.count
}

func numberOfSections(in collectionView: UICollectionView) -> Int {
    return 1
}
接著,在 TableViewController.swift 文件裏面聲明一個 collectionView 變量:
@IBOutlet weak var collectionView: UICollectionView! {
    didSet {
        collectionView.backgroundColor = .clear
    }
}
和剛剛的操作一樣,將這個變量和故事面板裏的 CollectionView 連線。
為了實現展示數據的功能,我們可以像 tableView 那樣來做,在類方法 collectionView(:cellForItemAt:) 裏面進行操作:
func collectionView(_ collectionView: UICollectionView, cellForItemAt indexPath: IndexPath) -> UICollectionViewCell {
        let cell = collectionView.dequeueReusableCell(withReuseIdentifier: "Cell", for: indexPath) as! imageViewCollectionViewCell

        cell.imageView.image = images[indexPath.row].image
        cell.generalLabel.text = images[indexPath.row].general
        cell.titleLabel.text = images[indexPath.row].title
        cell.subTitleLabel.text = images[indexPath.row].subTitle

        if images[indexPath.row].subTitle == "" {
            cell.subTitleLabel.isHidden = true
            //cell.subTitleLabel.text = "   " // 這樣就可以看到美觀感
        }

        cell.layer.cornerRadius = 10.0
        cell.layer.masksToBounds = true

        return cell
    }
如果你現在去運行的話,你不會看到數據,我們還需要指定數據源在哪裏。在 viewDidLoad() 裏面加上兩句話:
override func viewDidLoad() {
    super.viewDidLoad()
    collectionView.delegate = self
    collectionView.dataSource = self
}
此時,你再去運行,你會發現 collectionView 可以工作了。
添加表格視圖
第二部分和第三部分其實思路是一樣的,都是為了達到 static cell 與 dynamic cell 混合使用的目的。
1. storyboard 準備工作
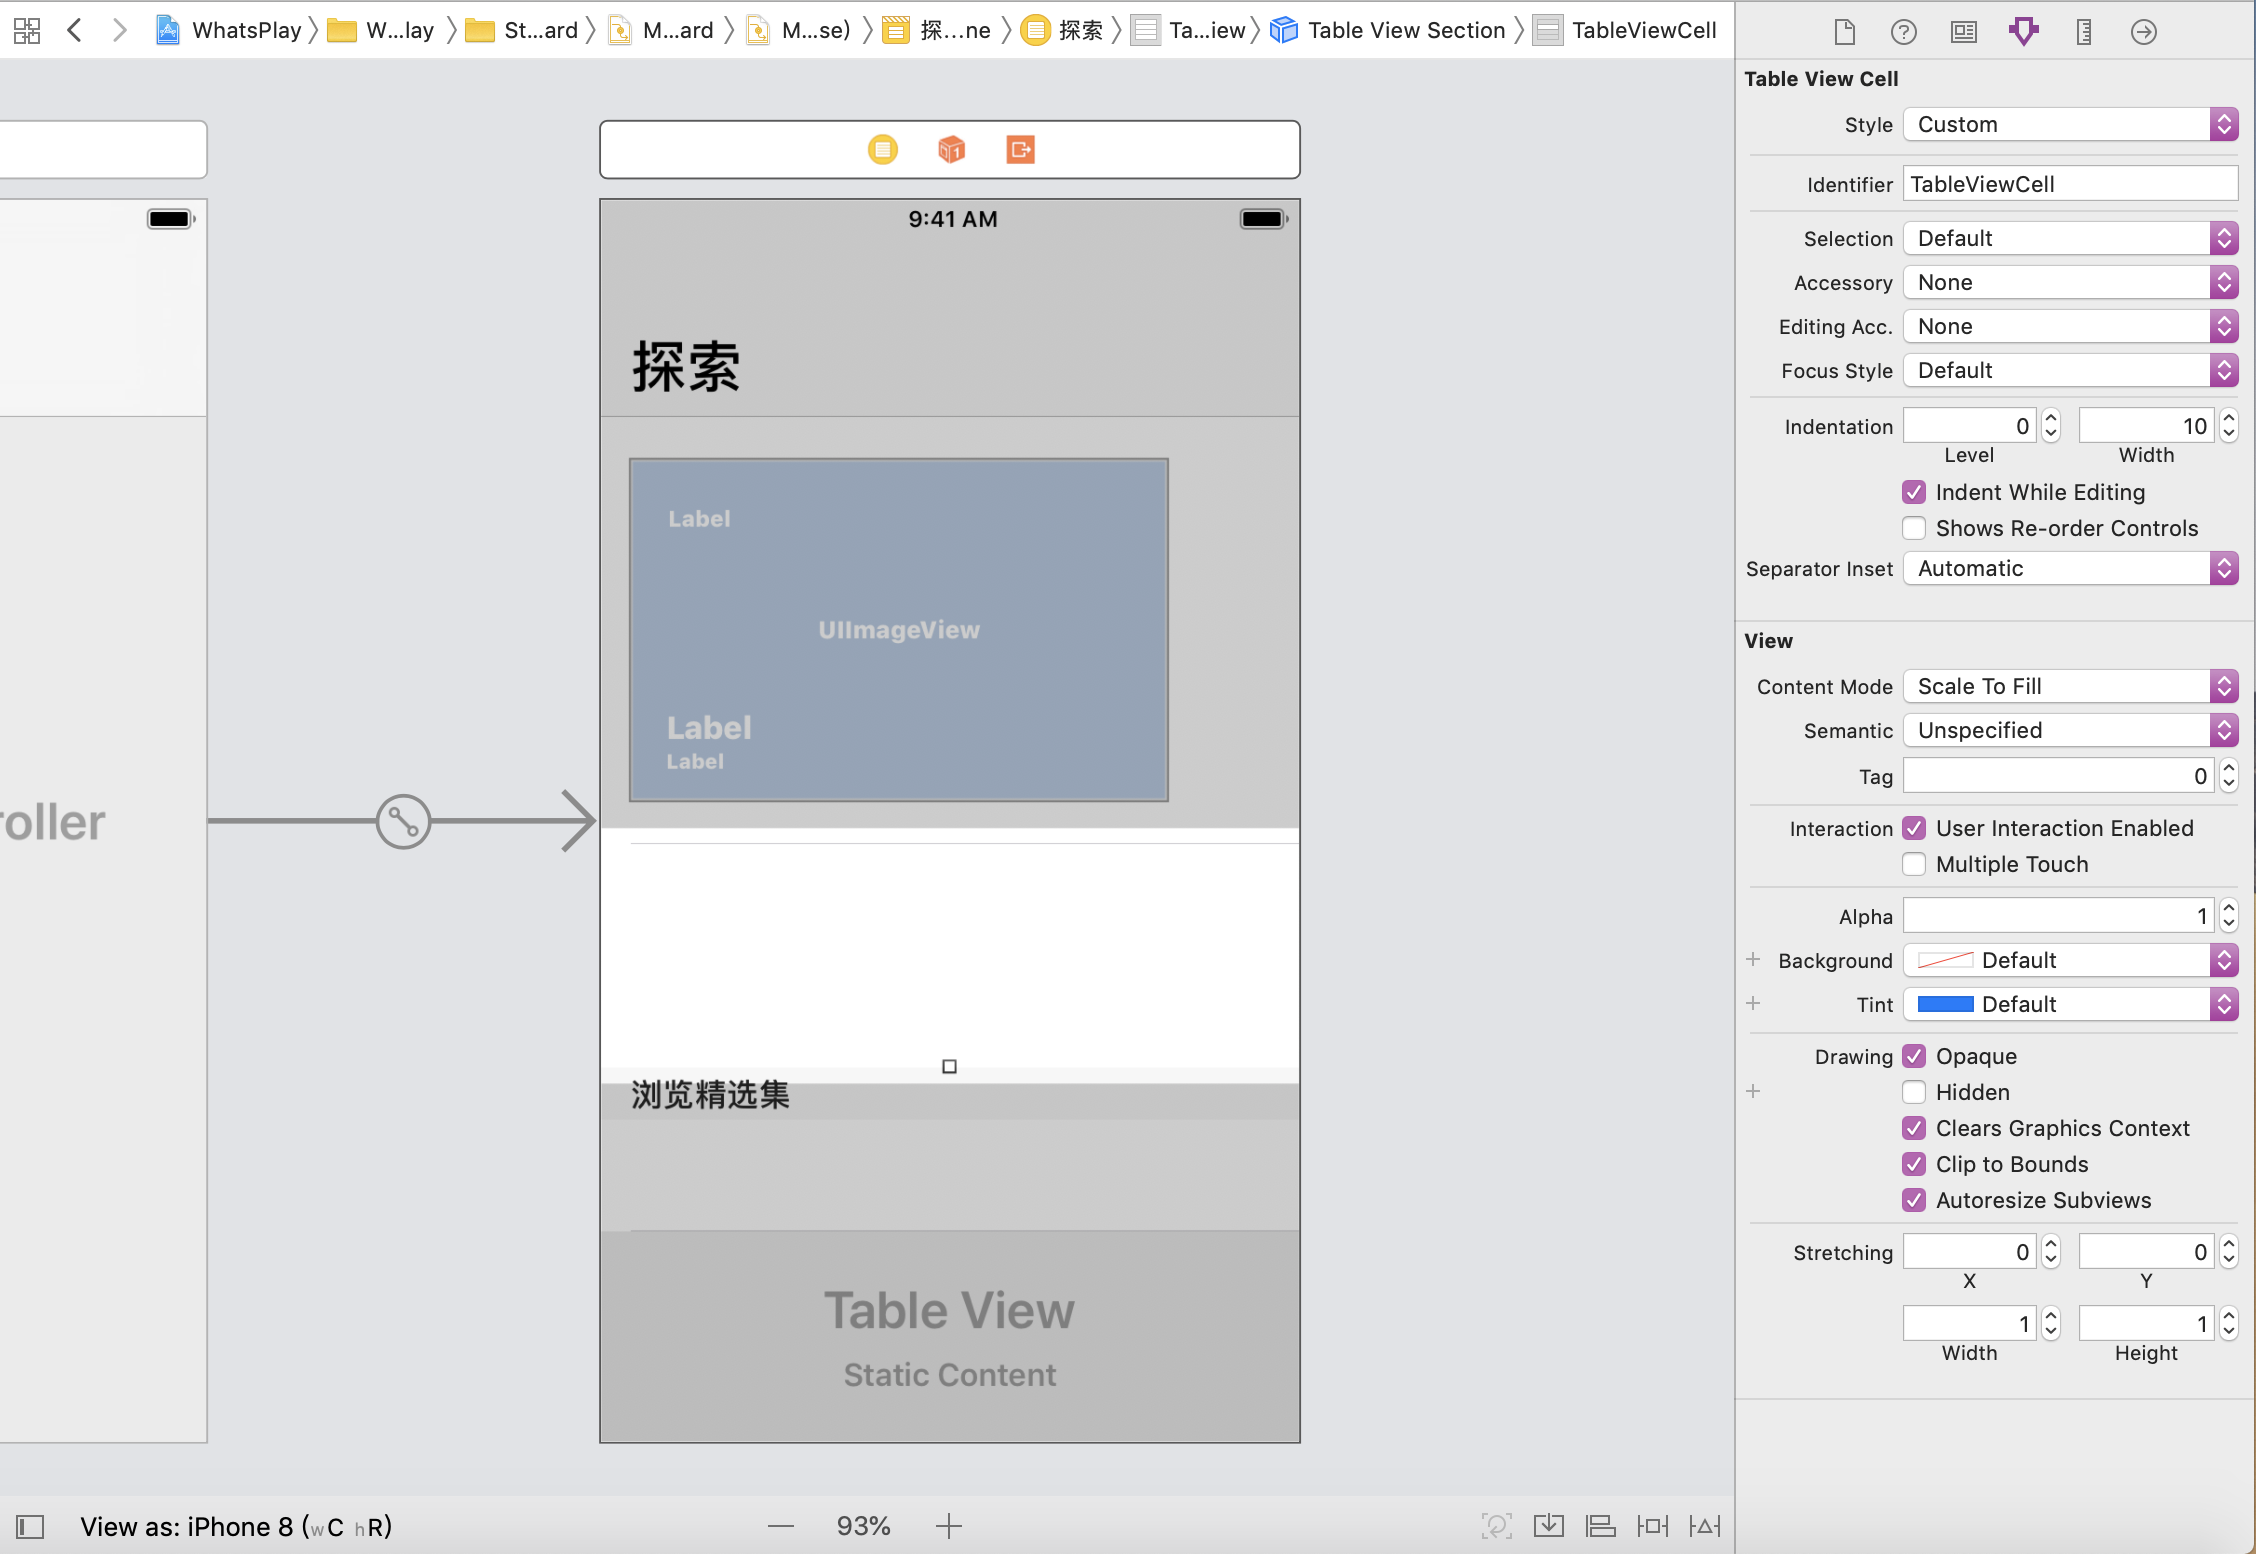
打開我們的故事面板,點擊一開始創建三個 Section 裏的第二個 section,將它的高度修改為 120,然後,給第二組的空白 Cell 設置 identifier 值,如圖,我將它設為 TableViewCell:
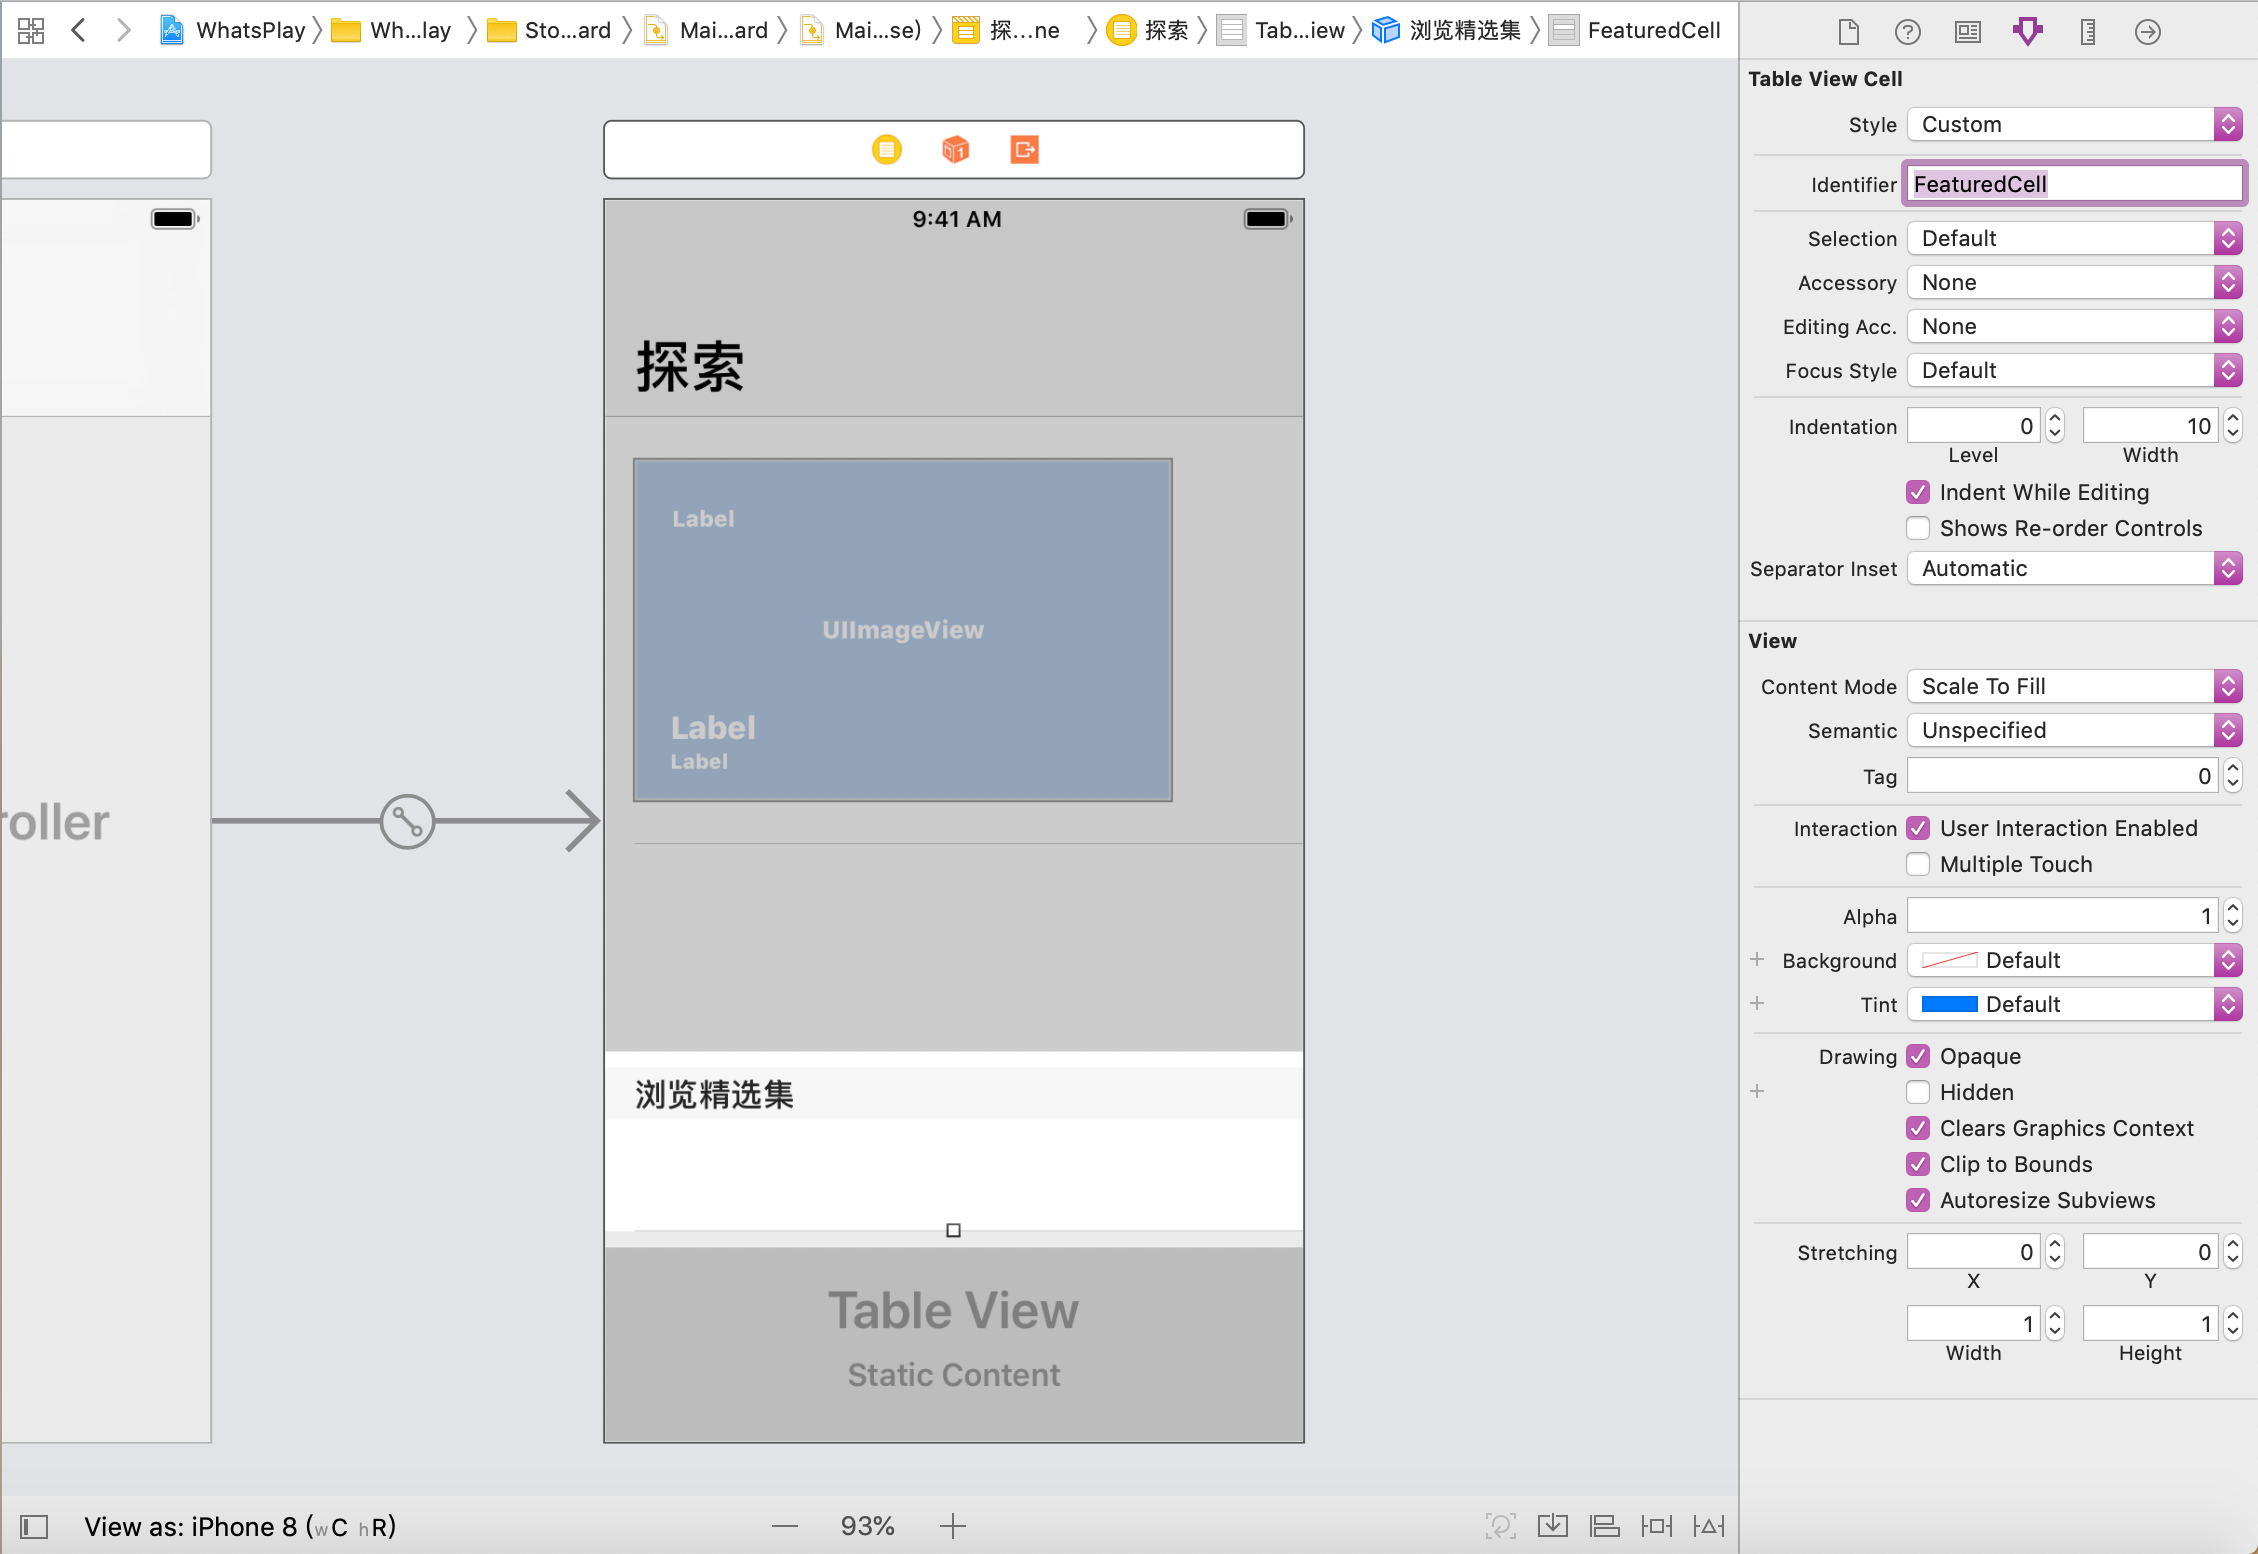
同樣的,給第三個 section 寫一個 Header,將它命名為瀏覽精選集,將它的高度修改為 60,給第三組的空白 Cell 設置 identifier 值,我將它設置為 FeaturedCell:
2. 創建第二部分的 Xib 文件
由於第二組和第三組的 section 需要自定義 cell,使用這裏使用 XIB 來完成。
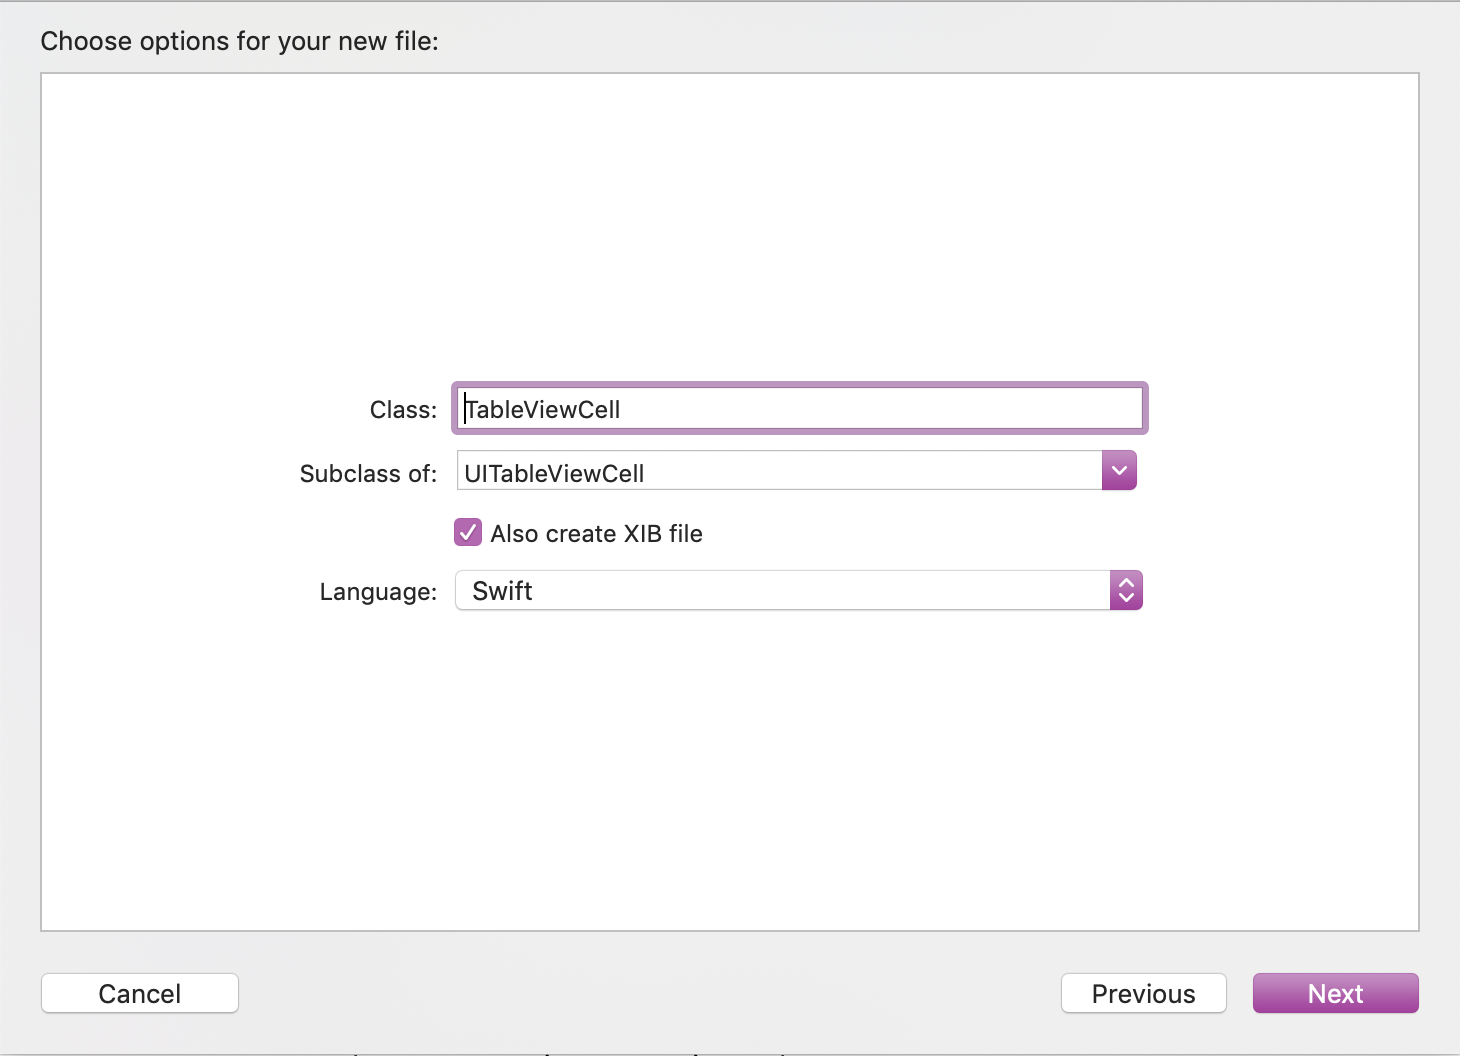
我們先來自定義第二組的 Cell,使用 command + N 快捷鍵,創建一個 TableViewCell 文件,我將它命名為 TableViewCell.swift,注意要勾選 Also Create XIB file:
打開 storyboard,點擊第二個 section 的 Cell,在右側打開 identity inspector,將它的繼承類修改為剛剛創建的 TableViewCell。
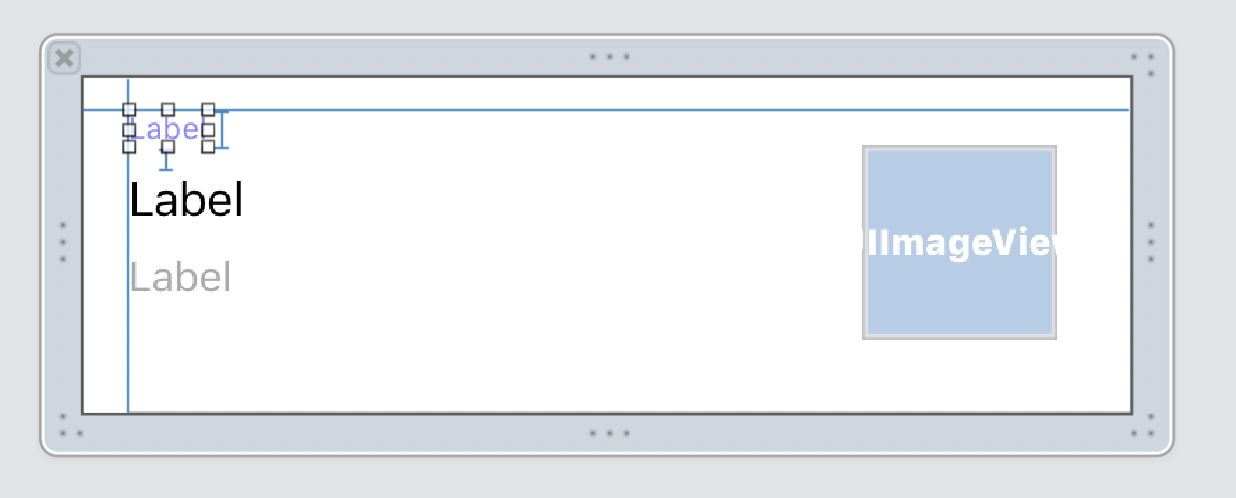
現在,我們來分析看看需要給 Cell 自定義哪一些控件。如圖所示:

打開我們的 Xib 文件,它的操作其實和 Storyboard 一樣,你只需要在 Library 裏面將需要的控件拉到 xib 文件裏面就可以了。佈局的相關知識我就不再囉嗦了,只要佈局和我的差不多就可以:
3. 添加控件代碼
接著,打開 xib 文件對應的 TableViewCell 文件,我們的是 TableViewCell.swift 文件。和上述一些步驟一樣,先在裏面聲明一些變量:
@IBOutlet weak var classLabel: UILabel!  // 類別標簽
@IBOutlet weak var titleLabel: UILabel!  // 主標題
@IBOutlet weak var subTitle: UILabel!    // 副標題
@IBOutlet weak var backgroundImage: UIImageView! {
    didSet {
        backgroundImage.layer.cornerRadius = 15.0  // 設置圓角大小
        backgroundImage.layer.masksToBounds = true
    }
} // 配對圖片
再將它們和 xib 裏面的控件一一連線即可。
接著我們需要在 storyboard 裏面使用這個控件,打開 storyboard 對應的 TableViewController.swift 文件,在裏面註冊一下 NIB,如下:
// 第二組需要自定義cell,這裏使用XIB來完成
let nib = UINib(nibName: "TableViewCell", bundle: nil)
在你的 ViewDidLoad() 裏面添加上代碼:
// 需要用代碼註冊Nib
self.tableView.register(nib, forCellReuseIdentifier: "TableViewCell")
這樣子,第二部分的佈局就差不多結束了。
4. 創建第三部分的 xib 文件
第三部分和第二部分差不多,創建方式一模一樣,只是控件的佈局不一樣。
新建一個 TableViewCell 文件,我將它命名為 FeaturedTableViewCell,勾選創建 Xib 文件的選項。
像第二個 Section 一樣,我們對它進行佈局等一系列操作:
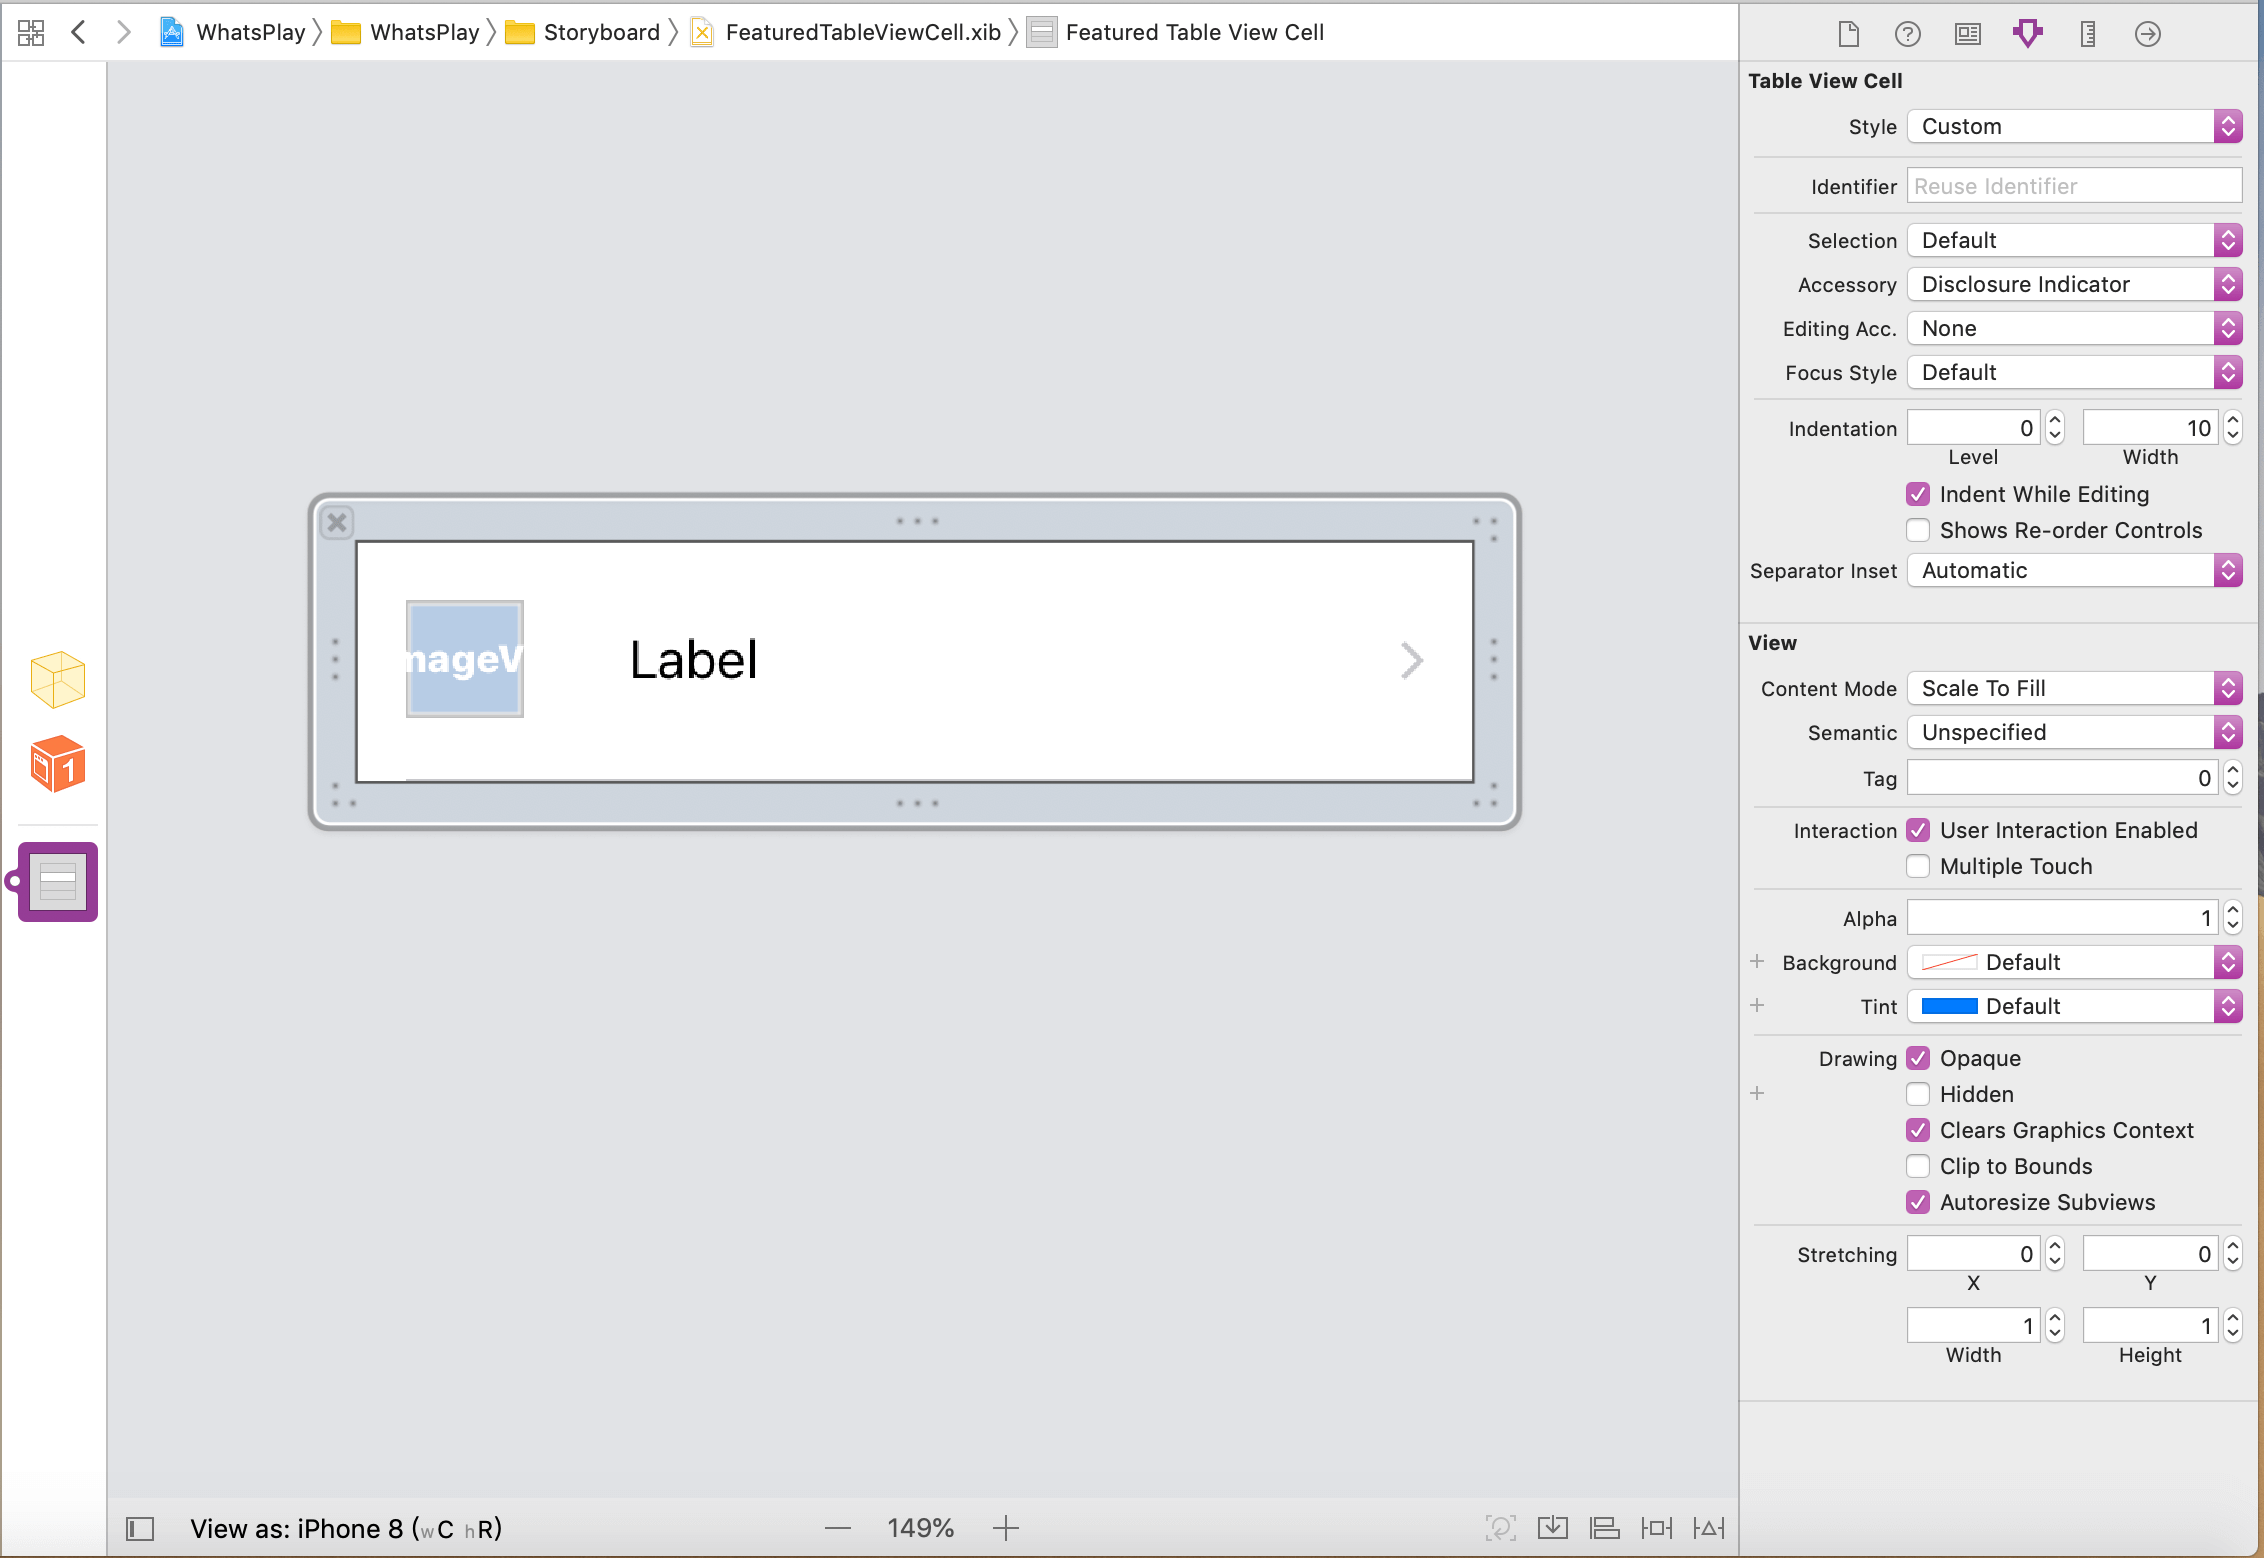
編寫好控件的代碼:
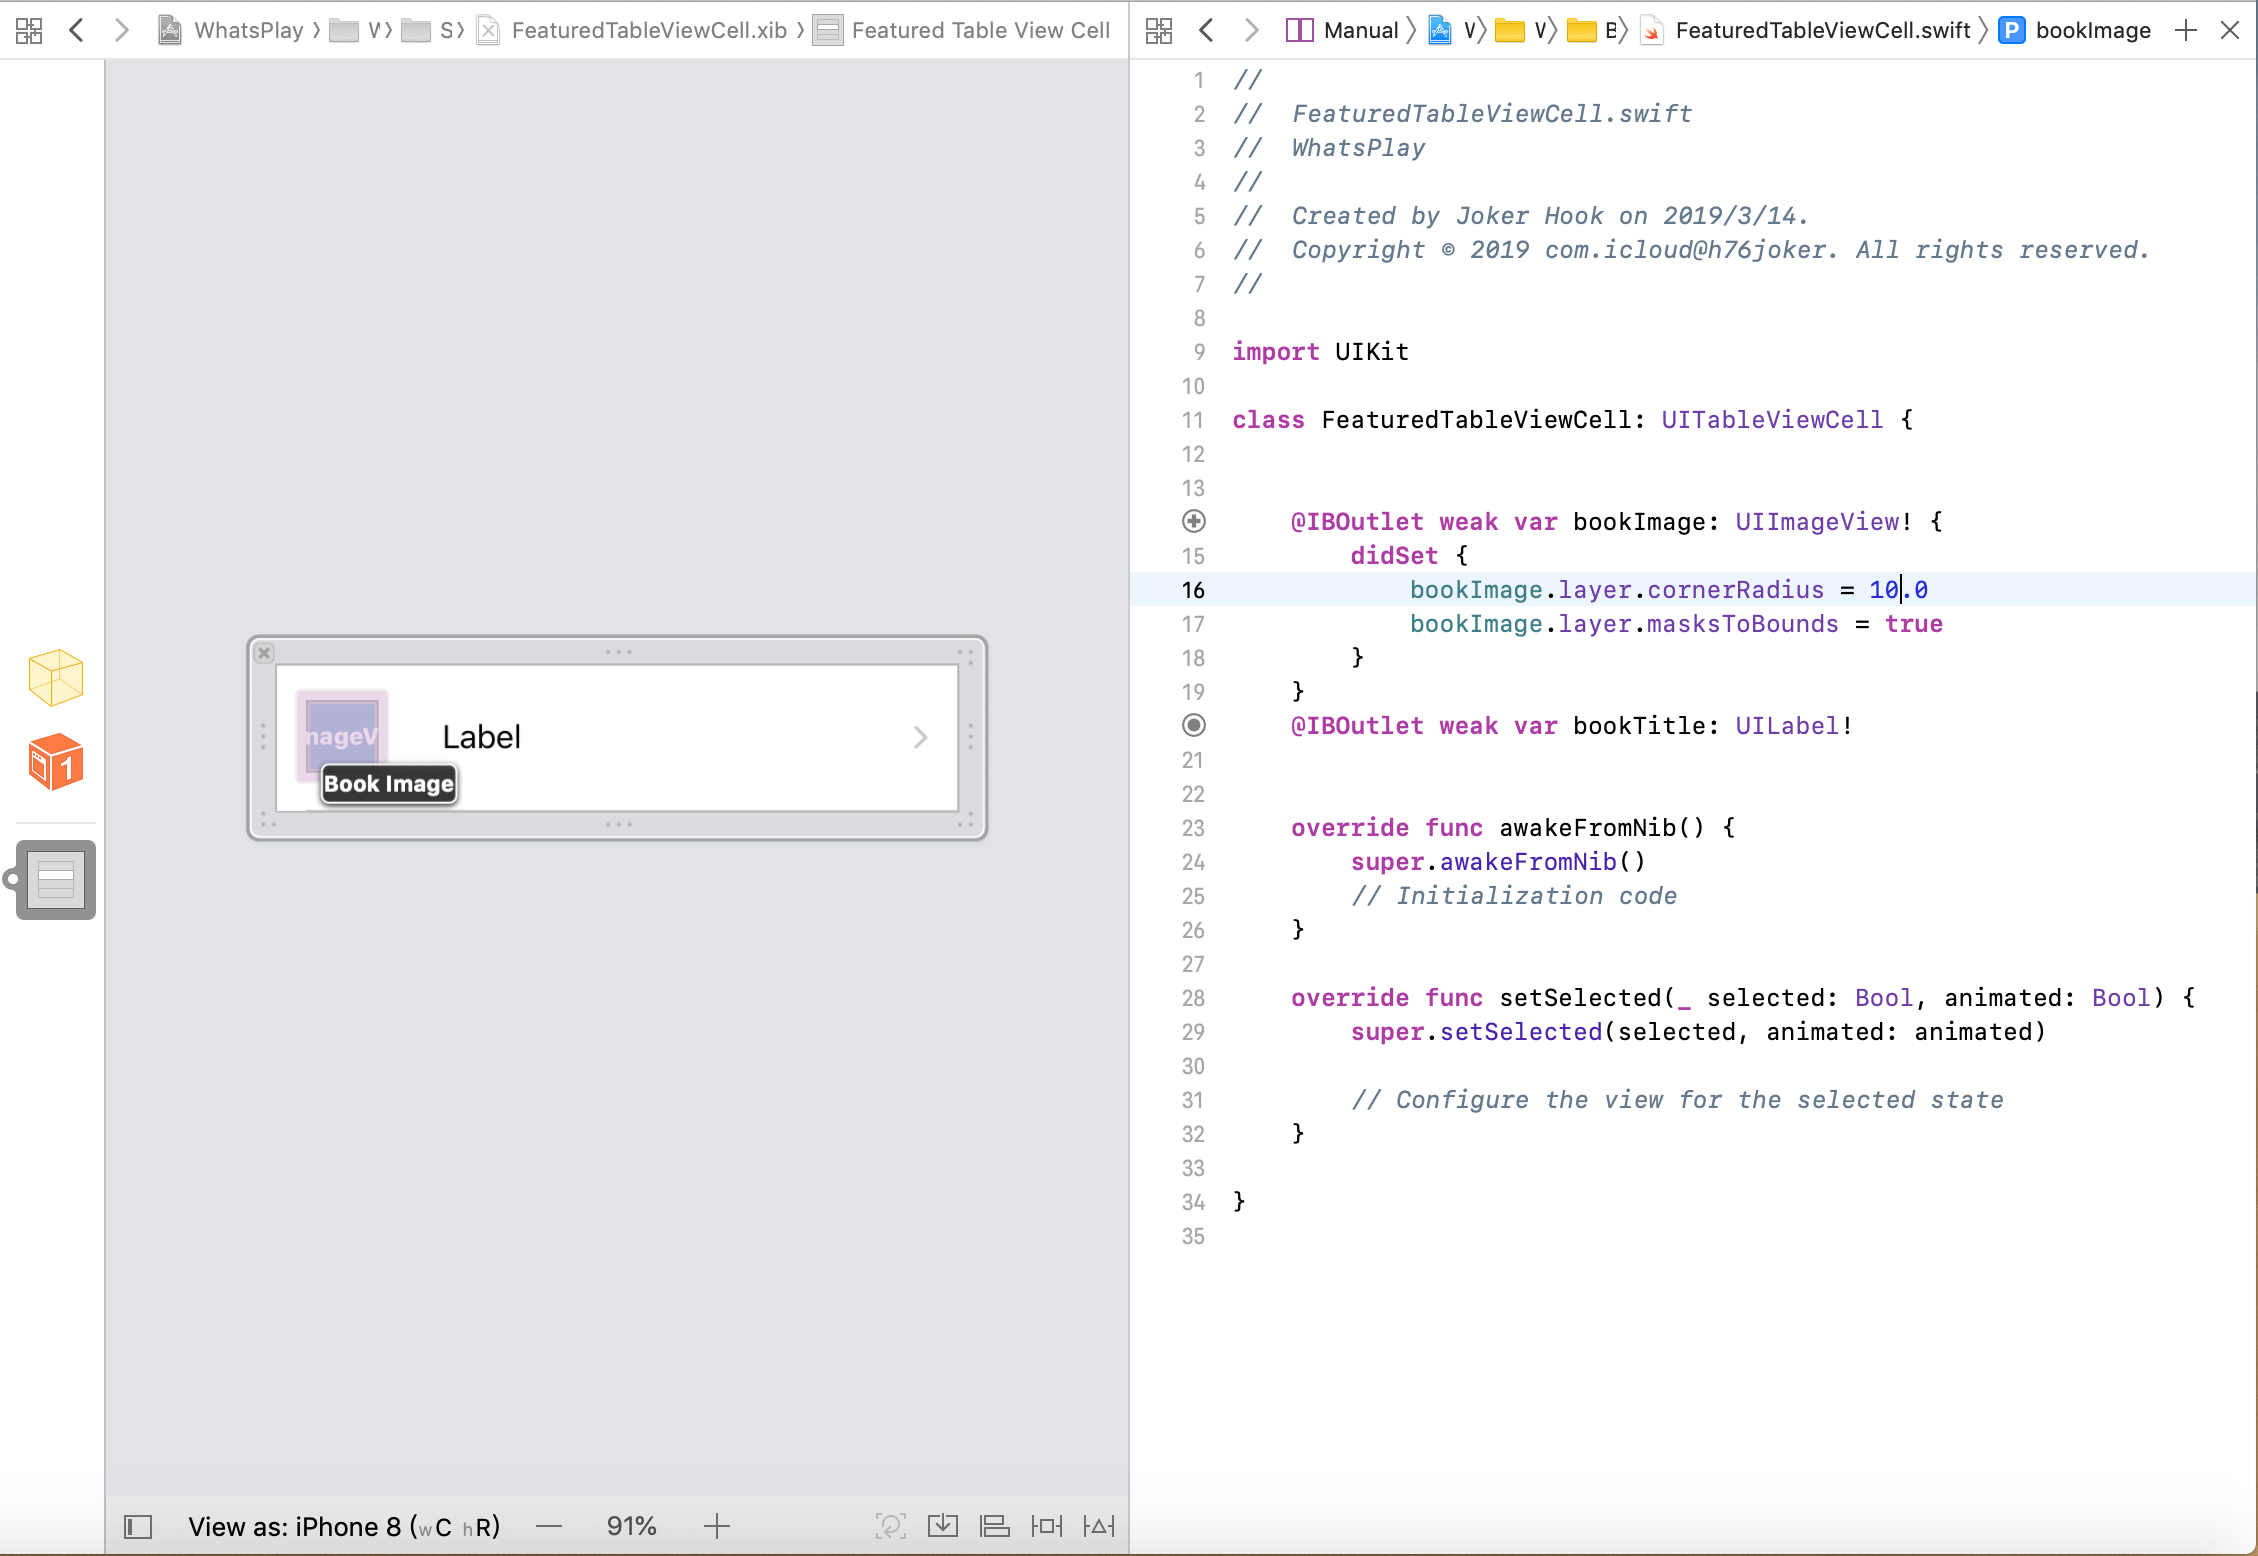
在 TableViewController.swift 裏面註冊一下 nib:
    // 第二組需要自定義cell,這裏使用XIB來完成
    let nib = UINib(nibName: "BookTableViewCell", bundle: nil)

    // 第3組也需要自定義cell,這裏使用XIB來完成
    let featuredNib = UINib(nibName: "FeaturedTableViewCell", bundle: nil)

    override func viewDidLoad() {
        super.viewDidLoad()
        // 必須帶上這兩句話才有數據
        collectionView.delegate = self
        collectionView.dataSource = self

        // 需要用代碼註冊Nib
        self.tableView.register(nib, forCellReuseIdentifier: "TableViewCell")
        self.tableView.register(featuredNib, forCellReuseIdentifier: "FeaturedCell")

    }
非常好,我們快要接近成功了,你已經完成了 3/4 的工作了,我們還需要實現 TableView 的代理,這個可以實現 static cell 與 dynamic cell 混合使用。
展示表格視圖
這一部分是整篇文章的最後一部分,我們用代碼形式來完成數據展示的任務。
1. 創建數據源
我們先來創建第二個 section 的數據源,在 TableViewController.swift 文件裏面添上:
    /**
     * 這裏是第二部分
     * 我想要在 CollectionView 下方展示一系列書籍,使用 TableViewCell 來顯示
     * 想要在靜態的 cell 裏面實現動態的 cell 需要使用 xib 文件
     */

    // 這是我將要在 tableViewCell 裏面展示給大家的內容
    private var books = [Book(classText: "友誼", title: "塔克的郊外", subTitle: "一只蟋蟀、一只老鼠和一只貓咪的\n童話連續劇。", image: UIImage(named: "5")), Book(classText: "青春", title: "會飛的教室", subTitle: "一部由孩子們自編自演的聖誕情景劇,\n一部濃縮的校園風景錄。", image: UIImage(named: "6")), Book(classText: "浪漫", title: "銀河鐵道之夜", subTitle: "一部未完成的作品\n銀河深處,便是那幸福的天堂嗎?", image: UIImage(named: "7")), Book(classText: "生命", title: "夏洛的網", subTitle: "世界上有兩種人,一種人讀過\n《夏洛的網》,另一種人正準備讀。", image: UIImage(named: "8")), Book(classText: "冒險", title: "柳林風聲", subTitle: "一個適合坐在火爐邊,大家一起聽的\n故事。", image: UIImage(named: "9"))]
接著是第三個 section 的數據源:
    /**
     * 這是第三部分
     * 在這一部分要實現簡單的tableViewCell功能
     * 每一個 cell 由一張圖片,一個標題構成
     */
    private var featuredBooks = [Featured(image: UIImage(named: "10"), title: "小王子"), Featured(image: UIImage(named: "11"), title: "愛德華的奇妙之旅"), Featured(image: UIImage(named: "12"), title: "窗邊的小豆豆"), Featured(image: UIImage(named: "13"), title: "夢書之城"), Featured(image: UIImage(named: "14"), title: "天藍色的彼岸"), Featured(image: UIImage(named: "15"), title: "看得見風的男孩")]
2. 完善表格視圖
有了數據源以後,我們就要開始將它們寫入 tableViewCell 裏面了。說實話,操作和普通的 tableViewCell 操作一模一樣,我們只是多了一個註冊 nib 的環節。
    // 以下代理方法必須實現
    override func tableView(_ tableView: UITableView, cellForRowAt indexPath: IndexPath) -> UITableViewCell {
        if (indexPath.section == 1) {
            let cell = tableView.dequeueReusableCell(withIdentifier: "TableViewCell") as? TableViewCell
            cell?.classLabel.text = books[indexPath.row].classText
            cell?.titleLabel.text = books[indexPath.row].title
            cell?.subTitle.text = books[indexPath.row].subTitle
            cell?.backgroundImage.image = books[indexPath.row].image
            return cell!
        }

        if indexPath.section == 2 {
            let cell = tableView.dequeueReusableCell(withIdentifier: "FeaturedCell") as? FeaturedTableViewCell
            cell?.bookImage.image = featuredBooks[indexPath.row].image
            cell?.bookTitle.text = featuredBooks[indexPath.row].title

            return cell!
        }

        return super.tableView(tableView, cellForRowAt: indexPath)
    }

    override func tableView(_ tableView: UITableView, numberOfRowsInSection section: Int) -> Int {
        if section == 1 {
            return books.count //這裏返回第二組的行數
        }
        if section == 2 {
            return featuredBooks.count
        }
        return super.tableView(tableView, numberOfRowsInSection: section)
    }


    override func tableView(_ tableView: UITableView, indentationLevelForRowAt indexPath: IndexPath) -> Int {
        if indexPath.section == 1 {
            return super.tableView(tableView, indentationLevelForRowAt: IndexPath(row: 0, section: 1))
        }
        if indexPath.section == 2 {
            return super.tableView(tableView, indentationLevelForRowAt: IndexPath(row: 0, section: 2))
        }
        return super.tableView(tableView, indentationLevelForRowAt: indexPath)
    }

    override func tableView(_ tableView: UITableView, heightForRowAt indexPath: IndexPath) -> CGFloat {
        if indexPath.section == 1 {
            return 120
        }
        if indexPath.section == 2 {
            return 80
        }
        return super.tableView(tableView, heightForRowAt: indexPath)
    }
我不解釋類方法的含義,這個你可以從 AppCoda 上的 Swift Book 找到你要的知識點。
讓我解釋一下那幾個判斷語句:由於我們一共有三個 section,每一個 section 對應的控件不同,就需要有一定的判斷功能,注意 section 是從 0 開始數的。
後記
這是比較簡單的模型,你可以發揮自己的想像力創造更多好看的介面。謝謝閱讀我的文章。

