各位 iOS 開發者們,不曉得這幾篇以來的程式庫如何呢?希望我們所介紹的程式庫能對你有所幫助。這週也將繼續介紹我們所挑選的幾個 Swift 程式庫,希望能幫助你在 iOS App 開發的道路上,繼續前進。
1. TLPhotoPicker

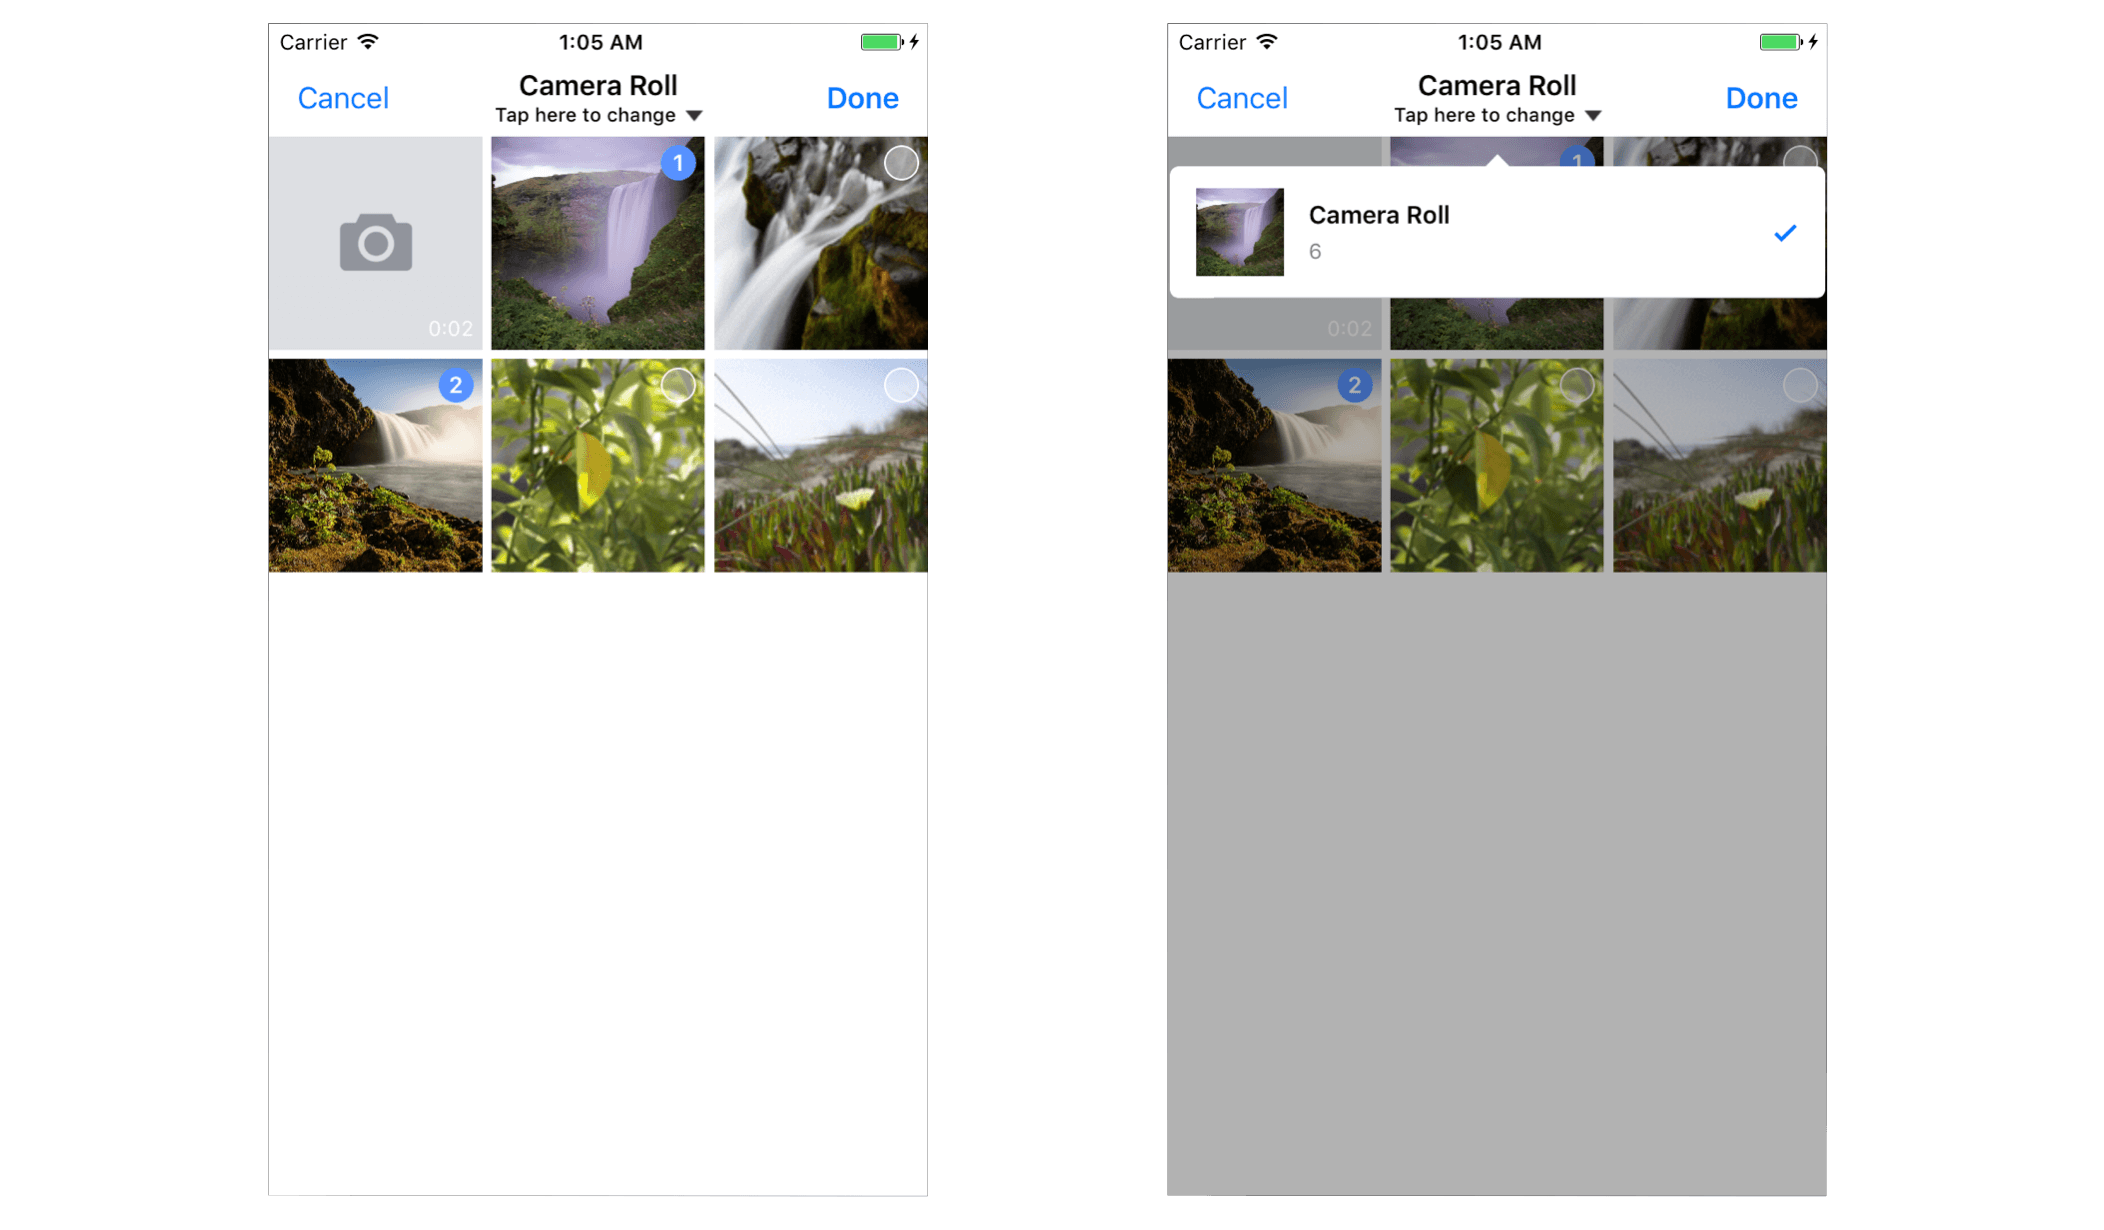
讓使用者在相簿中選取照片或影片是蠻常見到的 App 功能,要完成這樣的功能我們可以使用原生的 UIImagePicker 或者自行撰寫。而使用第三方程式庫也是個不錯的選擇,例如這套 TLPhotoPicker。 TLPhotoPicker 讓開發者可以快速的製作出一個介面不錯的相片選取器讓使用者選取在裝置中的相片或影片。
在安裝完之後,我們首先要在 info.plist 裡添加詢問使用者是否可以使用相簿及相機的權限
![]()
接著引入程式庫並讓類別繼承 delegate
import TLPhotoPicker

class ViewController: UIViewController,TLPhotosPickerViewControllerDelegate{}
然後我們將 TLPhotoPicker 初始化並設定 delegate 的指向為 ViewController,並將畫面呈現:
let photoViewController = TLPhotosPickerViewController()
photoViewController.delegate = self
self.present(photoViewController, animated: true, completion: nil)
接著完成實作 delegate 方法:
func dismissPhotoPicker(withTLPHAssets: [TLPHAsset]) {
    //使用者選好照片時
}
func dismissPhotoPicker(withPHAssets: [PHAsset]) {
    //使用phasset
}
func photoPickerDidCancel() {
    //取消選取照片
}
func dismissComplete() {
    //完成照片選取並離開
}
func didExceedMaximumNumberOfSelection(picker: TLPhotosPickerViewController) {
    //選取超過最大上限數量的照片
}
最後,我們就完成 TLPhotoPicker 的設定。當你執行程式時,就會有如下圖這樣的相片選擇器了!

程式庫網址/圖片來源:
https://github.com/tilltue/TLPhotoPicker
2. Cluster

當我們在製作關於地圖的 App 時,少不了會有添加圖釘(Annotation)的功能。不過當添加的圖釘越多時候,不但降低 App 執行效率,同時也讓畫面變得凌亂影響使用者體驗。為了解決這樣的問題,我們可以讓圖釘依據地圖的範圍整合成叢集(cluster)來顯示,這在 Google Map SDK 上有提供這樣的功能讓開發者方便使用。但是 iOS 原生的 MapKit 並沒有內建這樣的功能,必須要由開發者自行撰寫,增加了開發的難度。這回介紹的 Cluster 擇為 iOS 提供了一個解決方案。
同樣在安裝完程式庫之後引入:
import Cluster
接著初始化 ClusterManager:
let clusterManager = ClusterManager()
然後定義圖釘(Annotation)並放入到 clusterManager 中:
let annotation = Annotation()
annotation.coordinate = CLLocationCoordinate2D(latitude: latitude, longitude: longitude)
//latitude:緯度,longitude:經度

annotation.type = .color(color, radius: 25)
//or
annotation.type = .image(UIImage(named: "imagename"))
//設定圖釘樣式(color:圓點的色彩,radius:圓點半徑,image:圖釘圖片)

clusterManager.add(annotation)
最後再完成 MapView 的 delegate 方法讓 CLUSTER 與 Map 整合:
//產生叢集及一般圖釘
func mapView(_ mapView: MKMapView, viewFor annotation: MKAnnotation) -> MKAnnotationView? {
    var view = mapView.dequeueReusableAnnotationView(withIdentifier: "Cluster")
    if view == nil {
        view = ClusterAnnotationView(annotation: annotation, reuseIdentifier: "Cluster", type: .color(color, radius: 25))
    } else {
        view?.annotation = annotation
    }
    return view
}

//地圖範圍變化時,重新讀取
func mapView(_ mapView: MKMapView, regionDidChangeAnimated animated: Bool) {
    clusterManager.reload(mapView, visibleMapRect: mapView.visibleMapRect)
}
完成後就會像下面圖片所呈現的效果:

程式庫網址/圖片來源:
https://github.com/efremidze/Cluster
3. YNSearch
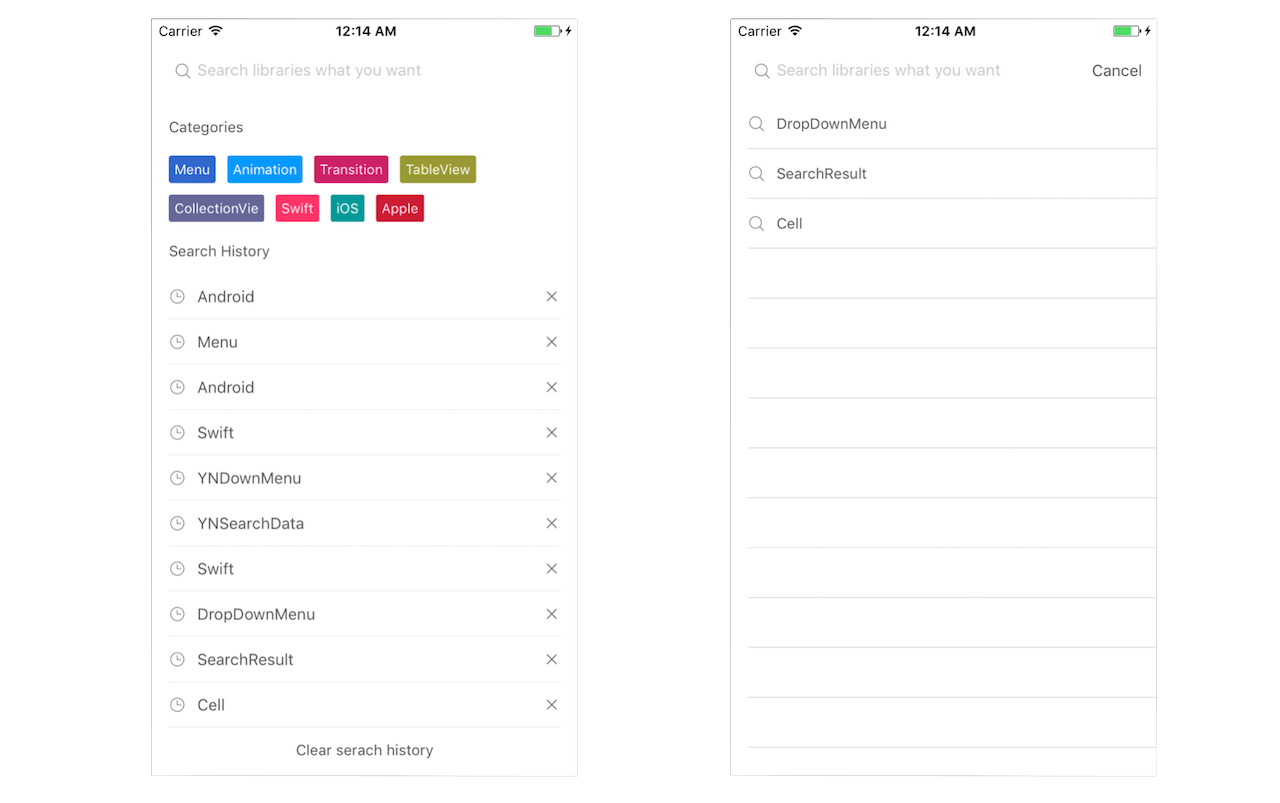
YNSearch 是一個關於搜尋功能的第三方程式庫。YNSearch 除了搜尋輸入框功能之外,也提供了分類按鈕以及歷史紀錄兩種功能,讓開發者能夠以此建構出不錯的 Search TableView。
一樣地,在安裝完程式庫後引入 YNSearch:
import YNSearch
接著設定分類按鈕:
let catetories = ["Menu", "Animation", "Transition", "TableView", "CollectionVie", "Swift", "iOS", "Apple"]
ynSearch.setCategories(value: catetories)
self.ynSearchinit()
然後設定資料。需要注意的是 YNSearch 的資料預設是以繼承 YNSearchModel 的 Model 形式放入產生:
let data1 = DataModel(key: "DropDownMenu")
let data2 = DataModel(key: "SearchData")
//key 為呈現在搜尋結果的文字
let allData = [data1, data2]

self.initData(database: allData)
最後再設定呈現搜尋結果的 YNSearchListView 的 delegate 方法:
func ynSearchListView(_ ynSearchListView: UITableView, cellForRowAt indexPath: IndexPath) -> UITableViewCell {
        let cell = self.ynSearchView.ynSearchListView.dequeueReusableCell(withIdentifier: YNSearchListViewCell.ID) as! YNSearchListViewCell
        if let ynmodel = self.ynSearchView.ynSearchListView.searchResultDatabase[indexPath.row] as? YNSearchModel {
            //設定 cell 裡的 searchLabel 的文字為每個資料所設定的 key
            cell.searchLabel.text = ynmodel.key
        }
        return cell
}

func ynSearchListView(_ ynSearchListView: UITableView, didSelectRowAt indexPath: IndexPath) {
    if let ynmodel = self.ynSearchView.ynSearchListView.searchResultDatabase[indexPath.row] as? YNSearchModel, let key = ynmodel.key {
        //將選擇的結果放入歷史紀錄
        self.ynSearchView.ynSearchListView.ynSearch.appendSearchHistories(value: key)

        //呼叫 delegate 中的 ynSearchListViewClicked方法
        self.ynSearchView.ynSearchListView.ynSearchListViewDelegate?.ynSearchListViewClicked(key: key)
        self.ynSearchView.ynSearchListView.ynSearchListViewDelegate?.ynSearchListViewClicked(object: self.ynSearchView.ynSearchListView.database[indexPath.row])
    }
}
以上就是 YNSearch 的基本設定。此外 YNSearch 也提供一些 delegate 方法讓開發者客製化使用:
func ynSearchHistoryButtonClicked(text: String) {
//點選歷史紀錄
}

func ynCategoryButtonClicked(text: String) {
//點選分類按鈕
}

func ynSearchListViewClicked(text: String) {
//點選搜尋結果
}

func ynSearchListViewClicked(object: YNSearchModel) {
//點選搜尋結果
}
所呈現的結果會如同下面的畫面:

程式庫網址/圖片來源:
https://github.com/younatics/YNSearch
4. InteractiveSideMenu
有時我們會有製作 SideMenu 的需求。但 iOS 原生並沒有相關的程式庫可以使用,因此就有許多相關的第三方程式庫來幫我們解決這樣的困擾,這回要介紹的 InteractiveSideMenu 就是其中一套不錯用的程式庫。
在安裝完之後,先引入程式庫:
import InteractiveSideMenu
然後我們在要呈現的主 ViewController 上繼承 MenuContainerViewController:
class MainViewController: MenuContainerViewController
接著,我們在 viewDidLoad() 中設定 sidemenu 是哪一個 ViewController:
menuViewController = self.storyboard!.instantiateViewController(withIdentifier: "NavigationMenu") as! MenuViewController
以及 sidemenu 中的各選項所對應的 ViewController:
contentList = [MenuItemContentViewController]()
contentList.append(self.storyboard?.instantiateViewController(withIdentifier: "First") as! MenuItemContentViewController)
contentList.append(self.storyboard?.instantiateViewController(withIdentifier: "Second") as! MenuItemContentViewController)
在設定主 ViewController 中預設顯示的 ViewController 是哪個:
//選擇第一個為預設顯示的 ViewController
selectContentViewController(contentViewControllers.first!)
而如果你所設定的 sidemenu 是 tableView 的話,可以在 didSelectRowAt 中設定點下 cell 時顯示相對應的 ViewController,並隱藏 sidemenu:
func tableView(_ tableView: UITableView, didSelectRowAt indexPath: IndexPath) {
    menuContainerViewController.selectContentViewController(menuContainerViewController.contentViewControllers[indexPath.row])
    menuContainerViewController.hideMenu()
}
另外,只要呼叫 showMenu() 就可以讓 sidemenu 呼叫出來:
showMenu()
完成後,就會呈現類似下圖的效果:

瞧,是不是讓 sidemenu 的製作變得更輕鬆了呢?
程式庫網址/圖片來源:
https://github.com/handsomecode/InteractiveSideMenu
5. CryptoSwift
有時我們會需要幫傳送的資料進行加密,不過 Swift 沒有支援加密的 framework,你必須要先建立橋接檔(Bridge-Header)引用 CommonCrypto.h 才可以使用相關的函式,但這些加密相關的函式在使用上也不是那麼的方便,因此 CryptoSwift 提供了讓 Swift 以簡單的方式為資料加密。
將程式庫引入後就可以使用加密的各項函式了:
import CryptoSwift
CryptoSwift 提供了許多常見的加密方式,例如 md5、sha、aes 等等。
// md5 加密
let data = "test".md5()
// sha1 加密
let data = "test".sha1()
// sha256 加密
let data = "test".sha256()

// AES128 加密
do {
    let aes = try AES(key: "encryptkey", iv: "encryptiv")
    let ciphertext = try aes.encrypt(Array("this is a test text".utf8))
} catch { }
以上為部分的加密方式,更多的加密支援可以到 CryptoSwift 的 github 頁上查閱。
程式庫網址/圖片來源:
https://github.com/krzyzanowskim/CryptoSwift
如對以上程式庫或我們這個 Swift 程式庫系列有任何意見,歡迎留言交流分享。


