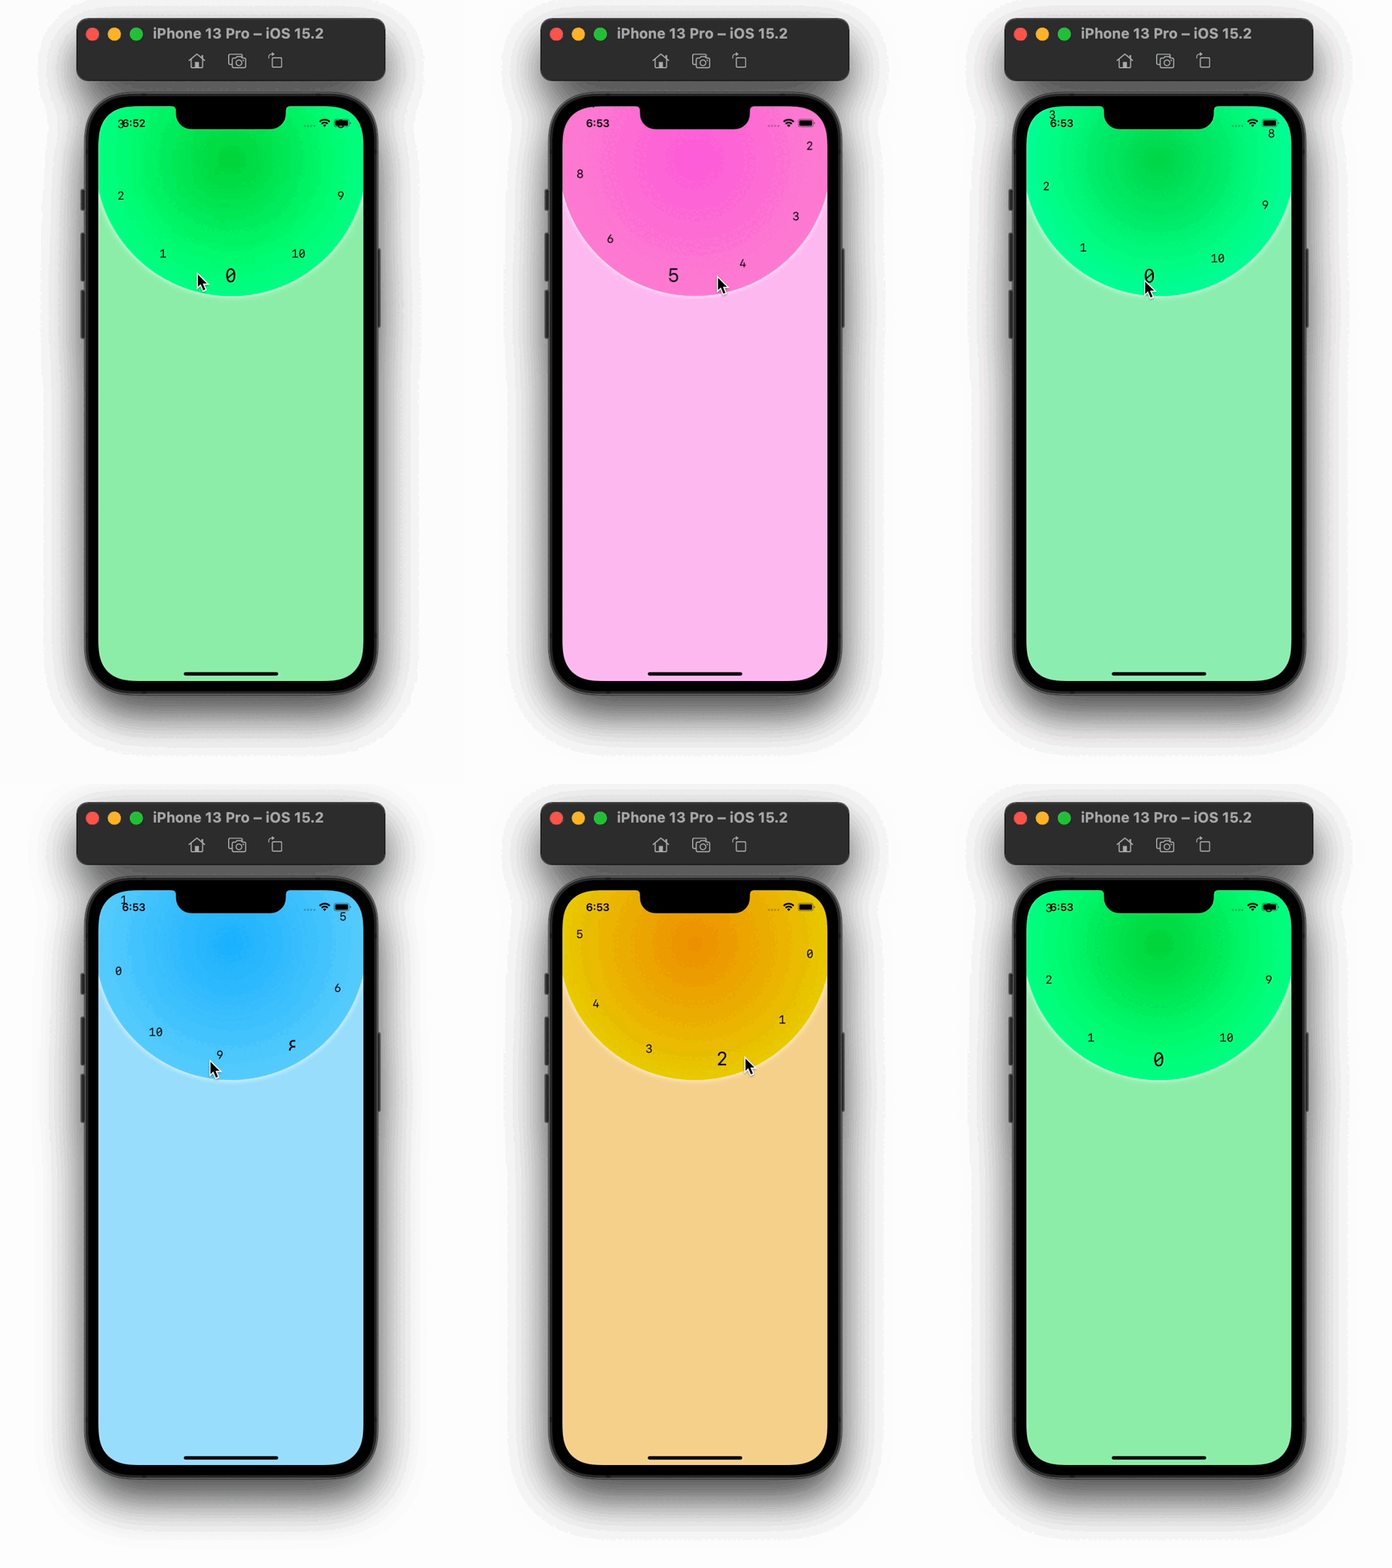
在這篇文章中,讓我們一起在 SwiftUI 構建一個輪盤選擇器 (Wheel Picker),並獲取使用者的滑動動作方向。
首先,讓我們從輪盤要顯示的數據開始。
如果我們想用輪盤來選擇顏色,我們就可以儲存顏色的數值。
如果我們想做一個選單,把圖片放在輪盤中央,我們就可以添加圖片變數。
在這篇文章的範例中,我們會在輪盤的外圍顯示數字,供使用者選擇。
struct myVal : Equatable {
    let id = UUID()
    let val : String
}
使用者需要向左或向右滑動輪盤,來選擇數字。讓我們建立一個列舉 (enum),來設定使用者可以滑動的方向。
enum Direction {
    case left
    case right
}
接下來,我們要建立一個視圖,並在視圖中添加以下變數:
radius:這是輪盤的半徑。從父視圖中取得了輪盤框架的大小後,這個在 Appearance 的數值就會被更改。direction:儲存使用者滑動的方向。choosenIndex:儲存使用者從輪盤選擇的數值。degree:輪盤轉動的角度和其內部視圖 (internal view)。array:這是我們剛剛創建的結構 (struct)myVal的陣列 (array)。這個陣列是用來構建輪盤內的內部視圖。circleSize:輪盤的寬度和高度。
struct WheelView: View {
    // Circle Radius
    @State var radius : Double = 150
    // Direction of swipe
    @State var direction = Direction.left
    // index of the number at the bottom of the circle
    @State var chosenIndex = 0
    // degree of circle and hue
    @Binding var degree : Double

     let array : [myVal]
     let circleSize : Double

     var body: some View {
      // BODY
     }

    }
讓我們建立一個函式,來按使用者滑動的方向,轉動輪盤到下一個數值。
用 360 除以陣列中數值的數量,來計算新的角度。我們也需要一直追蹤使用者選擇的數字。
    func moveWheel() {
        withAnimation(.spring()) {
            if direction == .left {
                degree += Double(360/array.count)
                if chosenIndex == 0 {
                    chosenIndex = array.count-1
                } else {
                    chosenIndex -= 1
                }
            } else {
                degree -= Double(360/array.count)
                if chosenIndex == array.count-1 {
                    chosenIndex = 0
                } else {
                    chosenIndex += 1
                }
            }
        }
    }
我們也會在 body 的開頭設置一些變數。首先,我們需要知道陣列中每個數值之間的間距 (spacing) /角度 (angle)。然後,我們可以使用 onEnded() 修飾符創建拖曳手勢 (drag gesture)。
在 onEnded 中,讓我們把滑動動作的起始位置 x 與動作結束的位置進行比較。如果起始值大於結束值,就代表使用者向左滑動,反之亦然。在 onEnded() 的最後,讓我們調用 moveWheel 函式來轉動輪盤。
    var body: some View {
        ZStack {
            let anglePerCount = Double.pi * 2.0 / Double(array.count)
            let drag = DragGesture()
                .onEnded { value in
                    if value.startLocation.x > value.location.x + 10 {
                        direction = .left
                    } else if value.startLocation.x < value.location.x - 10 {
                        direction = .right
                    }
                    moveWheel()
                }
        }
        .frame(width: circleSize, height: circleSize)
    }
接下來,我們把 Circle() 嵌入到 ZStack 來創建輪盤,然後 loop through 數值的陣列,來把數值添加到輪盤中。
然後,讓我們計算陣列來每個數值的角度、x offset、和 y offset。
在這個範例中,我們會使用 Text(),而數值就是從 0 到 10。
在選擇的視圖中,添加 .rotationEffect()、以及綁定到父視圖的角度。內部視圖會沿著與輪盤本身相反的方向移動。
在 loop 中,讓我們利用 x offset 和 y offset,來偏移 x 和 y 數值。
最後,在輪盤內突出顯示被選取的數值。我們在範例中會用不同的字體,來突出顯示被選取的數值。
在輪盤的 ZStack 中,添加 rotationEffect()、以及綁定到父視圖的角度。
接著,讓我們利用 .gesture() 修飾符,來把拖曳手勢添加到 Stack 中。
    var body: some View {
        ZStack {
            let anglePerCount = Double.pi * 2.0 / Double(array.count)
            let drag = DragGesture()
                .onEnded { value in
                    if value.startLocation.x > value.location.x + 10 {
                        direction = .left
                    } else if value.startLocation.x < value.location.x - 10 {
                        direction = .right
                    }
                    moveWheel()
                }
            // MARK: WHEEL STACK - BEGINNING
            ZStack {
                Circle().fill(EllipticalGradient(colors: [.orange,.yellow]))
                    .hueRotation(Angle(degrees: degree))

                ForEach(0 ..< array.count) { index in
                    let angle = Double(index) * anglePerCount
                    let xOffset = CGFloat(radius * cos(angle))
                    let yOffset = CGFloat(radius * sin(angle))
                    Text("\(array[index].val)")
                        .rotationEffect(Angle(degrees: -degree))
                        .offset(x: xOffset, y: yOffset )
                        .font(Font.system(chosenIndex == index ? .title : .body, design: .monospaced))
                }
            }
            .rotationEffect(Angle(degrees: degree))
            .gesture(drag)
            .onAppear() {
                radius = circleSize/2 - 30 // 30 is for padding
            }
            // MARK: WHEEL STACK - END
        }
        .frame(width: circleSize, height: circleSize)
    }
WheelView
以下是完整的程式碼:
struct WheelView: View {
    // Circle Radius
    @State var radius : Double = 150
    // Direction of swipe
    @State var direction = Direction.left
    // index of the number at the bottom of the circle
    @State var chosenIndex = 0
    // degree of circle and hue
    @Binding var degree : Double
//    @State var degree = 90.0

    let array : [myVal]
    let circleSize : Double


    func moveWheel() {
        withAnimation(.spring()) {
            if direction == .left {
                degree += Double(360/array.count)
                if chosenIndex == 0 {
                    chosenIndex = array.count-1
                } else {
                    chosenIndex -= 1
                }
            } else {
                degree -= Double(360/array.count)
                if chosenIndex == array.count-1 {
                    chosenIndex = 0
                } else {
                    chosenIndex += 1
                }
            }
        }
    }

    var body: some View {
        ZStack {
            let anglePerCount = Double.pi * 2.0 / Double(array.count)
            let drag = DragGesture()
                .onEnded { value in
                    if value.startLocation.x > value.location.x + 10 {
                        direction = .left
                    } else if value.startLocation.x < value.location.x - 10 {
                        direction = .right
                    }
                    moveWheel()
                }
            // MARK: WHEEL STACK - BEGINNING
            ZStack {
                Circle().fill(EllipticalGradient(colors: [.orange,.yellow]))
                    .hueRotation(Angle(degrees: degree))

                ForEach(0 ..< array.count) { index in
                    let angle = Double(index) * anglePerCount
                    let xOffset = CGFloat(radius * cos(angle))
                    let yOffset = CGFloat(radius * sin(angle))
                    Text("\(array[index].val)")
                        .rotationEffect(Angle(degrees: -degree))
                        .offset(x: xOffset, y: yOffset )
                        .font(Font.system(choosenIndex == index ? .title : .body, design: .monospaced))
                }
            }
            .rotationEffect(Angle(degrees: degree))
            .gesture(drag)
            .onAppear() {
                radius = circleSize/2 - 30 // 30 is for padding
            }
            // MARK: WHEEL STACK - END
        }
        .frame(width: circleSize, height: circleSize)
    }
}
父視圖
在父視圖中,添加我們剛剛創建好的 WheelView,並將角度、輪盤陣列、和圓形的大小傳遞給輪盤。然後,讓我們 offset 修飾符將輪盤設置在螢幕頂部。
struct ContentView: View {
    @State var degree = 90.0
    let array : [myVal] =  [myVal(val: "0"),
                            myVal(val: "1"),
                            myVal(val: "2"),
                            myVal(val: "3"),
                            myVal(val: "4"),
                            myVal(val: "5"),
                            myVal(val: "6"),
                            myVal(val: "8"),
                            myVal(val: "9"),
                            myVal(val: "10")]

    var body: some View {
        ZStack (alignment: .center){
            Color.orange.opacity(0.4).ignoresSafeArea()
                .hueRotation(Angle(degrees: degree))

            WheelView(degree: $degree, array: array, circleSize: 400)
                .offset(y: -350)
                .shadow(color: .white, radius: 4, x: 0, y: 0)
        }
    }
}
謝謝你的閱讀!


