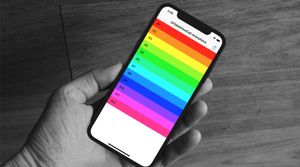
本文將會教你如何為 Table View Cell 添加自定義顯示動畫,提升 App 的用戶體驗 (User Experience)。
問題敘述
動畫效果是提升用戶體驗的關鍵因素。我猜你在當前專案中至少使用一個 Table View,考慮到 Table View 在 iOS App 中被廣泛運用,開發引人注目的加載動畫,將可顯著提升 App 的用戶體驗。
那麼,讓我們看看幾行程式碼如何能為你的 App 帶來新價值吧!
開始實作
首先,下載初始專案,這樣就可以節省編寫樣板程式碼和初始設置的時間。運行後,你會看到帶有靜態 Cell 的 UITableView。

打開 TableViewController.swift 後,你就會看到需要加工的初始代碼:
@IBAction func onRefresh(_ sender: UIBarButtonItem) {
    // Refresh table view here
}

override func tableView(_ tableView: UITableView, willDisplay cell: UITableViewCell, forRowAt indexPath: IndexPath) {
    // Add animations here
}
onRefresh 函式負責處理右側 navigation bar 按鈕的點擊動作,稍後我們將添加觸發動畫的程式碼,但現在先保持原樣。
所有操作都將在 tableView(_:willDisplay:,forRowAt:) 中進行。讓我們添加一些簡單的動畫,來看看它能否正常運行。
實作簡單動畫
讓我們從一個簡單的淡入淡出動畫 (Fade Animation) 開始。UIView 有一系列的方法可以自己製作動畫視圖。
將這段程式碼添加至 tableView(_:willDisplay:,forRowAt:):
cell.alpha = 0

UIView.animate(
    withDuration: 0.5,
    delay: 0.05 * Double(indexPath.row),
    animations: {
        cell.alpha = 1
})
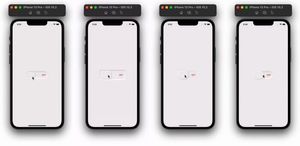
運行專案來查看動畫的實際成果。

實作更複雜的動畫
在實作動畫效果時,很難只透過程式碼來判斷其好壞程度,通常你都要反覆嘗試多個變數,才會得到滿意的方案。優秀的開發人員會希望遵循最佳實踐 (best practice) 來製作一個可重用的方案,以便輕鬆插入和調整動畫。本節將著重在發展這樣的基礎。
我們要做的第一件事是定義 Animation 型別,它本質上是一個接受多個參數的閉包:
typealias Animation = (UITableViewCell, IndexPath, UITableView) -> Void
Animator 適合運行動畫,還確保動畫不會對所有可見 cell 運行多於一次。
嘗試
Animator類別並移除hasAnimatedAllCells屬性,看看滑動 (scroll) 行為有何變化。
final class Animator {
    private var hasAnimatedAllCells = false
    private let animation: Animation

    init(animation: @escaping Animation) {
        self.animation = animation
    }

    func animate(cell: UITableViewCell, at indexPath: IndexPath, in tableView: UITableView) {
        guard !hasAnimatedAllCells else {
            return
        }

        animation(cell, indexPath, tableView)

        hasAnimatedAllCells = tableView.isLastVisibleCell(at: indexPath)
    }
}
現在,我們希望動畫越靈活越好,以便輕鬆地調整和替換它們。為此,我們來實作會自己創建動畫 AnimationFactory,這個工廠已經添加了我們淡入淡出的動畫:
enum AnimationFactory {

    static func makeFadeAnimation(duration: TimeInterval, delayFactor: Double) -> Animation {
        return { cell, indexPath, _ in
            cell.alpha = 0

            UIView.animate(
                withDuration: duration,
                delay: delayFactor * Double(indexPath.row),
                animations: {
                    cell.alpha = 1
            })
        }
    }
}
以下列程式碼取代 TableViewController.swift 中的舊動畫程式碼:
override func tableView(_ tableView: UITableView, willDisplay cell: UITableViewCell, forRowAt indexPath: IndexPath) {
    let animation = AnimationFactory.makeFadeAnimation(duration: 0.5, delayFactor: 0.05)
    let animator = Animator(animation: animation)
    animator.animate(cell: cell, at: indexPath, in: tableView)
}
現在我們只需要添加刷新功能就可以了!
@IBAction func onRefresh(_ sender: UIBarButtonItem) {
    tableView.reloadData()
}
讓我們運行專案,看看它是否按預期運作。
在這裡,我們順利重構了之前不可重用的動畫程式碼,並用新而漂亮的動畫程式碼取而代之。現在我們已經準備好實作更酷的東西了!
彈跳動畫 (Bounce Animation)
要實現更複雜的動畫,你需要利用 UITableViewCell 的 transform 屬性,以將 2D 變換例如旋轉、縮放、移動或傾斜等效果應用於 cell。這就是我們要為彈跳動畫所做的事情。
UIKit 功能強大,可讓你通過單一方法定義彈跳動畫。請記住,我們將所有新動畫程式碼放入了工廠類別中。打開 AnimationFactory.swift 並添加下一個方法:
static func makeMoveUpWithBounce(rowHeight: CGFloat, duration: TimeInterval, delayFactor: Double) -> Animation {
    return { cell, indexPath, tableView in
        cell.transform = CGAffineTransform(translationX: 0, y: rowHeight)

        UIView.animate(
            withDuration: duration,
            delay: delayFactor * Double(indexPath.row),
            usingSpringWithDamping: 0.4,
            initialSpringVelocity: 0.1,
            options: [.curveEaseInOut],
            animations: {
                cell.transform = CGAffineTransform(translationX: 0, y: 0)
        })
    }
}
讓我解釋幾個重點:
dampingRatio── 基本上是一種彈跳力量,數值為 1 表示根本沒有彈跳效果,數值越接近 0 表示彈跳效果越強。velocity── 彈跳速度。數值為 1 代表一秒內行進的總動畫距離。options── 動畫視圖的 options,我們使用.curveEaseInOut來使動畫慢慢開始,在其持續時間中間加速,然後在完成之前再次減速。
要找到傳遞給動畫函式最適合的數值,就要不斷調整動畫來嘗試。
更新 TableViewController 中的程式碼,以新的彈跳動畫取代淡入淡出動畫。
let animation = AnimationFactory.makeMoveUpWithBounce(rowHeight: cell.frame.height, duration: 1.0, delayFactor: 0.05)
let animator = Animator(animation: animation)
animator.animate(cell: cell, at: indexPath, in: tableView)
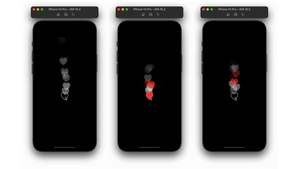
動畫會產生這樣的效果:

移動和淡化動畫 (Move and Fade Animation)
我們下一個實作的動畫會做兩件事:移動 Cell、並同時淡化它們。為此,我們使用 UITableViewCell 的 transform 和 alpha 屬性。
static func makeMoveUpWithFade(rowHeight: CGFloat, duration: TimeInterval, delayFactor: Double) -> Animation {
    return { cell, indexPath, _ in
        cell.transform = CGAffineTransform(translationX: 0, y: rowHeight / 2)
        cell.alpha = 0

        UIView.animate(
            withDuration: duration,
            delay: delayFactor * Double(indexPath.row),
            options: [.curveEaseInOut],
            animations: {
                cell.transform = CGAffineTransform(translationX: 0, y: 0)
                cell.alpha = 1
        })
    }
}
像剛才一樣,將新動畫程式碼放在 TableViewController 中。
let animation = AnimationFactory.makeMoveUpWithFade(rowHeight: cell.frame.height, duration: 0.5, delayFactor: 0.05)
let animator = Animator(animation: animation)
animator.animate(cell: cell, at: indexPath, in: tableView)
運行 App,動畫應該像這樣:

滑入動畫 (Slide in Animation)
我相信你已經掌握了編寫動畫的訣竅,並開始欣賞你在前文構建的可重用方案。
滑入動畫一如其名,就是將 Cell 從螢幕的右邊邊緣移動到 TableView 的實際位置。為此,我們還是會使用 transform 屬性。現在,我們將這個動畫程式碼添加到工廠。
static func makeSlideIn(duration: TimeInterval, delayFactor: Double) -> Animation {
    return { cell, indexPath, tableView in
        cell.transform = CGAffineTransform(translationX: tableView.bounds.width, y: 0)

        UIView.animate(
            withDuration: duration,
            delay: delayFactor * Double(indexPath.row),
            options: [.curveEaseInOut],
            animations: {
                cell.transform = CGAffineTransform(translationX: 0, y: 0)
        })
    }
}
接下來,更新 TableViewController 程式碼以使用滑入動畫。
let animation = AnimationFactory.makeSlideIn(duration: 0.5, delayFactor: 0.05)
let animator = Animator(animation: animation)
animator.animate(cell: cell, at: indexPath, in: tableView)
完成後,動畫應該像這樣:

專案原始碼
你可以在此處下載最終專案和初始專案。如有任何問題,歡迎讀者在下面提出。
總結
動畫對每個 iOS App 的用戶體驗中都非常重要。TableView 是 iOS 中最廣泛使用的組件,因此開發炫麗的 Cell 動畫對你專案的用戶體驗十分有利。我們設計的可重用方案可以輕鬆插入和調整動畫,以便在你目前開發的 App 中進行調整和使用。
希望這個動畫實作方法能為你們提供一個良好的基礎,作為你在使用 Table View Cell 顯示動畫的良好開端。
Twitter: https://twitter.com/V8tr。
LinkedIn: https://www.linkedin.com/in/vadim-bulavin/
FB : https://www.facebook.com/yishen.chen.54
Twitter : https://twitter.com/YeEeEsS


